Showing posts with label 4-way bargello. Show all posts

Saturday, August 31, 2019

Inspiring Women Artists, Autumn Art, and A New 8-way

U.S. postage stamp of a Grandma Moses painting
Homage to an artist of the past
I have frequently advised you to look at the work of various artists, past and contemporary, to get inspiration for your needle art. I would like to  steer you to some very contemporary women painters. You can find their work online. I'll give you a brief analysis of how their work has inspired me to do some new pieces in different kinds of needlework. Look for the mention of more of these artists in future posts, along with my projects that they inspired. If you have other artists, past or present, whose work you think I should be looking at, please drop me a line at annakes_garden@yahoo.com.

Our first artist is Tilly Willis (www.tillywillis.com). She is a British citizen and a well-known portrait painter there. She has traveled extensively in Africa and done many studies of life in the countries she has visited. Her compositions have been made into color prints. Their style is quite different from the detailed work she does as a portrait artist. This pleased me greatly because i have always maintained that it was not necessary for an artist to be limited to a single style. Her pictures of people going about their daily tasks are made up of stylized two-dimensional flat shapes in vivid colors against a simple background, They are very expressive, both in outline and in gesture.

soccer players preliminary design sketch
Soccer players preliminary design layout
I plan to do something similar in simple tent stitches. I am going to plan my picture by cutting the simple shapes from colored construction paper that I can move around on my canvas until I have them placed just where I want them, like a collage. Then I can trace all the elements onto the canvas and begin to stitch. Considering the success of the U.S. Women's Soccer Team, I thought they would be a good subject for this project. The accompanying photograph will show you what I mean. I will show you the finished composition in a future post.

Untitled tissue paper collage by Annake
I realize that many of you do not think of collage as a major art form, but you would be mistaken. It is a major contemporary art form with large artwork and installations in both two and three dimensions. This is an art form where women probably outnumber men, but there are still many male collage artists. (Remember, Picasso and Braque introduced collage.) If you have become interested in this art form, I suggest you check out some of the many artists listed in Collage Artists of America online. There is a list of upcoming exhibitions. If you get a chance, try to see one of them. I think you will be impressed.


Autumnal Prophecy, collage by Roberta Bellofatto
"Autumnal Prophecy", collage by Roberta Bellofatto

A good area for collecting
A good area for collecting...
A different kind of collage is the "nature walk" collage — one of my favorites.   The idea is to go on a nature walk and collect leaves and flowers to press,  and small "found objects" like feathers, tiny seashells, etc., that can be glued to a prepared background. These are the perfect times to do one, when leaves are changing color and plants are producing seeds. Remember that you are not allowed to collect such things in most state and all national parks or on private property without permission. If you live in a city high-rise, you may not be close to places where such things can be collected. Or you may not feel safe taking your group for such a walk because of heavy traffic or other hazards. Sometimes just looking around familiar backyards or an uncut vacant lot will give you plenty of material.

Canvas boards
Canvas boards
Since the items you may collect are heavier and bulkier than those we have featured in earlier collage posts, you will need heavier back-ground material than poster board or cardboard, or else the picture will not lie flat when it is finished. Individual packs of 8" X 10" canvas boards are good for individual artworks, but you will need larger ones for small groups working together. Mat board and heavy corrugated cardboard are alternatives, especially if cost is a major concern. For a permanent installation, Masonite can be used. It is dark in color and should be painted before use.


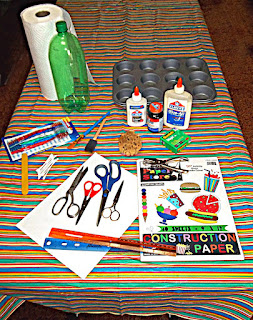
collage tools and materials
Some collage tools and materials
The boards can be used plain, pre-painted, or covered with one or more tissue paper sheets. If you have access to colored crepe paper, it can also be used, but be advised it "bleeds"  color into the composition, while tissue paper does little or no "bleeding". Check our earlier post for a list of materials that you will need. Have a pile of newspapers and paper towels for pressing the plant materials and general clean-up. Select your work area and assemble your materials in advance.

Found objects for collage use
The next step is an excursion to collect the grasses, leaves, seedpods, etc. for the compositions. Small children will need supervision and should be taught to ask an adult before collecting plants and other materials. Everyone should have a collecting bag, An adult should have a pair of pruning shears to detach small branches or cut tough stems. Delicate materials like feathers and fragile plant parts that should not be pressed may be stored in the crisper drawer of a refrigerator until used. Everything else should be placed between layers of newspaper on a flat surface and dried thoroughly before attaching them to the canvas. Canvases may be prepared in advance or on collection day, whichever works best for you.

At the beginning of this section is a picture of a completed collage to give you an idea of what can be done quite simply. Make sure materials are thoroughly dry. Use the white glue full-strength to secure the three-dimensional materials to the board and let them dry. Delicate materials should be attached with the half-and-half glue/water mixture. Brush the area of canvas first. Tweezers are useful for placing tiny stems and branches. Carefully place the delicate materials on that area and gently brush the mixture over them until they are covered completely. (The milky-looking glue mixture will dry clear.) Let that layer dry.

Brushing on the glue and water mixture

Add tissue paper over the top if you like, brushing it (both bottom and top surfaces) with the glue mixture to hold it in place. To get a glossy surface, you will need several all-over coats of the half-and-half mixture, dried between applications. A hand-held hair-dryer can speed up the drying, but it should be wielded by an adult and not held less than a foot away from the surface or the surface may buckle and warp. Spaced dryings are preferred. The finished picture should be hard and glossy to the touch. Now you are ready to frame the picture if you like.

Preliminary sketch for 8-way bargello
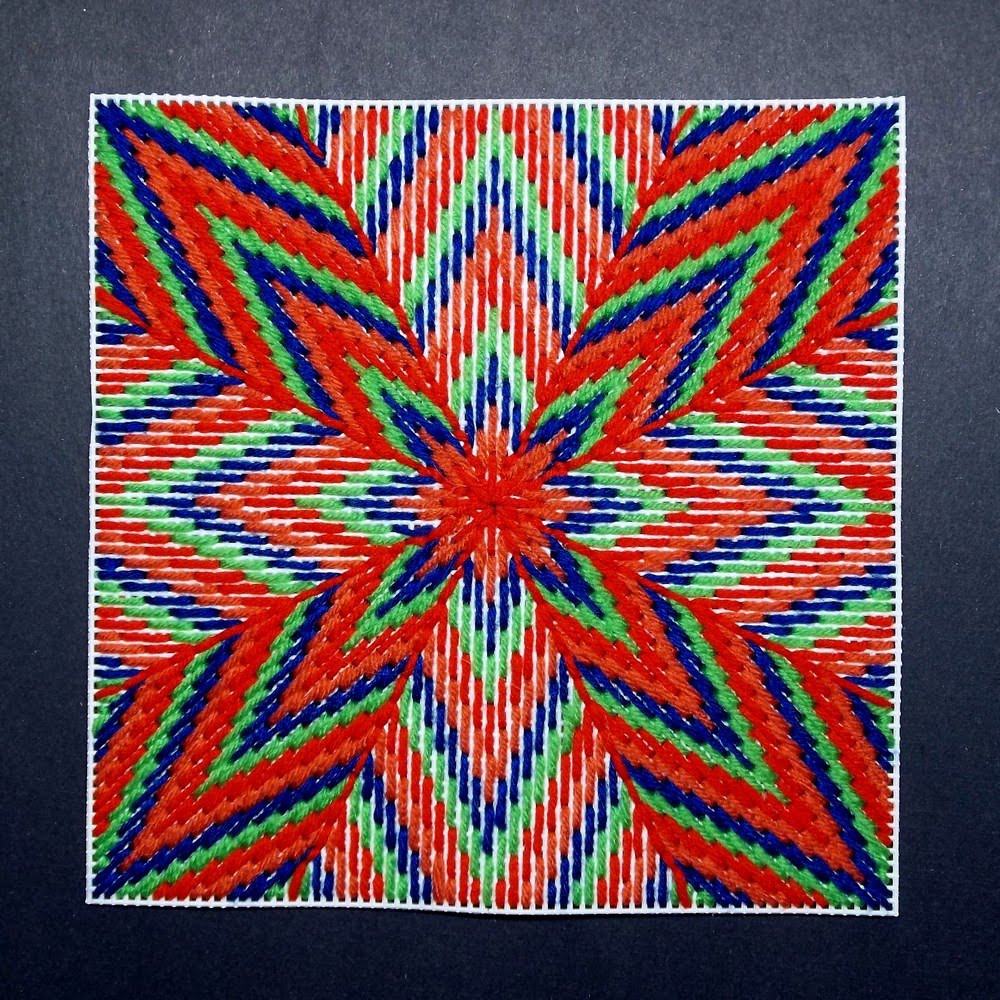
A few months ago (May 5, 2019) I did an article in which I showed some alternative ways to use a small all-over pattern to make different kinds of needlework. I expressed a desire to use it as a 4-way or an 8-way bargello project. One of the easiest ways to make an 8-way design is to superimpose one 4-way pattern on another 4-way pattern. That is essentially what I have done here. My idea was to "marry" a 4-pointed star design with a strong diagonal one without sacrificing either one. This design (see the end of this post) has more colors in it than any of my other designs.  I added some different colors to make it more varied, while retaining its autumnal feel. However, the colors you see on your monitor may not be the exact colors I see on mine. It would be best if you choose your own colors for your design.

unusual 4-way bargello by Annake
 An unusual 4-way bargello by Annake
It is designed to be a typical bargello pattern, but it is versatile enough to be used in a number of different techniques. It is important for you to decide which technique you want to use before you begin shopping for materials The simplest way to use this would be a tent stitch design. For this, count the squares in your design carefully. You will need a minimum of needlepoint or plastic canvas with one square of mesh for each square of the design, plus an extra vertical row because tent stitch is slanted. If you plan to surround the motif with a background larger than the one I have left blank on the pattern, add another row of canvas squares for each row of background. The next easiest technique would be latch-hook. Each square of the design would require one square of mesh. add additional rows for background, plus at least 3 rows on all sides to turn to the back of the finished work and secure.  Finally you could do the motif in cross-stitch on needlepoint or plastic canvas, monk's cloth or aida cloth, or checked gingham. You will need 2 rows of "holes” for each cross stitch or one printed square on the gingham.

In a 4-way or 8-way bargello, each square represents 4 upright stitches, each over 3 threads of needlepoint canvas. (Unless you can get plastic canvas by the yard, it will not be wide enough for this project). This pattern is not for beginners. If you have never done any bargello, I suggest you use our 'Search My Blog' gadget in the sidebar to look up past articles on bargello and choose a simpler design for your first project.  If you have done some bargello patterns, I still suggest having some scrap canvas at hand to work out any trouble spots that you may find before you have to take out a number of stitches.  And count and measure before you begin! Depending on the size of your canvas mesh, this can be a fairly large project. I'll show mine in a future post.

Downloadable 8-way pattern


Our latest Teachable Moments project, "Teachable Moments: The Moon", is now available on our Extras page (see the tabbed menu above this post.) While it was designed for use by teachers or parents, others may find it useful as a companion piece for our Skyscapes 3 post (July 11, 2019).


 Creative Commons LicenseThis post by Annake's Garden is licensed under a Creative Commons Attribution-NonCommercial-ShareAlike 3.0 Unported License.

Tuesday, January 1, 2019

Adjustments, Additions, and Adaptations

All-over pattern worked from a "corner" design
A phone call from a friend alerted me to an error in the December 5th post. She called to say she had accidentally reversed the numbers in the sample she was doing of the multicolored 4-way bargello pattern. Instead of making her stitch squares 3 stitches over 4 threads, she had made 4 stitches over 3 threads and wondered if she should take the completed stitches out and start over. This puzzled me because when making stitch squares, I recommend 4 stitches over 4 threads. I suggested that she do another sample with those numbers and keep the original one to see how they differed. She agreed. Then I went back to the blog post to see what went wrong.

What happened was that sometime before posting J.D. had told me the post was too long and something needed to be cut from it. I took out a section about using this design as an all-over design, along with a completed sample. Somehow the stitch directions given for this change got detached and the stitch count I had recommended for that exercise got attached to a place it did not belong. My apologies if this has confused anyone. J.D. doesn't do needlework, so he wouldn't have caught the error. I should have caught it, but didn't.  The error has now been corrected in the initial post.

I was trying to make two points with that segment of text. First, that, since this was an all-over pattern, it was not necessary to start in the middle of the canvas. I started the piece pictured at the top of this page at the upper right-hand corner of the design and expanded it both horizontally and vertically as far as my canvas segment allowed. Second, the pattern can be worked to fit rectangular projects. They do not have to be square, as the 4-way ones do need to be.  I suggested that viewers might want to do a sample using the 3 stitches over 4 threads formula that I used for this sample, which elongates the squares into rectangles vertically. (That's where the text error occurred.) The pattern stitch my friend was using elongated the squares to rectangles horizontally. Here is an example of what that would look like done on the same canvas as mine and beginning in the same corner of the design. The result is definitely rectangular — and large. It is probably not a good design for a 4-way, unless you are using much smaller squares of canvas. It would probably work on #14 needlepoint canvas.

Pattern resulting from error in directions
Pattern done as tent stitch
Same pattern done as tent stitch, 1 stitch per square
The samples I usually show on these posts are done on #7 plastic canvas. I recommend this for practice and to make pattern samples that are meant to be filed for future reference. But before we leave this pattern, I would like to show you one more variation. This is the pattern square done in conventional tent stitch, with one stitch for each square of the pattern. It is also done on #7 canvas, so you can imagine how small it would be on a canvas with more squares to the inch!  These patterns are very versatile. If you do latch-hook, for example, you can use a pattern like this one by putting in a knot for each square of the pattern. This would work as both a four-way pattern, perhaps for a pillow, and an all-over one for a mat or rug. Beading and mosaics could also be done with such a pattern.

When working a multicolor pattern like this, I recommend using a separate needle for each color. This cuts down on the time spent in threading needles and decreases yarn waste. Secure each color often on the back of your canvas. Do not carry long strands of yarn across the back of your canvas while moving from one colored segment to the next.

The designs made from the small corner squares have proven to be popular. For that reason, I am giving you some more of them to work with. In each case, the original square that was rotated is shown in its proper position and is emphasized by a black outline. The two-color pattern is suitable for an all-over design, but perhaps is not as good for a 4-way design.

3 patterns based on different corner patterns

New 8 way bargello design
We have a new 8-way bargello to show you. Because some stitches are horizontal or vertical, while others are slanted on the canvas, some segments of the eight do not reflect the light in the same way that others do. This gives a feeling of movement to the composition. I don't know how well this will show up in a photograph, but I hope you can see the effect. I also hope you enjoy the new design.

We have used plain backgrounds behind bargello patterns a great deal. Only once, when we emphasized the use of a bargello pattern behind the capital A in the original Annake's Garden's logo, have we discussed the use of bargello as a background for other kinds of stitchery. Here is a picture of a screaming eagle that we use to decorate our table when we are doing an event on or near a patriotic holiday. The background is made up of strips of bargello patterns in red, white, and blue combinations. Doing slanted designs like this requires some planning. I recommend drawing a few diagonal lines lightly in pencil on your background canvas to guide your stitches. I worked the eagle first in conventional tent stitch,  then ran the last stitches of each pattern under the edges of the eagle's feathers.
                                    
Screaming eagle with bargello stitch background
I urge you to try making some of your own new designs. All you will need is some graph paper and colored pencils, pens, or crayons. Often what looks like a very simple pattern on a 6-part square turns out to be unusual and beautiful when fully rotated.  Then you will want to see it done in yarn. Keep your small samples in a container of some kind (any thing from a shoebox to an expandable portfolio), so that you can return to them whenever you like. Also, when you have a pattern you really like, try it in several different color combinations.

Have fun - and a wonderful new year!


 Creative Commons LicenseThis post by Annake's Garden is licensed under a Creative Commons Attribution-NonCommercial-ShareAlike 3.0 Unported License.

Wednesday, December 5, 2018

Wrapping Up the Season: Late Fall Q &A, 2018

small tree with lights
Before I begin with recent questions, I want to pass along two items of interest from a benefit show and sale for a local animal shelter that we took part in a few days ago.

A charming couple purchased several of my puppets for their children. They said they planned to fill the bodies and arms of the puppets with "stocking stuffers" like candy, money, miniature toys and games, etc., and sew them shut with an easy-to-pull thread. Then the children would each have a puppet to play with after they had enjoyed their small treats. What a great idea! I learn so much from the people I meet! The same idea would work for birthday parties or sleep-overs. Here J.D. is showing the puppet of a girl elf with some stocking stuffers.

elf puppet filled with goodies
Elf puppet filled with goodies

dog and cat puppets
Two of our puppet pets
The other thing I want to point out refers to our dog and cat puppets, like the Siamese cat and Yorkshire terrier seen here. You will notice that each of our dogs and cats is wearing a "collar" and a "tag".  This is to remind children that their pets should be licensed and wear identification tags for their protection.

Now to our questions.

I like the 4-way bargellos a lot. I understand how the pattern "grows" from the center out. I can follow your examples, but I don't know how to start a new design from the center outward. Can you give me some examples to get me started?

Certainly. I'll be glad to. And I can show you a "short-cut'" that you can use to generate new designs when you run out of inspiration. All you need is quarter-inch graph paper and something to color the squares. I'll show you that trick first. Take a piece of graph paper and mark off several frames around squares that are 6 graph squares wide and 6 graph squares high. Start with the square in the lower right-hand corner. Color it. With the same color or a second color, fill in a random pattern of graph squares in the next row outward. Repeat with a 3rd color in the next rows of graph squares. Continue as long as you like, with as many colors as you like. Repeat colors if you like. Make several of these designs on your sheet until you find one you like more than the others.

three 6 x 6 designs on graph paper
Three 6 x 6 designs on graph paper

First design rotated and repeated four times
Now take a clean sheet of graph paper and mark its center both horizontally and vertically. Repeat your desired pattern on top of the horizontal line, starting just to the left of the vertical line. Now repeat your pattern in reverse to the right of the vertical line. Turn the paper upside-down. Repeat what you just did below the horizontal line above the horizontal line now. Now you have a 4-way starting pattern.  Each colored square represents a stitch in your bargello pattern. Empty squares can be worked in white, black, beige, etc. Work the four parts of your design in the center of your canvas, then decide how you want to "grow" your finished pattern. Here is what the first of our small patterns looks like done in this way. This one is done in a single color with a white background.

Second design rotated and repeated four times
Second design
Here is the second "starter square"done in the same way.  the more colors that you use, the more complex the design that you create. This one is done in two shades of two colors, plus a white background. Substitute your own choice of colors. Once you have gotten that far, you need to decide if you will continue that design all the way out to the edges or put in new directions of your own making, You may want to practice on graph paper before you start a large project.

Third design rotated and repeated four times
Third design
And here is the third "starter square", expanded. Here you have strong diagonals balancing the vertical and horizontal lines. You might choose one over the other to change your design as you work outward from the center. This one also uses four colors, but the contrasts are stronger and the white background is greatly reduced. It is a good all-over design.


But remember these important rules:
  1. Each square represents 4* vertical stitches, each over 4 threads.
  2. No canvas is left bare; stitches share the squares of mesh.
  3. There will be places where there will not be room for an entire square. In that case,work as much of the square as you can.

When you did the 6-way bargello you showed two optical illusions that you and J.D. saw. I liked them and copied them on plastic canvas, but now I don't know how to proceed. You didn't show any shading on the pieces, but it seems to me that shading is what makes the optical illusions work. Can you show those patterns with the correct shading, please?

You are correct that shading enhances optical illusions.  However, there is more than one way to shade a particular illusion, depending on where you decide the light source is.  We will be glad to show you how we would shade the two illusions.  Just be aware that there is more than one "correct" way to do them.

annake's and j.d.'s illusions with shading
Annake's (left) and J.D.'s (right) illusions with shading

You can use black, white, and grays for your shading or you can use various tones and shades of a single color. If you use different colors, you may achieve an interesting design, but lose much or all of the illusion. I suggest you work the designs out on paper before you select the yarns. Think carefully also about your background and whether or not you are going to outline the sections with back-stitch or some other embroidery stitch.  Good luck.  It should be an interesting project.

You haven't mentioned latch-hook lately. Are you still doing it?

Yes, although it has been curtailed somewhat because of the increase in frequency of shows that we have done this year and the remodeling we have been doing to give me more studio space for drawing and painting.  Here is a rug that I finished at the beginning of summer. When I was doing research for the posts on creating landscapes in needlework, I came across a photograph of a Ming Dynasty scroll that had a beautiful butterfly on it. I wanted to do a rug with a similar butterfly, but in "hot" modern colors.  This is the result.

Latch Hooked Rug "21st Century Ming Butterfly"
Latch Hooked Rug, "21st Century Ming Butterfly"

Have a happy holiday season for all the holidays we celebrate around the world.


*This post has been updated on December 15, 2018 to correct an error in content. Our thanks to the reader who brought this to our attention.

 Creative Commons LicenseThis post by Annake's Garden is licensed under a Creative Commons Attribution-NonCommercial-ShareAlike 3.0 Unported License.

Sunday, July 1, 2018

Back to the Classroom: Hungarian and Parisian Stitches

Simple needlepoint of a Boston terrier
Needlepoint picture of a Boston terrier
I had prepared a number of visual devices for this class period. First, I had completed the bulldog picture with a background of the Parisian stitch. I used six related light greens in a random order.  I also demonstrated that the Parisian stitch can be used in a single color to suggest a texture as well. It is the stitch that has been used to make the strawberries in the basket and on the tablecloth in this little kitchen still life.

Needlepoint still life of a basket of strawberries

Hungarian stitch sample
The first stitch we made in the next session was the Hungarian stitch, a very old stitch from the Renaissance. It uses the same stitches as the Parisian stitch, but in a different order. If you are working on a sample along with this discussion, start a few squares further down the canvas than you did for the Parisian. You can always go back and fill in the missing full or partial stitches. Start with the short stitch over two threads or bars. Then do the long stitch which starts a thread above the short stitch and ends a thread below it, covering four threads. Follow it with a second short stitch. Skip the next square of mesh and leave it empty. This is vital. Your stitch pattern will not work without it. Repeat the cluster of three stitches plus an empty square of mesh all the way across your sample. In the next row, a short stitch goes below the short stitch in the row above. Skip the long stitch. Put a short stitch under the next short stitch. Start a long stitch in the empty square of mesh and end it a thread below the short stitch..Put another short stitch below the short stitch above. Skip the next square, leaving it empty. I have done this sample in two colors  (rose and light green) so that the pattern is easy to see.

Hungarian stitch variations
Hungarian stitch can also be used in other combinations. This sample shows it used, from the top, in strong contrast (red/white/blue), weak contrast (complementary colors of orange and blue in muted tones), and as a sample in variegated yarn. When you do separate samples of stitches like these, don’t forget to go back and even out your rows at the top and bottom with partial stitches in the appropriate colors. That is how you truly learn a pattern. I did not do that at the tops of these samples because I wanted you to know how many rows to drop down before starting the first stitch.

Close-up of eagle from "Firs and Feathers"
Hungarian stitch is one of my favorite stitches. It is effective when used in a solid color for the background to a picture, as you can see in this close-up from a much larger picture. I chose it for the forest sky because its double diagonals echoed the sloping profiles of the bargello “evergreen” trees, the subtle slant of the tent stitches, and the strong shape made by the eagle’s wings.

Doubled Parisian stitch
Both the Parisian stitch and the Hungarian stitch can be doubled. Just follow the pattern, but make two consecutive stitches each time. The doubled Parisian is shown in the pink and white sample.

This is an attractive pattern on its own for objects like glasses cases, cell phone cases, place mats, etc.
Doubled Hungarian stitch

The doubled Hungarian is shown in orange and yellow. Be sure to double the empty square each time, too. This is a bold pattern that works up quickly. If you are using it as a background, however, be careful that it doesn’t overwhelm the picture in the center. As a background, it is better done in softer, more neutral colors. Also, while the pattern is so regular that you could work all of the first color and then fill in the second color, I don’t recommend this if you are doing a background. I’m afraid you will get into trouble when you have to use short stitches or omit stitches to match up with your central figure.

Hungarian stitch medallion
Hungarian stitch "medallion"
Another thing that can be done with Hungarian stitch is to use it to make medallions like the one shown here, Start in the exact center of your piece of canvas, Make a single Hungarian stitch. Change colors and surround the single stitch with three Hungarian stitches on each side. (Sides will share some stitches.) The next row and color will have five Hungarian stitches; the next, seven. Repeat colors if you like. Proceed until the medallion is the size you want.

Medallion extended to be a 4-way bargello
Medallion extended to a 4-way bargello
If you want a larger design, continue as far as you like. When you cannot make any more complete diamonds, make as much of each diagonal line as you can, then work the design into each corner of the canvas. Or stop when the medallion is as large as you want it to be and work the remaining canvas in a solid color in one of the tent stitches. In either case, you will have made a simple 4-way bargello pattern like the one at the end of this article. I’ll bet you never thought it would be that easy to make something that looks so complicated!

The last stitch for the session was the Hungarian diamond. Start even farther down your canvas for this one. Begin with the short stitch over two threads or bars. The second stitch is the stitch over four threads in the Hungarian stitch, The third stitch starts one thread above the second stitch and ends one thread below it, covering six threads. The fourth stitch repeats the second stitch and the fifth stitch repeats the first stitch — diamond made. Skip the next square of mesh. Repeat the pattern across your sample. In the second row, the 2-stitch goes under the 4-stitch above it, the 4-stitch goes under the 2-stitch above it, and the 6-stitch begins in the empty square. Complete the diamond and leave the next square empty, Continue as far as you can across the row, ending with a partial diamond.

Here is the pattern in two colors:

Hungarian diamond stitch
Hungarian diamond stitch in green and yellow

Hungarian diamond stitch variations
Once again, this pattern can be used in a variety of ways. This sample shows, from the top, strong contrast (red/black/ white), blended contrast (shades of green), plus a sample in variegated yarn.

Outline traced on a photograph

The students chose the background they wanted to use and filed their other samples. When they had worked for a while and I felt they could easily finish the background at home, we stopped. I showed them how they could make more realistic pictures of family pets or other animals. I used a photograph to show them where to draw the outlines that they would then trace on their canvases. I also showed them:
  •  how back-stitching enhanced the picture,
  •  how to put the reflections in the animal’s eyes,
  •  how to put in the dots on the muzzle where whiskers emerge,
  •  how to do the whiskers with thread, and
  •  how to put a little shine on the animal’s nose.
Back-stitching need not be done in black. It can be done in either a darker shade or a lighter tint than the area being outlined.

The class looked at a group of pillows with bargello tops. They chose one that could be done in a variety of color combinations to learn during the next session. We adjourned. The Easter ladies stayed behind for a few minutes to discuss how to best use the animal pictures they wore making. I gave them some pointers for making and lining square Easter baskets.

Now, here is that 4-way bargello pattern. The background is done in basket-weave tent stitch.

Finished 4-way bargello Diamonds and Gold
Finished 4-way bargello, "Diamonds and Gold"

Remember that practice brings you closer to perfection.



 Creative Commons LicenseThis post by Annake's Garden is licensed under a Creative Commons Attribution-NonCommercial-ShareAlike 3.0 Unported License.

Friday, November 10, 2017

A Six-way Bargello, Plus More Optical Illusions

8-way bargello pillow top
8-way Bargello Pillow Top
This post, I'm trying to make good on some projects I promised earlier this year. The first one was to give you a pattern for a 6-way bargello design. We have already done 4-way bargellos and an 8-way bargello (above), but a 6-way is different because the design is based on 60-degree angles, rather than the familiar 90-degree and 45-degree ones. I have designed several of these, but we will be starting with a very simple one. There will be others next year, but they will be a little more difficult. I suggest that you study the posts on 4-way (December 22, 2014) and 8-way bargello (April 22, 2016) before you begin a 6-way project. You may find that you want to try one of the others first, but I assure you this one is probably easier. I'm going to take you step-by-step through this project. Let's begin with the design, which you can download.

Pattern for six-way bargello project
Click here to download Pattern for 6-way Bargello
Since this is a 6-sided design, it makes sense to start with a 6-sided figure, the hexagon. I began by finding the center of my paper and marking it with a dot. Then I constructed a hexagon with the dot at its center. I then made 6 more hexagons, each starting from a point, not a side, of the original one. (If you are constructing a design like this, rather than using a pattern, you may want to make a cardboard template of the center hexagon to draw around as you progress.) You will notice that each of the spaces between the outer and inner hexagons as well as between each outer hexagon and its neighbor is a triangle. Where the bases of two triangles touch, they form a diamond-shape. Finally, I divided the central hexagon into 6 equal triangles. This gave me a choice of triangles or diamonds to stitch. I then made several copies of the design and began to work it out in various color combinations. You can see some of the results below.

Four possible color schemes for 6-way bargello
Four alternative color schemes for 6-way bargello project
As I worked on the design, I told J.D. that I could see an optical illusion forming in one of the designs. He said he could see one, too, but that he would have to erase some of the lines in the design to make it. I suggested that we each draw the design we imagined to see if we had different illusions in mind. When we compared our results, we had indeed seen different illusions. (We were delighted, because another of my promises was to provide more optical illusion designs!) This “game” continued for some time. Below are two of the more interesting ones, for the benefit of those of you who have taken up this pursuit.

Annake's and JD's floating block illusions
Annake's (left) and J.D.'s floating block illusions derived from the 6-way bargello  pattern


In the meantime, I prepared my canvas for the demonstration I'm going to show you now. For more information about preparing a canvas, see the post for May 11, 2014. I began with the triangles in the central hexagon. There are several ways to approach these triangles. An obvious one is to do two sets of triangles in two colors. That is, alternate the two colors as you move around the hexagon. To use three colors, work two adjacent triangles in the first color, the next two in the second color and the last two in the third color. Finally, you can use a different color for each triangle 6 in all. I decided to do two shade of one color in the hexagon, two more in the ‘star’ and a final three in the hexagons. Since it is autumn, my favorite season, I chose yarn in autumn colors.

You are probably going to look at the triangles and think, “This is going to be hard:  the triangles point in different directions and I will have a lot of slanted stitches.” No, they are just triangles with equal sides. They don't point anywhere. They don't do anything but sit there and wait for you to fill them with stitches!

I began with the triangle in the bottom center of the hexagon with yellow yarn. I started at the base of the triangle and stitched from the base to the side line of the triangle, increasing the length of the stitch each time until I reached the triangle's upper point. From there I decreased each stitch until I reached the end of the base. My first and last stitch may go over only one thread of the canvas. The other two yellow triangles form a ‘Y’ with the first one. Then I reversed the canvas to work the gold stitches. The most important thing is to have each gold stitch begin on its base line, but end in the same hole as the yellow stitch it meets. Don't leave any bare canvas. Any bits of the pattern line that show through or any irregularities in stitches meeting will be covered later with top-stitching. Your stitches should cover both sides of the canvas. Don't pull them too tight or you will deform the shapes of the triangles.

6-way bargello, Step 1
I am working on #12 cotton needlepoint canvas with tapestry and crewel yarns. You will have more or fewer stitches than mine, depending on the type of material you are using for a background and the yarn you are using. If you have a stitch that looks thin and doesn't cover the canvas, put another stitch right over it and pull it down firmly. No one will ever know … and I won't tell.

Now that Step #1 was complete, I moved on to Step #2. Here I was concerned with the triangles outside the center hexagon the ones that form a 'star' shape when they are completed. “Okay,” you will say, “now the triangles are pointing in different directions!” No, they aren't. Hold the canvas in the same position that you used to begin the center hexagon. This time work the triangle at the top. Be sure the stitches start in the same holes as those of the ones they are touching in the hexagon. Work that triangle the same way, followed by its companions at bottom right and left. Reverse your canvas again and do the other three triangles. All of your stitches at this point will be straight up and down. Didn't I say it was easy? When I finished the ‘star’, I took the time to top-stitch the sections of the center hexagon with dark brown. Step #2 is complete.

6-way bargello, Step 2
By this time I really liked the triangles because they each took very little time. I decided to do the outer hexagons in the triangles, but I wanted each hexagon to be in a single color. I removed the canvas from the hoop and drew the triangles lightly in pencil. (I am using a hoop because the canvas is very flexible and needs to be stretched taut.) Then I worked all 6 triangles in each hexagon in a single color and top-stitched the junctions in the same color. If you are doing all the hexagons in a single color, or in 6 different colors, you are free to start with any hexagon you like. If you are using 2 colors, your hexagons will form a ‘Y’. If, like me, you are using 3 colors, you will have 2 hexagons in each color, and they will be directly opposite each other. With the hexagons complete, I top-stitched around the ‘star’ points and the edges of the hexagons. Step #3 is done.

6-way bargello, Step 3
If you want to expand the design, you might fill in the triangles between the hexagons or make them into diamonds. You might add another ring of hexagons to the outside of the existing ones and proceed from there. Since I am preparing my design to be a round pillow-top, I am simply going to fill in the background to the outer edge of the circle. A sample of the background stitch pattern I am going to use is shown below. The finished pillow will be shown on a future post.

background stitch for 6-way bargello pillow top
Background stitch  for 6-way bargello pillow top
Until next time, have fun with this six-way design.


 Creative Commons LicenseThis post by Annake's Garden is licensed under a Creative Commons Attribution-NonCommercial-ShareAlike 3.0 Unported License.

Contact Us

Name

Email *

Message *

Blog Archive