Friday, March 31, 2017

Quickpoint: Big Stitches for Needle Art Success

ferret and butterfly detail
Quickpoint is a form of needlework that I recommend to several groups of people. First of all, to beginning needleworkers. It is easy to do and the results are achieved quickly. Almost any kind of design can be adapted to the technique. There are some absolutely beautiful pillow kits currently available that originated in Belgium. You may not want to start out with something quite that expensive, however. You also know, if you are a regular reader of this blog, that I feel kits sometimes discourage creativity.*  I would personally rather see all craftspeople do something that is original and that expresses their tastes and personalities. A second group for whom quickpoint is appropriate is that of creative people who have very limited time to do projects. The final group would be those people who once enjoyed needlework, but now find their eyes and hands do not respond as well as they once did. I belong to that group myself. Please don't give up an activity that you love. Find less physically demanding ways to work. Quickpoint is large and the canvas mesh is easy to see. The needles are large and have eyes that are easy to thread. The yarns are thick and cover the canvas quickly. Projects can be any size that is easy for you to hold.


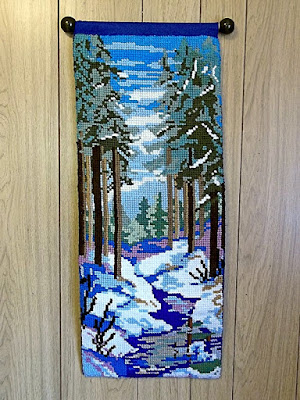
quickpoint wall hanging, "Spring Thaw"
Quickpoint wall hanging, "Spring Thaw"
The “point” part of quickpoint implies that it is only done in needlepoint. This is misleading. Although it is done on a canvas background, quickpoint is also lovely done in counted cross-stitch. (I believe needlepointers and cross-stitchers together form the largest group of people doing stitchery today.) The wall hanging here, “Spring Thaw”, is done in cross-stitch. This is how it looked completed.


#3.75 & #5 canvas
#3.75 & #5 canvas
 Traditional quickpoint canvas has 4.5 stitches to he inch. I do not have a source for this canvas at the moment, so I cannot show it to you. I can, however, show you a larger-mesh and a smaller-mesh canvas, both of which work well for quickpoint. The canvas with the larger squares is #3.75 conventional latch-hook rug canvas. It can be worked in uncut rug yarn or one of many thick craft or novelty yarns. The canvas with the smaller mesh is also a rug canvas, but one which requires a special hook. It is #5 canvas. You can use two strands of knitting worsted yarn or several strands of crewel or tapestry yarn on this canvas. For the best results, do not double the yarn; instead, cut two or more separate strands the same length and thread all of them through the eye of the needle at the same time. Some of these materials can be hard to find. Good paces to look for them are thrift stores, charity shops, and yard or garage sales.

Framed needlework ferret & butterfly
Framed needlework, "Are You Endangered, Too?"


From time to time, I create a needlework picture for a series I call “Close Encounters”. The photograph at the beginning of this post is a close-up of one of these pictures, entitled “Are You Endangered, Too?” You can see the entire picture at the right. It is done primarily in cross-stitch with some tent stitch.


Framed quickpoint, "Let's Do Lunch"
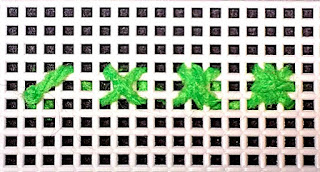
Another of the series is the one at the left, “Let's Do Lunch”. It also has some star stitches in the more heavily textured areas. A star stitch is made by stitching a + (like a plus sign) over a completed cross-stitch. A conventional cross-stitch occupies four squares of mesh. A star stitch (which has many other names, including Double Cross, and St. George & St. Andrew) occupies nine squares of mesh as you can see in the sample. As with cross-stitch, it does not matter which part of the “plus stitch' you do first as long as you are consistent and do the stitch the same way every time.


Steps in making the star stitch

Tip: If you are doing a framed picture or a wall hanging that you want to stay rigid and not sag, you need to work on jute canvas. To do a pillow or other soft object, you will need cotton canvas or a nylon mesh. Again, you may have to do some searching to find the appropriate materials.

Quickpoint cross-stitched butterfly

 
Here is one last example of combined quickpoint. The butterfly was done in cross-stitch. The outlining is done in a single strand of crewel yarn, as are the “floating” lines that represent veins in the wings. The background is done in tent stitch. This is easier to see in the enlargement below.


Detail of butterfly's wing


Annake working on "Spring Thaw"
When I am planning a complicated piece with many different shades of color, I often make a detailed graph of the planned design before I begin stitching. You can see part of such a graph over my shoulder as I am working on “Spring Thaw”. On the “Close Encounter” pictures, however, I charted some features and simply outlined everything else. I didn't chart the butterfly, simply outlined it. I'm currently starting a new picture in the “Close Encounter” series. In the next post on this topic, I will take you through the process for that picture, step-by step.


In the meantime, think “big stitches” and do a little quickpoint.


* My apologies if I have offended anyone from Belgium. I have many fond memories of the country and its friendly people.

 Creative Commons LicenseThis post by Annake's Garden is licensed under a Creative Commons Attribution-NonCommercial-ShareAlike 3.0 Unported License.

Monday, March 20, 2017

Four-way Designs from Hawaiian Quilts

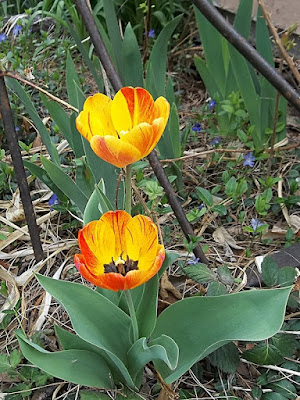
Orange & yellow tulips
Orange & yellow tulips in Annake's garden
Not long ago, we had an interesting question on one of our Question and Answer posts. The question was, “Do four way designs have to be geometric?” (To date most of the four-way designs we have discussed have been for needlepoint, particularly bargello (May 11, 2014, December 22, 2014, August 22, 2016). I replied that the short answer was, “Certainly not!” I went on to say the long answer would require one or more complete posts on the subject. This is the first of those posts. I thought back to a time some years ago when three classes of 5th grade students had been studying about the tropics, particularly the state of Hawaii. I wanted them to do an art project related to the subject to complete the unit.

I have never asked my students to do a project from kindergarten drawings to junior college term papers that I did not do right along with them, so I did some research. I came across some materials about traditional Hawaiian quilts. These were done on square blocks in two colors, one for the cut-out silhouette and one for the background. The subjects were usually native plants as represented by flowers, fruit, and leaves. I did some practicing with colored construction paper.

Pink orchid design on grey
Annake's pink orchid design on grey paper

Folded sheet tulip design
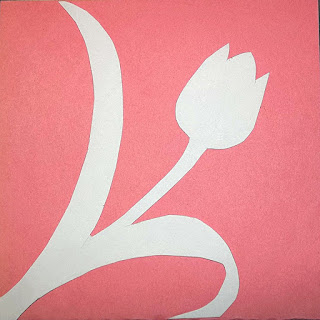
Tulip design, cut from a quarter-folded sheet
The next class day, I showed the classes how to cut a piece of rectangular paper to make it square. Then we folded each square into quarters. I drew a simple flower and leaf design on one of the small squares, beginning at the central corner. I cut out the design, unfolded the paper, and turned it over so that the drawing did not show. Pressing the paper flat on a square of a different color produced a design very similar to the Hawaiian quilt designs. I did a different design for each of the three classes and displayed them so they could be studied. Instead of the unfamiliar tropical flowers, I used familiar garden flowers from our town gardens, such as crocuses, tulips, daffodils and irises. I did, however, display photographs of tropical flowers to give them a choice.
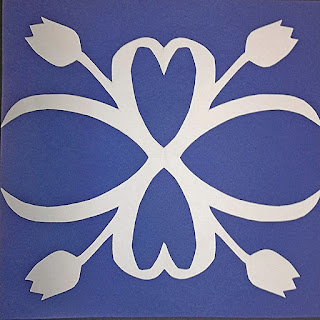
Four-way tulip design, unfolded
The assignment was to produce “quilt blocks” of their own. The first task was to produce a corner design that they thought was attractive. Since the drawings would not show on the finished cut-out, each student could do as many as four practice drawings. During the next session, each student chose the best drawing and cut it out of the folded paper (after being cautioned not to cut the four sections apart). Then each student chose a background square in a contrasting color and glued his or her pattern to it, carefully centering it on the background. They were allowed to add additional decoration if they desired.
 
Later all the projects were displayed on a wall of the school cafeteria. Most of the students then took their designs home, but a few wrote notes to me on the backs of their projects and gave them to me, a gesture that pleased me greatly. I want to show you three of these. (Yes, I kept them.) Remember that these were 10-year-old and 11-year-old children. The first one is typical of the designs. It combined a leaf cut-out with drawings of flowers and detailed drawing of the veins in the leaves. The second one is a very carefully and skillfully done cut-out with butterflies added in the corners, facing inward rather than outward. The last one is by a rule-breaker. (Those of you who have been reading these posts for the last four years know that I am a rule-breaker myself, and therefore probably more tolerant of rule-breaking than most people.) While the swans do hold together nicely, they are not connected at the center. It was then necessary for the young artist to place a patch of blue and white “waves” in the hole in the center of the design.
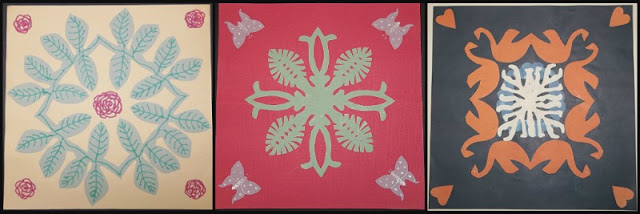
Student "quilt blocks"


Now you may be asking yourself, “What does this have to do with me and my art or needlework?” That's a fair question. I expect, however, that the quilters among you have already started envisioning designs of your own. These might involve silhouettes of animals or toys for a baby's or child's quilt or vehicles or sports equipment for a man's pillow. The possibilities are endless. For those of you who want to further explore Hawaiian quilt designs, and who have a Pinterest® account (www.pinterest.com), there are enough ideas in their archives to keep you busy for years!

But let's return to the simple tulip design. You may wonder why I didn't make all the tulip leaves form “hearts”. That is easy enough to do. Try it for yourself. The answer is that I wanted a design that could be manipulated to fit a rectangle as well as a square. Since I had the pattern made, I cut it out of a couple of papers with patterned designs. Then I tried them in various combinations: plain-on-plain, plain-on-patterned, patterned-on-plain, patterned-on-patterned. Some of the most unlikely color and pattern combinations worked rather well, as you can see below.
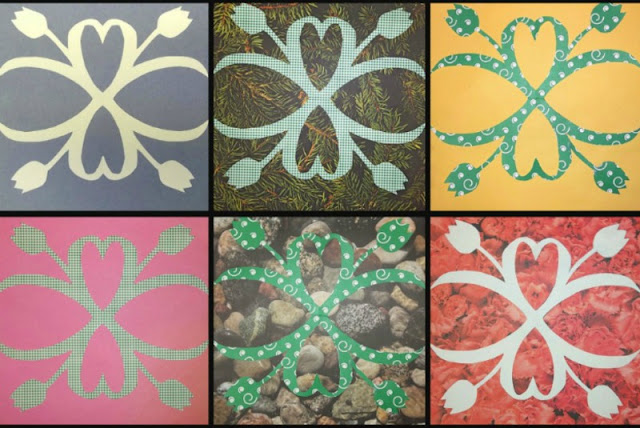
Four-way square paterns with different paper combinations


Tip: If you are a beginning quilter, you may find it useful to collect a variety of papers in various colors and patterns. Paint and wallpaper stores and decorator's shops often discard wallpaper pattern books. If you ask them to save those for you, many will do so, especially if you are doing projects with school children, Scouts, senior citizens, etc. It doesn't hurt to ask. Then you can take a pleasing paper pattern with you to a fabric store and look for fabrics in the colors and with similar scale patterns to your paper sample.

On our next post on the subject of four-way designs (later this year), we will discuss multi-colored four-way designs in painting, collage, crewel, tent stitch, reverse applique, etc. In the meantime...

Use your imaginations,


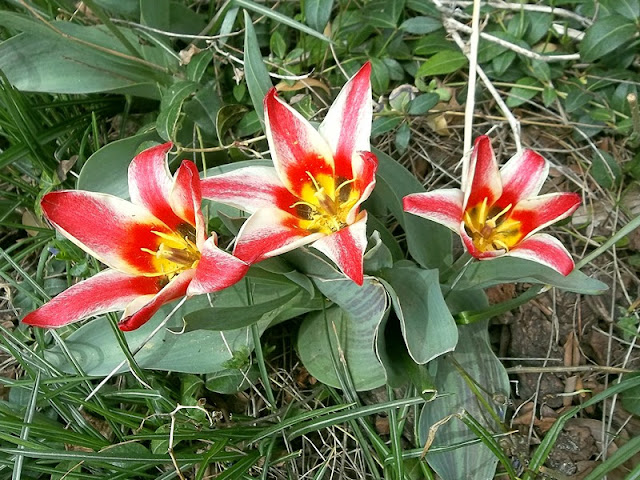
red-and-white tulips
More tulips from Annake's Garden

 Creative Commons LicenseThis post by Annake's Garden is licensed under a Creative Commons Attribution-NonCommercial-ShareAlike 3.0 Unported License.
Friday, March 10, 2017

You Asked for It!

4-way pattern on paper inspired by Hawaiian quilts
When we did the Winter Questions and Answers (February 14, 2017), I mentioned that we had received so many questions asking for help with certain projects that we couldn't answer all of them in a single post. I promised to complete the instructions in the first post for the month of March, and here they are. First, let me inform everyone that there will be two posts (or possibly more) devoted to answering the question about 4-way designs. The first of these will appear later this month and will touch on such topics as Hawaiian quilts, reverse applique, and pencil-and-paper art. I hope you will enjoy these posts as much as I did preparing them for you.

This first section is for those of you who would like step-by-step illustrations of the Swedish weaving pattern. The pictures below show the top and middle sections of the design step-by-step. The colors are similar to but not identical to the yarns used in the needlepoint design. The colors were worked with six-ply embroidery floss, except for the two straight burgundy lines, which were done with three strands of craft thread (or you could use two strands of cotton crochet thread). For the bottom section of the design, turn your fabric 180°. Repeat the first section in reverse order. It was fun to convert one type of needlework into a very different one. It makes a point that I have made before that patterns have multiple uses. Thank you for the opportunity to demonstrate that.

Swedish weaving sample Step 1
Swedish weaving sample Step 2
Swedish weaving sample Step 3
Swedish weaving sample Step 4
Swedish weaving sample Step 5
Swedish weaving sample Step 6
Swedish weaving sample Step 7
Swedish weaving sample Step 8

The next section is for those of you who wanted to do the little animal heads in needlepoint. Remember that each square represents a tent stitch ( / ). I have stitched the designs on #7 plastic canvas so that the stitches are easy to see. The designs are stitched in knitting worsted and back-stitched in a single strand of black crewel yarn. If you do them on #10 or #14 needlepoint canvas, they will be quite a bit smaller. This is good for repeated designs, either as a border or as an all-over spaced repeat. Done on quickpoint canvas, they will be quite a bit larger. I did not attempt to match the colors on the patterns except to assure that light and dark tones bear the same relationship to each other.

Tip: Some of the designs have been modified slightly to make them easier to do in needlepoint. The tent stitch traditionally starts at lower left and goes to upper right ( / ). In a number of cases I have used a reverse tent stitch that starts at the lower right and goes to upper left ( \ ). You can see this in the spaniel's forehead, the fox's ears and jaws, the owl's ear tufts, etc. Doing this sometimes causes a tiny piece of the canvas to show through. If you don't like this, put a traditional tent stitch underneath the back-slanted stitch.

spaniel, fox, and owl on plastic canvas


As I stitch a design, I sometimes change small elements of the pattern to make a design that is more pleasing to me. I made the cat's mouth smaller and the terrier's nose larger on these two designs. That does not mean the revised designs are better than the original patterns. You may prefer the original pattern, or you may wish to make modifications of your own. Don't hesitate to change details to get results that you like better. To emphasize eyes and noses I do a cross-stitch instead of a tent stitch.

catand terrier on plastic canvas

Occasionally I make larger modifications. When I first stitched this bear's head, I did not like the result at all, but found it difficult to determine why I disliked it. Finally I decided that the eyes and nose were too close together and the nose was not prominent enough. I added another row of stitches between the eyes and the nose and made the nose more noticeable. This had the effect of making the bear's head longer, so that it appears thinner than the one on the cross-stitch pattern. These are the kinds of decisions you must make as you stitch.

bear's head on plastic canvas

Below are some more small patterns suitable for borders or scattered all-over designs. Do them in straight stitches, back-stitch, and French knots in a single color for blackwork, redwork, or whitework, or in multicolor for Holbein embroidery. Or use what you have learned about making your own patterns to convert them to cross-stitch or tent stitch. The colors are simply suggestions. Use your own choices.

Let's have fun with these,


Holbein stitch patterns for butterflies, bugs, and leaves
More Holbein stitch patterns, for butterflies, bugs, and leaves


 Creative Commons LicenseThis post by Annake's Garden is licensed under a Creative Commons Attribution-NonCommercial-ShareAlike 3.0 Unported License.

Contact Us

Name

Email *

Message *

Blog Archive