Tuesday, January 16, 2018

How One Thing Leads to Another...

classsroom examples 1
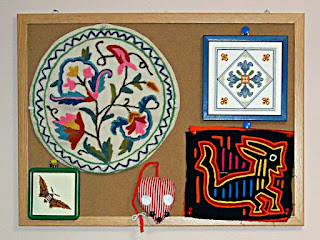
Examples of different needle-craft techniques
Working with introductory needlework classes, I stress several things: learning basic skills so that you don’t need to depend on kits or patterns; making comparisons as you move from one technique to another so that you can apply the same skills to more than one kind of needlework; stressing your personal preferences for color, texture, stitches, etc.; saving money on materials and equipment; and using your imagination to create new uses for what you have learned. I believe that creating things builds character and confidence and brings a kind of satisfaction that is unique.

more classroom examples
More classroom examples
I begin with some general principles that I have learned from experience over many years — most of them learned from my own errors. (See “11 Secrets for Needlework Success” on our June 1, 2014 post.) These include such simple things as how and when to remove a bad stitch (using the eye of the needle rather than the point, and doing it immediately). I don’t believe in asking students to purchase a long list of supplies, so I provide most of what they will use for their first course of instruction. I do ask them to bring a bag (preferably cloth), that will not be used for anything but their needlework, scissors or shears that have not been used to cut anything but fabric or yarn, and a notepad and pencil for writing down instructions.

Butterfly drawing on plastic canvas
Butterfly line drawing on plastic canvas
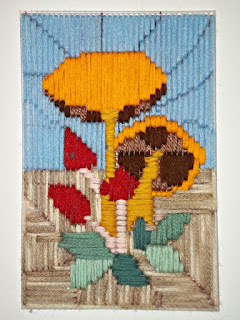
We begin with a choice of simple outline drawings on 5-inch by 7-inch (10 cm X 15 cm) pieces of plastic canvas. Plastic canvas will be used for the first activities because it resists stitches being pulled too tight, which is the most common beginner’s mistake. The designs are simple — a flower, a butterfly, a cluster of mushrooms — yet they can be attractive when completed and can even be framed if the student likes her work. At the very least, they can be filed for future reference. After choosing a design, they are asked to decide on the colors they will use in completing it. They are not allowed to choose black as one of their colors (why will be evident later).

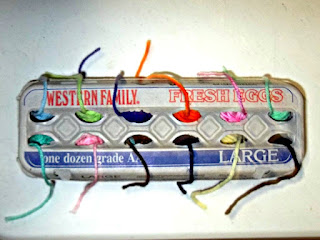
Egg carton with balls of yarn
Each one is given an egg carton with 12 openings in the top and invited to fill it with small balls of yarn. I roll balls of leftover yarn from each of my projects and store them in similar cartons, so there is always a large variety available. Once the yarns are selected, the free end of each one can be drawn through one of the 12 openings and the carton can be closed to keep the yarn clean.

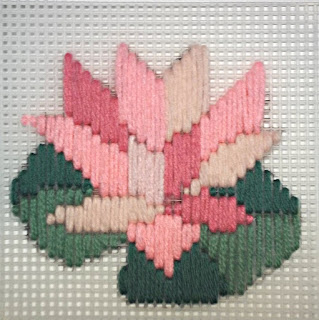
First stage of a small water lily picture
Once they have made their choices and seated themselves, each one is given a tapestry needle with a large eye. I explain how the needles are numbered and tell them where they can buy additional needles locally when they decide they need them. I ask them to choose a section of the design to stitch first and to select a color of yarn. I explain why we don’t use lengths of yarn longer than 18 inches (46 cm.) and often use less. Each table has an 18-inch tape fastened to it so they can learn to estimate that length. After they have chosen and cut their yarn, I demonstrate the use of a waste knot to begin the work. I then demonstrate the upright gobelin stitch and show how it covers both sides of the canvas. I then ask them to make 5 stitches and stop.

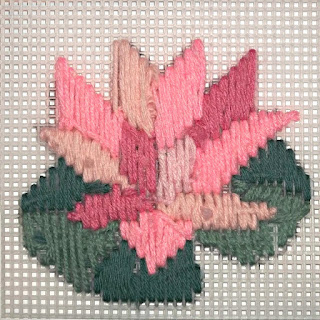
Back view of water lily project
If the yarn they have chosen does not cover the canvas, I demonstrate the proper way to remove the stitches and replace each one with two side-by-side stitches. They are then to complete the section of design that they have chosen. As the first student nears the end of her yarn, we stop and I show them how to secure the end of the yarn under completed stitches and clip it close to the back of the canvas. I encourage them to look often at the back of their work. I don’t expect the back to look quite as good as the front, but there is no reason for it to look like an unmade bed, either! I then show them how to start a new piece of yarn by running it under existing stitches and we continue. I answer questions as we proceed.

Once a student has completed an entire section of her design, we stop. I show them how to start an adjoining section using the canvas “holes” where the stitches of the first section ended. In other words, how to make the design without leaving any bare bars of canvas showing inside the design. Once all have completed a few sections of their designs, I point out that there are details in each design which are so narrow (flower and mushroom stems, butterfly bodies, etc.) that they would look better worked horizontally rather than vertically. Students work one of those and make a note of any others. Then we ceremoniously sever the waste knot, thread the needle, and secure that piece of yarn under completed stitches.

Picture of mushrooms, in progress
Beginning sessions, especially with a large class, usually end with the rest of the central design to be done as “homework”. The next session begins with a consideration of the background. We look at a number of color samples and compare the effects of dark and light colors. I also demonstrate the effects of variegated yarns for this purpose — as a “water” background for a waterlily or “straw” for the ground under a group of mushrooms, for example. Long, straight stitches will be used for this also, but I will show that there can be advantages to using both horizontal and vertical stitches. Students work at least two adjoining sections of the background in class, joining them together and to the central design. The rest will be “homework”.

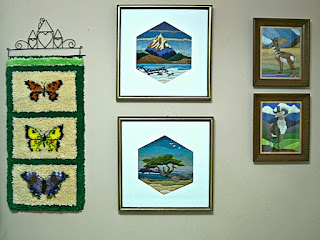
Students are then amazed to find they have learned the basics for doing a more complex design like these pictures in French long-stitch which are among the more than three dozen technique samples on the walls of my classroom. Moreover, since they have essentially been doing satin stitch on canvas, I show them how everything they have learned will ‘translate’ into work on either finer canvas or cloth with tapestry yarn or embroidery flosses (even the variegated ones).

Pronghorn and bighorn in French longstitch
Pronghorn and bighorn in French long-stitch

But the lesson is not yet finished. Students are given black yarn and taught how to separate strands. Using 12-inch (30 cm.) lengths, they are taught how to back-stitch, square to square, around their central design (and the background divisions if they like) to make “stained-glass” stitchery like this picture or the butterfly on this pillow. Back-stitching is one of the most useful and versatile stitches in a needleworker’s “vocabulary”.

Examples of "stained-glass stitchery"
See how “one thing leads to another”?


Cedaredge/Surface Creek/Delta County readers:
Annake is now offering needle arts classes on Wednesdays and Saturdays, and still has a few openings for the class that begins January 27th, 2018. If you are interested, please contact her atannakes_garden@yahoo.com

 Creative Commons LicenseThis post by Annake's Garden is licensed under a Creative Commons Attribution-NonCommercial-ShareAlike 3.0 Unported License.

Monday, January 1, 2018

Question & Answers, New Year's 2018

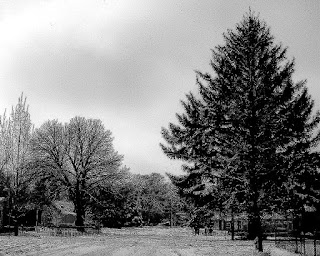
Black/white photo of a winter scene
A Winter Scene
When can we expect Part V of the Still Life in Needlework series? And what is next after that?

There will be some delay, I'm afraid. J.D. is busy making prints of some of his work. His sister J.J. has just sent us several folders of her photographs that haven't even been downloaded yet. And I am offering beginning needle arts classes for adults on weekdays and mother/daughter or grandmother/grand-daughter classes for children 10 years old and older on weekends, starting in mid-January. All that is going to take some time to sort out. At this point, it looks like at least mid-February for Still Life V. I apologize for the delay. Next will be the start of a similar series on landscapes, hopefully launched before Earth Day. There will be posts on other subjects in the meantime, including our yearly Anniversary issue. Please keep watching.
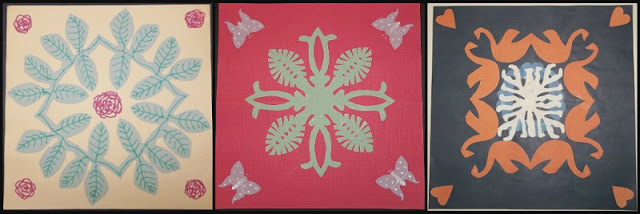
Three student designs for Hawaiian quilts


Are you still going to show more of the Hawaiian quilt kinds of designs that you started showing last spring?

Yes, indeed. I have shown some of mine in various contexts throughout the years, but you may have missed them if you were searching the posts for Hawaiian quilt designs. You may remember that this was a project I once was doing with 5th grade students who were studying about the state of Hawaii. I included three student designs (see above) that showed a real grasp of the Hawaiian quilt design style. Here is one more good student design that took a different approach.

Four-way design with strawberries


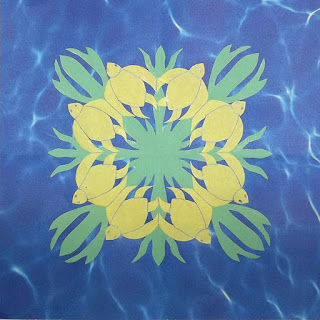
Four-way design with sea turtles
At the same time, I was teaching about different ecosystems in science, so I combined the two ideas and made several 4-way designs, each featuring something about a different environment. Some of these started at the center and worked toward the four corners of the square, while others featured corner designs with simple centers. Here is a central-focus design of sea turtles swimming outward through seaweed. I used a background that suggested ocean waters.
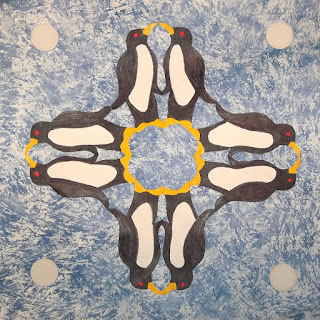

Four-way design with penguins

The second design shows pairs of penguins close together for both communication and warmth. The background suggests a pale sun and air filled with ice crystals. This one was a favorite with the students.
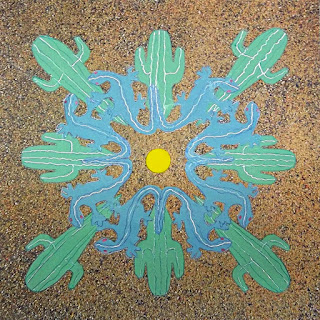


Four-way design using a desert motif

A third pattern features a desert habitat. This time the main emphasis is at the corners where large lizards surround cactus plants. The background suggests sand, while a hot sun fills the center spot.


There is quite a bit of detail in the corner designs, so we will show you a close-up of one of the corners.
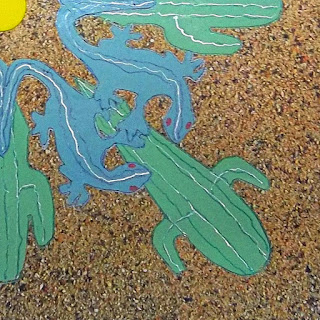
Close-up detail of the desert motif

There are other patterns in my files … somewhere. I'll show them at a later date. I hope you have enjoyed all of these and that they have given you ideas for either paper or fabric projects. I apologize for making you wait for them.

Did you ever finish the Siamese fighting fish you were doing in reverse applique?
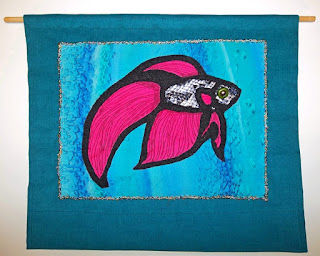
Finished reverse applique of Siamese fighting fish
Yes, it was finished as a small wall hanging. Here is a picture of it. I am currently working on a companion piece of a fantail goldfish, intended to face this one. In fact, you will see a post very soon with the pattern and directions for the goldfish. If you like, you can then make one of your own. So look around for those pretty scarves, silk handkerchiefs and men's ties that are never worn. Reverse applique can give them a whole new life!

Hey, Annake, those “roses” at the top of Part IV of the Still Life series sure look like tulips to me!?!

Good catch! We share the blame. J.D. wrote the caption and I didn't catch it in proof-reading. We both know better, since we grow both tulips and roses in Annake's Garden. Blame it on late hours and hurrying to get the post online. Sorry!

When are you going to show the real basket of flowers from Part IV?

Here it is now. How does it compare with your design?
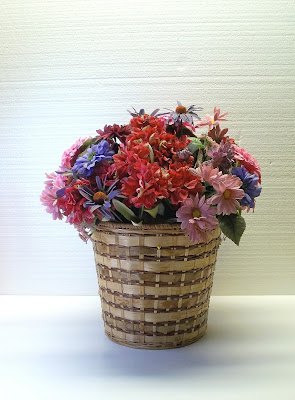
Original flower basket photo

Thank you for your patience,


A Note from the Gnome:
We recently changed our ISP, and the email address on our contact page no longer works. Until we can get a new contact page built, please address any correspondence to:  annakes_garden@yahoo.com


 Creative Commons LicenseThis post by Annake's Garden is licensed under a Creative Commons Attribution-NonCommercial-ShareAlike 3.0 Unported License.
Contact Us

Name

Email *

Message *

Blog Archive