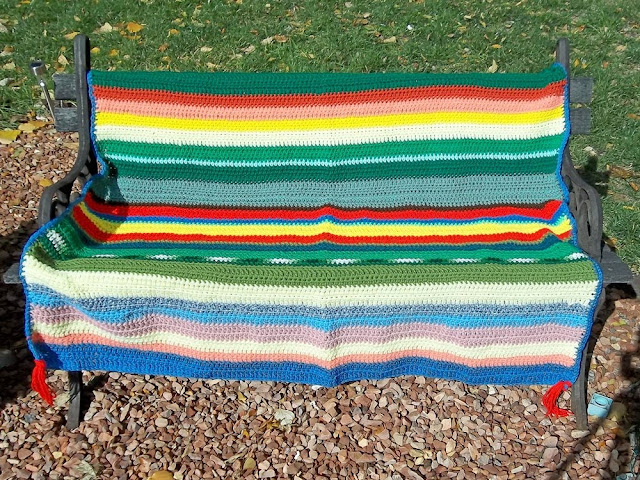
Light reaches the Earth from the Sun in several different forms. Two of the most important —
infrared and
ultraviolet — are not visible to us without the use of instruments. There are living things that are conscious of some of those
wavelengths, but we are not among them. In between infrared and ultraviolet there is a narrow band of
visible light which contains the wavelengths of all the colors that we can see with the naked eye. We call this "white light". In this case, white is not a color; rather it is the
presence of all colors. The black of interstellar space, also not a color, is the
absence of all visible light. When a light, natural or artificial, appears, so do colors. When there is no light, there are no colors. We are all familiar with the phenomenon that occurs when a beam of visible light passes through a glass prism and produces the
spectrum of color that we associate with a rainbow.
 |
| White light through a prism (public domain graphic) |
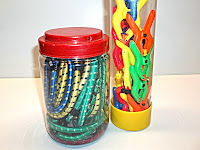 |
| Colored objects |
But when we talk about the colors of objects — paper, paint, cloth, wood, plastic — white is the
absence of color and black is the
presence of all colors. When elementary school children hear that, they immediately want to mix all the colors in their paint box to try to make black. But the best they can achieve is a muddy brown. It is a "teachable moment"
*. Light is
energy; pigments are
matter. They follow different rules.
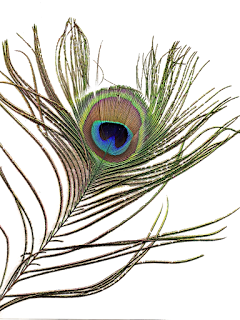 |
| Peacock plume |
Just to make the situation more confusing, many of the colors we
think we see are
structural colors, physical illusions, tricks of the light. They are no more tangible than the rainbows we discussed in the "Skyscapes" series (
June 2, 2019 post), but they are everywhere in nature — a butterfly's wing, a peacock's feather, a fish's scales, the blue of the sky. Structural color depends on
light, not
pigment.
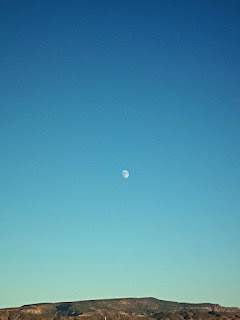 |
| Clear blue sky, showing color gradient |
The atmosphere is filed with dust particles and very tiny droplets of water. These are comparable in size to the shortest
wavelengths of visible light. That is the blue/violet range. These wavelengths are small enough to enter droplets and pass through them, being bent both at entry and exit, so they are scattered and reflected, while the longer wavelengths of light — red, orange, yellow, and some greens — pass through the atmosphere intact. (Rainbows, of course, depend on much larger raindrops.) Lacking intervening clouds, we see the sky as shades of blue. If it were not for the atmosphere that surrounds our planet, the sky would be the black of outer space. The way all this works was discovered and described by a physicist, John Tyndall, in the middle of the 19th Century. It is called the
Tyndall effect. But artist Leonardo da Vinci had written about the phenomenon in his notebooks much earlier, noting that the air appears more blue the further away it is from the viewer. He correctly theorized that this was because of moisture in the air.
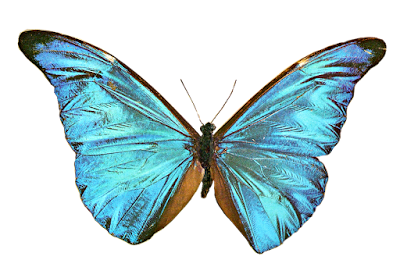
We followed a Morpho butterfly for nearly an hour through mature rain forest in Panama. (Mature rain forest is fairly open and easy to travel through, not like the "jungle", which is the result of damage and disturbance.) The butterfly, whose wings were as broad as my two hands pushed thumb-to-thumb, flew slowly and majestically from one food source to another. Flashes of sunlight reflected from its brilliant blue wings, which you can see in the accompanying photograph. But the blue was not in the scales on its wings, which are tiny and clear. The wings of the butterfly beneath the scales are a warm, dark brown. These absorb the longer wavelengths of light, while the scales — like the droplets of water in the air — reflect the short blue waves of visible light. This
structural light is
subtractive; that is, it depends on the array of wavelengths of light that pass through, too large to be taken in and
reflected or
refracted.
 |
| Morpho butterfly (public domain photo) |
 |
| RGB Additive Color Space (public domain graphic) |
We learned early in life that there were three
primary colors — red. yellow, and blue — and that we could mix those colors of paints or crayons to make the
secondary colors — orange, green, and purple. A few years later we learned in a science class that light came in different
primary colors. These were
cyan (a light greenish/bluish color),
magenta (a bright reddish/ purplish color), and yellow (we knew that one). This distinction goes back to Sir Isaac Newton. Scientists have learned quite a bit about light and color since Sir Isaac's time. They had to do so in order to make technicolor movies, color television (yes, children, both of those used to be in black-and-white), and the display on whatever digital device you are using to read this post. These broadcast on the principle that visible light is made up of red, blue, and
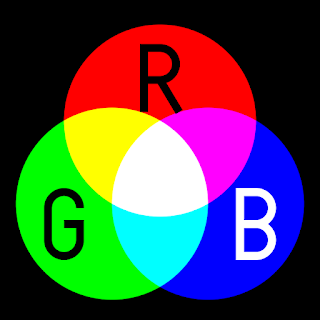
green wavelengths. (This made sense to me because green wavelengths are located about half-way between red and blue wavelengths.) If you overlap these colors of light, red and green make yellow, blue and green create cyan, and red and blue create magenta. The three primaries, combined in different proportions, give us all the colors we see on our screens — and in the world we see when we look up from them. (The
primary colors of light are the three colors of light which, together, produce white light. Mix any two primary colors and you get
secondary colors. Mix a secondary color with either primary in its make-up and you get a
tertiary color.)
 |
| Materials for cellophane experiments |
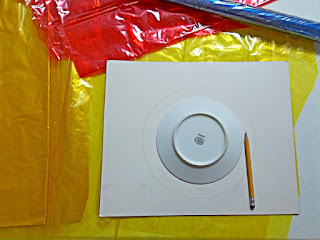
If you want to see some of the color-mixing effects for yourself, look for shops that carry gift-wrapping paper. Buy a roll each of red, yellow, green, and blue cellophane. Then all you need is a sunny window and a piece of white material to tape to the wall opposite the window. Do either the RBY or the RGB overlapping arrangements give you the results you expected? (If you are working with children and want to let them experiment with overlapping colors, it is a good idea to make frames for the cellophane. Chose a salad plate and a saucer that is at least a half-inch smaller all around than the plate. Draw around the salad plate to make circles on white poster-board. Center the saucer on each circle and draw around it. Cut out the center of each frame. Smooth a piece of cellophane flat on a table. Use white glue or rubber cement on the bottom surface of the frame and place it on the cellophane. When the combination has dried, cut away any surplus cellophane from the outer edge of the frame.
 |
| An atom ( public domain graphic) |
When light strikes an object, one of several things can happen. We mentioned earlier that light is a form of
energy. The smallest unit of light is called a
photon. Any material that the photon strikes is made up of
atoms. An atom has a center called the
nucleus, surrounded by orbiting
electrons at several different levels, but most of the atom — much like our solar system — is empty space. I mean a lot of space! Think of Yankee Stadium as an atom. The nucleus is about the size of a small gumball at the center of the playing field. The electrons are all racing around in the last rows of the cheap seats, all the way up on the rim!
 |
| Ways light can interact with matter |
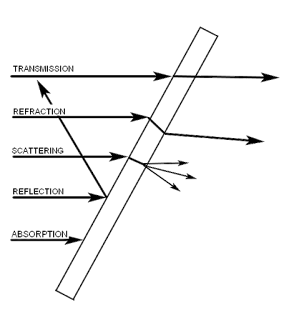
When a photon strikes an electron, one of several things may happen. If the photon gives up its energy to the electron, the photon disappears. We say the light has been
absorbed. If the photon is just slowed down by the electrons of a substance, it is bent. We say it is
refracted. Shiny, smooth substances tend to bounce some photons back toward their source. We say the light is
reflected. Sometimes the light passes through the substance and comes out the other side. We say the light has been
transmitted. Sometimes the photons seem to bounce in all directions at once. We say the light is
scattered. All these statements are over-simplifications, but they express the general ideas.
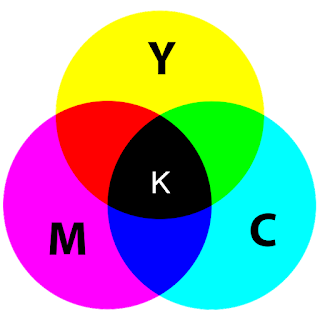 |
| CMY+K Subtractive Color Space (public domain graphic) |
Under the previous system (Newton’s), yellow and cyan create green, magenta and yellow make a red-orange, and magenta and cyan produce a dark blue-violet. Those are not large differences, but they are significant, especially when you begin working with secondary and tertiary colors. But there is one very important art enterprise which not only depends on the cyan/yellow/magenta model, but also adds true black to the mix. This industry is color printing.
Essentially this means what we see on our digital screen does not give us an accurate assessment of what is going to emerge from a color printer. Since J.D. deals with this problem all the time, I'm going to turn the discussion over to him.
J.D.: I’ll bet you have never seen a printer that prints white lines on black paper, although building one would be fairly simple. The problem is that your white ink would have to be completely opaque — any black paper showing through would turn your white lines noticeably gray. But thirty years ago, printers were made to do much the same thing: they only printed opaque black lines (words) on white paper.
However, to get more than two colors — one from the ink, one from the paper — with opaque inks you need at least one container of each basic color (let’s call them ‘pots’), plus a third to mix them in; then you need a way to mix them in the right proportion (to keep it simple, just think of it as a magic elf). Plus, if you need to mix the inks more than once, or change the proportion of colors in the mix, you need a way to thoroughly clean the mixing pot (add another elf) or another new pot. And, with every color you add … well, even with teeny tiny magical pots and an army of magic elves, it is easy to imagine your printer soon becoming the size of a factory, and the time you have to wait for your print job stretching to weeks.
The solution printer manufacturers found was to use inks that weren’t opaque, called dyes. These work like the colored cellophane that Annake discussed earlier: they lay one small dot of see-through color over another on the paper until they get the mixed color you ask for. This eliminates a lot of the pots of colors you need, including all the mixing pots (that happens right on the paper), puts most of the magic elves out of a job, and can be done a lot quicker.
This solution is pretty good, but not perfect. For one thing, like the children mixing paints mentioned above, you can’t get a good black this way. But since the printer manufacturers already had a good opaque black cartridge, they just added it to the machines along with the dye colors. However, you can’t mix the opaque black ink with the colored dyes, and there is no way to thin it to make it see-through. And that is why, when you tell your printer to print in black and white, it uses only the black cartridge; but, when you specify shades of gray (gray-scale), it only uses the color cartridges.
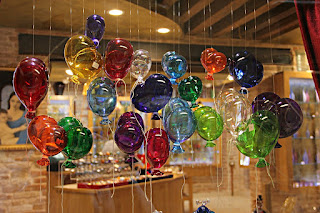 |
| Blown glass 'balloons' (public domain photo) |
Annake: Finally, the window in my office is made of glass. The glass, which is in a double layer, is set in metal frames. The frames are inset in a wooden wall, which is covered on the inside with plaster and on the outside with shingles. All of these materials are
solids. Light does not pass through metal. wood, plaster or shingles. Why, then, does light pass through solid glass? Glass is an
amorphous solid. Its atoms do not form structure in an orderly fashion like those of metal or wood. The atoms of glass arrange themselves in a random fashion, much like the atoms of a liquid that flows do. So glass is stable and rigid like a solid, but has a disordered arrangement of atoms like a clear liquid. Therefore, light can pass through it. At least part of the reason for this is that the silica sand used in making glass is heated to extremely high temperatures and then quickly
quenched — plunged into a cold liquid — to harden it. Perhaps the glass atoms simply don't have time to form a more organized structure.
Glass is a fascinating material. If you ever have the chance to watch glass-blowers or stained-glass artists at work, please spend some time with them and take along some children to see these artists at work. The children will enjoy and remember watching them as they ply their ancient arts.
Enjoy color in all its forms!

 This post by Annake's Garden is licensed under a Creative Commons Attribution-NonCommercial-ShareAlike 3.0 Unported License.
 This post by Annake's Garden is licensed under a Creative Commons Attribution-NonCommercial-ShareAlike 3.0 Unported License.


