I have frequently advised you to look at the work of various artists, past and contemporary, to get inspiration for your needle art. I would like to steer you to some very
contemporary women painters. You can find their work online. I'll give you a brief analysis of how their work has inspired me to do some new pieces in different kinds of needlework. Look for the mention of more of these artists in future posts, along with my projects that they inspired.
If you have other artists, past or present, whose work you think I should be looking at, please drop me a line at annakes_garden@yahoo.com.
Our first artist is Tilly Willis (
www.tillywillis.com). She is a British citizen and a well-known portrait painter there. She has traveled extensively in Africa and done many studies of life in the countries she has visited. Her compositions have been made into color prints. Their style is quite different from the detailed work she does as a portrait artist. This pleased me greatly because i have always maintained that it was not necessary for an artist to be limited to a single style. Her pictures of people going about their daily tasks are made up of stylized two-dimensional flat shapes in vivid colors against a simple background, They are very expressive, both in outline and in gesture.
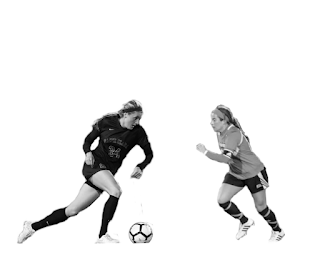 |
| Soccer players preliminary design layout |
I plan to do something similar in simple tent stitches. I am going to plan my picture by cutting the simple shapes from colored construction paper that I can move around on my canvas until I have them placed just where I want them, like a collage. Then I can trace all the elements onto the canvas and begin to stitch. Considering the success of the U.S. Women's Soccer Team, I thought they would be a good subject for this project. The accompanying photograph will show you what I mean. I will show you the finished composition in a future post.
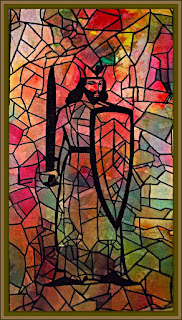
I realize that many of you do not think of collage as a major art form, but you would be mistaken. It is a major contemporary art form with large artwork and installations in both two and three dimensions. This is an art form where women probably outnumber men, but there are still many male collage artists. (Remember, Picasso and Braque introduced collage.) If you have become interested in this art form, I suggest you check out some of the many artists listed in
Collage Artists of America online. There is a list of upcoming exhibitions. If you get a chance, try to see one of them. I think you will be impressed.
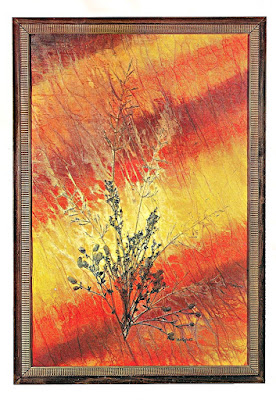 |
| "Autumnal Prophecy", collage by Roberta Bellofatto |
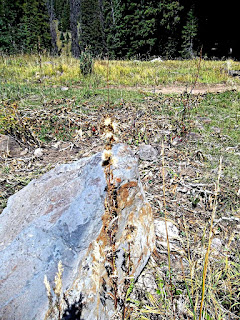 |
| A good area for collecting... |
A different kind of collage is the "nature walk" collage — one of my favorites. The idea is to go on a nature walk and collect leaves and flowers to press, and small "found objects" like feathers, tiny seashells, etc., that can be glued to a prepared background. These are the perfect times to do one, when leaves are changing color and plants are producing seeds. Remember that you are not allowed to collect such things in most state and all national parks or on private property without permission. If you live in a city high-rise, you may not be close to places where such things can be collected. Or you may not feel safe taking your group for such a walk because of heavy traffic or other hazards. Sometimes just looking around familiar backyards or an uncut vacant lot will give you plenty of material.
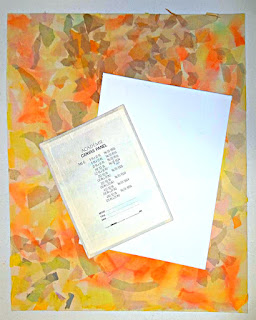 |
| Canvas boards |
Since the items you may collect are heavier and bulkier than those we have featured in
earlier collage posts, you will need heavier back-ground material than poster board or cardboard, or else the picture will not lie flat when it is finished. Individual packs of 8" X 10" canvas boards are good for individual artworks, but you will need larger ones for small groups working together. Mat board and heavy corrugated cardboard are alternatives, especially if cost is a major concern. For a permanent installation, Masonite can be used. It is dark in color and should be painted before use.
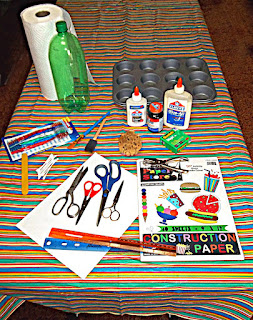 |
| Some collage tools and materials |
The boards can be used plain, pre-painted, or covered with one or more tissue paper sheets. If you have access to colored crepe paper, it can also be used, but be advised it "bleeds" color into the composition, while tissue paper does little or no "bleeding". Check
our earlier post for a list of materials that you will need. Have a pile of newspapers and paper towels for pressing the plant materials and general clean-up. Select your work area and assemble your materials in advance.
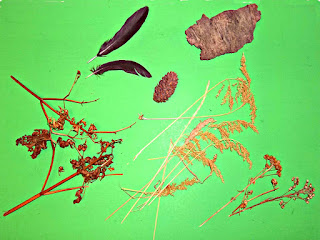 |
| Found objects for collage use |
The next step is an excursion to collect the grasses, leaves, seedpods, etc. for the compositions. Small children will need supervision and should be taught to ask an adult before collecting plants and other materials. Everyone should have a collecting bag, An adult should have a pair of pruning shears to detach small branches or cut tough stems. Delicate materials like feathers and fragile plant parts that should not be pressed may be stored in the crisper drawer of a refrigerator until used. Everything else should be placed between layers of newspaper on a flat surface and dried thoroughly before attaching them to the canvas. Canvases may be prepared in advance or on collection day, whichever works best for you.
At the beginning of this section is a picture of a completed collage to give you an idea of what can be done quite simply. Make sure materials are thoroughly dry. Use the white glue full-strength to secure the three-dimensional materials to the board and let them dry. Delicate materials should be attached with the half-and-half glue/water mixture. Brush the area of canvas first. Tweezers are useful for placing tiny stems and branches. Carefully place the delicate materials on that area and gently brush the mixture over them until they are covered completely. (The milky-looking glue mixture will dry clear.) Let that layer dry.
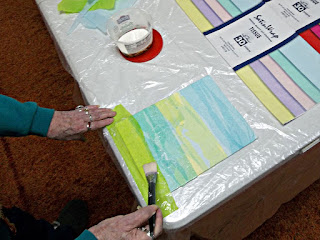 |
| Brushing on the glue and water mixture |
Add tissue paper over the top if you like, brushing it (both bottom and top surfaces) with the glue mixture to hold it in place. To get a glossy surface, you will need several all-over coats of the half-and-half mixture, dried between applications. A hand-held hair-dryer can speed up the drying, but it should be wielded by an adult and not held less than a foot away from the surface or the surface may buckle and warp. Spaced dryings are preferred. The finished picture should be hard and glossy to the touch. Now you are ready to frame the picture if you like.
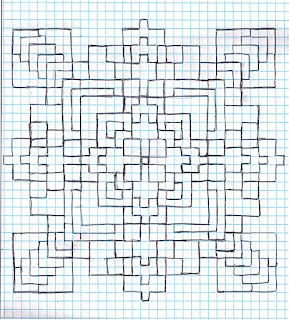 |
| Preliminary sketch for 8-way bargello |
A few months ago (
May 5, 2019) I did an article in which I showed some alternative ways to use a small all-over pattern to make different kinds of needlework. I expressed a desire to use it as a 4-way or an 8-way bargello project. One of the easiest ways to make an 8-way design is to superimpose one 4-way pattern on another 4-way pattern. That is essentially what I have done here. My idea was to "marry" a 4-pointed star design with a strong diagonal one without sacrificing either one. This design (see the end of this post) has more colors in it than any of my other designs. I added some different colors to make it more varied, while retaining its autumnal feel. However, the colors you see on your monitor may not be the exact colors I see on mine. It would be best if you choose your own colors for your design.
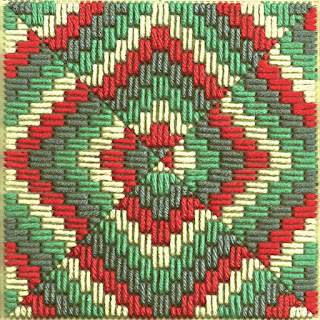 |
| An unusual 4-way bargello by Annake |
It is designed to be a typical bargello pattern, but it is versatile enough to be used in a number of different techniques. It is important for you to decide which technique you want to use before you begin shopping for materials The simplest way to use this would be a tent stitch design. For this,
count the squares in your design carefully. You will need a
minimum of needlepoint or plastic canvas with
one square of mesh for each square of the design, plus an extra vertical row because tent stitch is slanted. If you plan to surround the motif with a background larger than the one I have left blank on the pattern, add another row of canvas squares for each row of background. The next easiest technique would be latch-hook. Each square of the design would require one square of mesh. add additional rows for background, plus
at least 3 rows on
all sides to turn to the back of the finished work and secure. Finally you could do the motif in cross-stitch on needlepoint or plastic canvas, monk's cloth or aida cloth, or checked gingham. You will need 2 rows of "holes” for each cross stitch or one printed square on the gingham.
In a 4-way or 8-way bargello, each square represents 4 upright stitches, each over 3 threads of needlepoint canvas. (Unless you can get plastic canvas by the yard, it will not be wide enough for this project). This pattern is
not for beginners. If you have never done any bargello, I suggest you use our 'Search My Blog' gadget in the sidebar to look up past articles on bargello and choose a simpler design for your first project. If you have done some bargello patterns, I still suggest having some scrap canvas at hand to work out any trouble spots that you may find
before you have to take out a number of stitches. And
count and measure before you begin! Depending on the size of your canvas mesh, this can be a fairly
large project. I'll show mine in a future post.
Our latest Teachable Moments project, "Teachable Moments: The Moon", is now available on our Extras page (see the tabbed menu above this post.) While it was designed for use by teachers or parents, others may find it useful as a companion piece for our Skyscapes 3 post (July 11, 2019).
 This post by Annake's Garden is licensed under a Creative Commons Attribution-NonCommercial-ShareAlike 3.0 Unported License.
 This post by Annake's Garden is licensed under a Creative Commons Attribution-NonCommercial-ShareAlike 3.0 Unported License.


 This post by Annake's Garden is licensed under a Creative Commons Attribution-NonCommercial-ShareAlike 3.0 Unported License.
No comments :
Post a Comment
Post a New Comment Below -- We Love Feedback !!!