Showing posts with label new "Extras" tab. Show all posts

Saturday, October 31, 2020

Symmetry and Balance

COMING SOON - an expanded version of this article  in our  Extras section!
(This post is meant to point out just a few ways a parent or teacher can utilize the concept of symmetry to illustrate all kinds of learning at different age and ability levels. We hope you find it useful and that it generates ideas of your own for its use. More detailed suggestions will be added in our EXTRAS for different age groups, including an Open Letter to High School Students.)

Reflected landscape, photo by J.J.
In its simplest form, symmetry means having parts that exactly match each other. This can mean the reflection of a scene in clear, calm water, the wings of a butterfly, or a square bandanna folded into two triangles. But it can also mean much more. Just look at some of the words used in definitions of it: similarity, balance, harmony, proportion, rhythm, equality, order, agreement, equilibrium. Can you see opportunities to use the idea in art, music, mathematics, writing, science, human relationships and comparisons of almost anything?

Everybody has two knees
It is possible to start teaching about symmetry to children as soon as they understand the number 2. You can get the idea of 2 hands and 2 feet across and proceed from there. This can be done one-on-one, but is faster and more entertaining for the child if it is done with two or more children. Make it a game like "I Spy". I also use a song with a pattern like "'Old MacDonald Had a Farm". [Ital] Hold your hands up, palms together and have the child do the same. Establish that we have 2 hands. Say (or sing) "Everybody has 2 hands, eieio". Get the child to clap hands and say or sing the phrase with you. Point to your feet and stamp them, followed by "Everybody has 2 feet". Every few days introduce a new body part: ears, elbows knees, lips, etc. Repetition builds remembrance.

Motorcycle vs. bicycle
Working with symmetry leads directly to comparing and contrasting things: objects, living things, words, conditions, events, even ideas. This is one of the most useful skills you can teach. Constantly ask:  "How are these alike? How are they different?" This promotes observation, comparison, and consideration about how the likenesses and differences may matter in the long run. Don't be surprised if a child comes up with a difference that you haven't even considered. Praise them for correct observations, and gently correct misconceptions. Be prepared to answer "Why?" questions. If you don't know the answer, say so and discuss how you and they might find out what the correct answer is. (Introduce children to a library as soon as this is possible.) The more adept children become at sorting out similarities and differences, the better they will be at organizing their thinking and solving problems — in school and out.

Butterfly, photo by J.J.
Symmetry in Nature can be an interesting way to begin learning about Science. Studying pictures of butterflies and moths or making a leaf collection can can give children a hands-on experience with wings or leaves that are or aren't symmetrical.  Observing the growth habits of shrubs and trees can also be useful. For more about trees, see our posts for April 18 and May14, 2020. Emphasize that such characteristics are what scientists use to classify living things and establish how they are related to each other.

Pushme - pullyou?  (Photo by J.J.)

Navajo storyteller statuette
Symmetry is very important in the visual arts. I always tried to discuss symmetry when we were talking about cultures,  Both symmetrical and asymmetrical features are important when looking at the art of Native Americans. For example, in understanding why certain techniques developed in the Arctic and different ones in the desert Southwest, even though the tribes who now live in both places are closely related.  Recent studies have traced the people who are commonly called Navajo have strong genetic and artistic connections to tribes in Canada. Their art has made it possible to trace migrations made centuries ago and to reunite people who share an ancient heritage.

Original pastel sketch in center, "mirror" sketches on sides
As babies, our faces are very symmetrical, but as we grow older, the sides of the face become less alike.  If students have one of their class pictures, have them use a small mirror or aluminum foil to double one half of their faces. *We used to do this when school pictures were delivered.) Repeat this by doubling the other half. Students may already begin to see differences in their "two faces".  Have some photographs of mature and older people that they can experiment with. Exercises like this will make your students more discerning. Ask them to draw "self-portraits", either as they really are today or as they think they will look in the future. To illustrate the process let me show you a sketch of a lady who let me sketch her years ago in Panama. I thought her face was very interesting and made the other two sketches, one with the left half of her face doubled and one with the right half.

Symmetry is vitally important in any study of either history or current events. There is a great deal of truth in the idea expressed by the statement that "History is written by the conquerors." Unfortunately, textbooks tend to give only one side of an event or series of events, when there are always at least two sides involved — and often many of them.  I have been distressed to hear and read that the latest generations of our young people are not familiar with the Great Depression, World War II, the Holocaust, the Korean War or the Cold War (which is sill going on) and, consequently, are not in any position to put these events and their subsequent effects in perspective.

Guitar picker and audience, photo by J.J.
Most of those events have a great deal written about them and even old newsreels from the times which students, particularly, should be made aware of.  I lived through most of them. I encourage students to interview and perhaps record conversations with "senior citizens" while we are still around, as well as consulting the resources mentioned above.  The same thing is true for understanding the contentious issues of the present, many of which have very long roots. Debate is a great activity to practice that kind of symmetry. Not only must a team produce a compelling argument to support their proposition, but they must understand and anticipate the arguments that will be put forth by their opponents.

"Balance" and "rhythm" are terms associated with symmetry. To be successful in any sport, there are positions and movements that must be practiced over and over to train the body to react and respond correctly without having to stop and think about it. This is true whether you are making a free throw, swimming the backstroke, heading a soccer ball, or sticking a landing.  Gymnastics offers a good example in which not only is body position vital in performing different exercises, but it must look good while doing so.  Almost any kind of dancing requires that two or more people must coordinate their movements with great accuracy.

Square dancers (public domain photo)
When was in college, I belonged to a square dance group. In addition to following all the calls, each eight-person "square" was supposed to figure out a special finale for their performance. I was the smallest girl in our square and weighed the least. My partner was the tallest fellow in the group and very strong. For our finale the other three pairs danced backwards to give us plenty of room while we answered the call for "Swing your partner". We started with a standard "swing", but my partner kept turning and lifting me off the dance floor. We turned until my body was horizontal and parallel to the floor, level with his shoulder at the end of his extended arm. A couple more turns put my feet back on the floor and we danced backward to complete our "square".

Haiku by Basho
In a writing class you can introduce older students to the symmetrical "shaped poem" (also called diamante).  This kind of poem does not rhyme; nevertheless, it has very strict rules for its construction. Prepare a number of examples beforehand so that the students can figure out those rules. Be sure students know what participles are and how to break a word into syllables before they undertake the assignment. For the rules and a couple of examples of shaped poems, see our post from September 25, 2020. Another good activity is creating a haiku. There also is more information about haiku in this post.

When teaching or learning a second language, it is imperative that students realize that just because a word is paired with an English word in the vocabulary list, that doesn't mean it necessarily has that meaning in a conversation.  All languages contain many colloquialisms, in which a word may not convey anything like its dictionary meaning.  Pronunciation is also important. When we were stationed in Germany, my soldier husband went to a store selling car parts to buy an exhaust pipe for our old car. He had read the word for exhaust pipe in a parts catalog and asked for one at the counter.  He was angrily thrown out of the store. It seems his pronunciation was a little off and instead of requesting an exhaust pipe, he had requested, shall we say, a "woman of ill repute".

Now I'm going to turn this discussion over to J.D. to tell you about some other areas of his expertise...

J.D.: In music, it is very easy to find examples of symmetry, from the simplest exact repetition of phrases in "Frere Jaques" to the call-and-response of early Christian religious music to the inverted melodies used as base lines in things like Pachelbel's "Canon". It is easy to see these symmetries in the pitches of musical notes (melodies and harmonies) in written music notation, but nearly all elements of music — rhythm, volume (loudness), timbre, and many more — can demonstrate various symmetries. But one thing can never be symmetrical: because music, like dance or films, always changes from one moment to the next it must have a beginning and and end. Even if you make a piece of music where the second half is an exact mirror of the first, there is a point in time when no-sound becomes music and a point where music becomes silence.
 
 
Of course, particle and quantum physics tells us that it doesn't have to be that way, that the 'arrow of time' can go the other direction, but they have yet to find a way to demonstrate this in any practical way. And that is why the 'time travel' in our previous post was just an intellectual exercise.

Particle physics interactions
Physics, especially the exotic realms of particle and quantum physics, and those disciplines that try to reconcile Einstein's General and Special Theories of Relativity with them, thrive on symmetries. Particles have antiparticles with opposite charges; quarks (a staple of quantum physics) have properties like color and charm — which are not at all what they sound like they should be — which can be mirrored; and ... that is why Annake asks me to write about subjects like these which make her eyes glaze over when she hears me going on about them.

Physicists depend heavily on some pretty esoteric mathematics for their work, but even the simplest math — things we use every day — are based on symmetry. Not really a surprise: math is basically measuring things, and the word "symmetry" is derived from ancient Greek for "same measure"! And the first thing any one learns in mathematics (beyond simple counting) is the equation:

1 + 2 = 3 ;  "The sum of the squares of the sides equals the square of the hypotenuse"; x + y =  7

And even though the expressions on either side of "equals" don't look the same, they must be for the equation to be true.

The term "symmetry" takes on additional meanings in mathematics and the sciences as students get into more technical work. Be sure that they are aware of these. This occurs even in literature and the arts.   But once your students are accustomed to looking for symmetries, they can use this principle to increase their understanding of art. mathematics, science, music, current events — even culture.  But they need to have developed a skill for determining a sensitivity to how things are the same and how they are different. You can help them do that.

Good luck. Stay safe and well.


 Creative Commons LicenseThis post by Annake's Garden is licensed under a Creative Commons Attribution-NonCommercial-ShareAlike 3.0 Unported License.

Saturday, September 5, 2020

Using Annake's Garden's "Extras"

J. D. and I originally started our "Extras" section (see tab in the menu above) to encourage older people to learn how to keep doing art and crafts even though their eyes and hands, like mine, have lost some clarity and dexterity, and also to encourage newcomers to try new techniques. Then came the pandemic. We found ourselves adding suggestions for dealing with small children, guiding the "’tweens" to learn things at their own pace and look for more, and devising self-teaching units for teens who like to learn on their own or with a group they choose as co-learners. Some of you have already taken advantage of what we have posted and we intend to keep adding to the "Extras" and organizing them to make them readily available.

We realize that there are many of you who will find yourself staying home and supervising children of all ages over the coming weeks and months. This will be new territory for many of you, especially dads, grandpas, and older brothers who may be taking courses of their own. Using our most recent previous post, we are using this current post to demonstrate teaching a topic at many levels, starting with small children. Please bear with us and follow through the age-level examples. You cannot teach a three-year-old the way you coached that after-school soccer team.

If you read our Extras, you probably have noticed that I often suggest teaching children of various ages with simple themes and equipment.  We just did a post about butterflies and moths. That set me to thinking about various things that could be taught to children at various levels of development, starting with teaching very young children with the aid of paper butterflies. The butterflies use simple materials and are easy to make. I have included some outline patterns at the end of this section to get you started. You can begin with very young children and progress to teach more complex ideas as the children grow older. At the end of this discussion I will make some suggestions for older children and also suggest how teens can turn the subject into a self-teaching unit for science, creative writing, etc.


TEACHING WITH PAPER BUTTERFLIES

Prepare yourself:

Make a note of the facts you know about butterflies and do a search for additional information. Children will ask questions — lots and lots of questions. Treat them seriously because they are serious to the children. If you don't know the answer, tell them so and promise to find out. Keep your promise. Breaking promises to children is destructive to your relationship with them. Don't worry that they will think you don't know everything about everything. They will come to that conclusion on their own. And a few years from now, they will conclude that you don't know anything about anything that they are passionate about.

Prepare your materials:

You will need:
    a pencil
    paper (Colored construction paper, gift wrap, colorful magazine  pictures)
    scissors (sharp-pointed for you, put away afterward; blunt-pointed for them)
    tape, paste, or glue
    popsicle or ice cream bar sticks
    patterns for several butterflies
Nice to have:
    a pipe cleaner for each butterfly (cut them in half if you like)
    glitter (Yes, gentlemen, you need to master glitter as well)
    a hole-punch to make holes in the wings or make "dots" to glue on
    clear plastic if you want clear or partially-clear wings

Don't worry. You will need this stuff again and again. Have a place to store it and make participating in clean-up a part of each lesson.

 What to do
:

Click here to download
Cut out two butterfly shapes the same size. For older children, make sure the two shapes are from different papers so that you can demonstrate how the wings look different when the butterflies are flying and when they are at rest.

To make antennae, use two small pieces of paper or bend a pipe cleaner in half. curl the ends of the pipe cleaner so there are no sharp ends.

Decorate the butterfly wings.

If you want wings that are partially clear, cut "windows" in the same place on both sets of wings. Glue clear plastic on the backs of the butterflies.
Cut off any plastic that shows past the edges of the butterflies.

Glue the butterfly bodies to the popsicle stick. You may want to do this one at a time and let them dry completely before you attach the other side. If you are using antennae, glue them to the back of the top butterfly before you attach it to the popsicle stick.

When a butterfly is dry, wave the stick through the air to make sure everything is firmly attached.

Teaching with your butterflies:

Start with simple ideas. Butterflies are very small animals. We should not touch them because we could hurt them. If one comes and sits on us, we should be very quiet and not move until the butterfly flies away. Butterflies fly by flapping their wings.  (Put your hands up, thumbs together and demonstrate flapping. Have the children try to copy you.) When the butterfly needs to rest or sleep, it sits on a plant and holds its wings together. (Hands up, palms together, children copy.) With your paper butterflies, show that the butterflies fronts and backs are different. Let each child choose a butterfly and name it. Let the children "fly" their butterflies around the room for a few minutes, then bring them to be put away. Go through the routine of flapping the next session. Ask the children questions to see if they remember what they learned before. Then teach a couple of new concepts.  It is nice to have a story as follow-up.

If your local library is currently open, find out what children's picture books and storybooks about butterflies and caterpillars are available or can be ordered for you. If you have more than two children, who can sit on either side of you while you read, have them sit in a semicircle in front of you. Show them the cover of the book and then tell them the title. After you read each page, turn it so that all the children can see it and give them time to look. Children will have favorites and want to hear them over and over. Don't show how bored you may be, and don't ‘cheat’ by leaving out parts. They will know! And if you do it again, you will lose a little bit of their trust.

There are literally thousands of pictures of butterflies and short videos about them on line. If it is winter or you are in an area where the children are not likely to see butterflies, these are a good alternative.

You can teach any simple idea with some version of this technique. Don't try to teach too many new things in one day and remember that repetition is the way small children learn. Praise progress; correct gently. Correct quietly, but firmly if the child is doing something dangerous or destructive. You are now officially on your own.  Good luck. There is always the next time to do better.
  
The "’Tweens" —  Grades 4 Through 8

Starting at about 4th grade, children will, if encouraged, begin to find out things on their own. Competition plays a part in this. Timed quizzes and JEOPARDY-type games become popular, especially if grades are not involved. Continuing with our butterfly theme, here are some suggestions for further study, both in and out of class. The work can be individual or group-oriented. The complexity of the questions and the language for the suggested topics can be adjusted to the age level.

1. Butterflies are insects. In the next 5 minutes, write down a list of as many insects as you can think of. (Students make their lists. Teacher writes them on a poster or chalkboard.) Were there any that weren't insects? Cross them off. Ask the students to choose 3 insects from the list and find out 3 unusual or startling facts about them by (give a time limit.) Some students will go much further than the assignment. Share all information.

2. Over millions of years, many flowering plants have formed a partnership with butterflies and other animals. A butterfly visits a flower. It unrolls its long proboscis, a tube-like mouth-part, to drink a sweet, sugary fluid called nectar from the flower. This does not hurt the flower. The flower made the nectar for just this purpose. Often there are lines or spots on the flower to show the butterfly how to find the nectar. While the butterfly moves around, it picks up pollen which sticks to its body. When it flies to another flower, some of the pollen rubs off. This helps the flower.

Research to find the answers to these questions:
    What is pollen and why does the flower need it moved to another flower?
    What kind of light can the butterfly see that we cannot?
    How do flowers make sure that the butterfly picks up some pollen?
    What other animals pollinate flowers? Name one that is not an insect.
    What is cross-pollination and why is it important?

3. Butterflies and moths go through 4 different stages in their lives. They are egg, caterpillar (also called larva), pupa and adult. The process is called metamorphosis, which means "changing shape process". A 4-stage process of change is called complete metamorphosis. Fewer than 4 stages are sometimes called incomplete metamorphosis. For example, a frog goes through 3 stages: egg, tadpole, frog. The caterpillar hatches out of the egg, eats as much as it can, grows so much that it has to shed its skin several times (a process called molting). Then it hangs its body, usually by the tail, on a twig or branch and appears to go to sleep. Its body hardens as a stiff covering forms over it. A moth usually spins a tough silk covering, called a cocoon, for itself and often does this underground. But in either case the body changes completely, so that, when it comes out of the little shell or cocoon it leaves behind, it is a butterfly or a moth. Read about butterfly or moth metamorphosis and draw a picture of the 4 stages.

4. You may want to know why animals and plants have those strange looking scientific names. Think of it this way: the common name "butterfly" is not the same in many other languages — 300 of them to be exact!  Here are just a few of those names for butterfly and their countries: sommerfugl (Denmark), papillion (France), psyche (Greece), chouchou (Japan), farfalla (Italy), lubalaba (West Africa), mariposa (Spain), parpar (Israel). Imagine trying to translate the name of the Tiger Swallowtail butterfly into 300 different languages!  When an animal or plant has one scientific name, scientists from every one of those countries will recognize it and be able to write or talk to scientists in other countries about it. Just for fun, why don't you write a new name for "butterfly" and share it with the class?

5. Teach students the form for writing a haiku. Have them cut a butterfly shape from paper and write or print their haiku on it. Then have them incorporate their butterfly into a poster, paper sculpture, mobile or other art form.  Make a display of all the projects.

6. More ideas:

    Silk thread is made by silkworm moth caterpillars. This is a huge industry. Some older students may want to research it. CAUTION: They may not like what they find.

    The Painted Lady butterfly is found on all the continents except South America and Antarctica. Some students may like the Painted Lady Migration Project. Potential for map studies and figuring large distances.

     Moths have been around for about 200 million years. What do fossils tell us about the Earth at that time? Butterflies appeared about 50 million years ago. What might have been happening to make them become active in daylight?

     Many butterflies and moths are endangered by climate change, deforestation, loss of habitat and loss of food plants. Some may have already become extinct. What can we do to help protect them?

How Teens Can Do a Self-Teaching Unit That They Won't get In School

Teens:  self-teaching units are completely directed by you. There is nothing to be turned in and there are no grades. The units provide information on a subject and suggest activities, but you are in control of which ones you find interesting and challenging. You work at your own speed and select what is most interesting to you. You may work alone or contact friends or fellow students who might like to join you in the study, in person or online. The results of your research can be converted into essays, term papers, speeches, 3-dimensional constructions or other projects if those interest you and further your traditional education.

Currently there are two complete units in our Extras — a botany unit on the history of trees, and one on being an archaeologist. I'm going to "walk you through" a zoology unit suggested by our previous post. There is also a series of our posts on Color, combining several sciences and visual art. Below are the first four in the series, which you can find in our Archives. The fifth installment, which concerns the appearance and development of eyes over millions of years and the impact of color on living organisms today, is slated for late September.

August 14, 2019: Spectral Light And Structural Light; All About Color, Part I
September 24, 2019: Pigments And Palettes; All About Color, Part II
February 10, 2020: The Non-Colors And Metallics; All About Color, Part III
June 28, 2020: The "Escenses" of Color; All about Color, Part VI

In order to make our previous post the basis of a self-teaching unit, first read the directions for the 'Tweens above, and write down investigations that you could carry much further, making note of any scientific terms for follow-up. Then go to the bottom of this page and select "Older Posts". The first one will be our article: "Butterflies, Moths, and Words: Entomology & Etymology". Read it and consider how you would proceed if you chose to study that subject. We will continue to add more units on sciences and the arts as time permits, so check back occasionally. J.D. and I wish you the very best of luck in your studies.


 Creative Commons LicenseThis post by Annake's Garden is licensed under a Creative Commons Attribution-NonCommercial-ShareAlike 3.0 Unported License.

Thursday, May 14, 2020

Trees in Art and Design

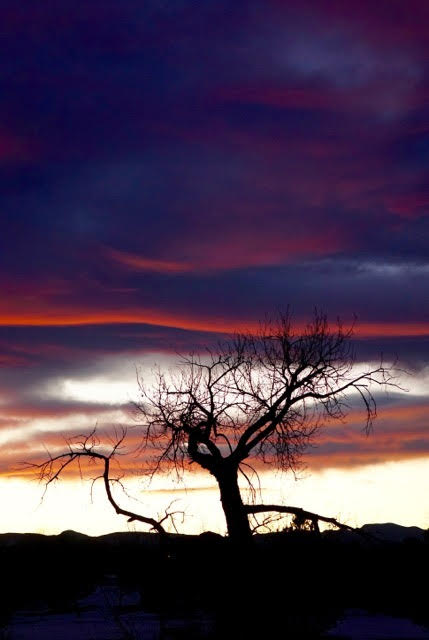
Bare trees against stormy sky
"Incoming Storm," photo by J.J.
Many trees change form drastically as they mature and age, sculpted by wind and weather.  A dwarfed, twisted tree at timberline can give real drama to a mountain scene. Some trees define the seasons. Last autumn we were in the high country, photographing the glorious colors of aspens and scrub oaks against the darker evergreens.

I like to study deciduous trees in the winter when their basic skeletal structure is most evident. Then I revisit the trees in the other seasons, sketching or photographing them to understand how that skeleton supports the masses of their leaves. Fruit trees are especially interesting because they have a flowering stage — often before any leaves have formed — and provide attractive backgrounds when the fruit is ripe. If I understand the way a tree is growing, I can anticipate where the masses of foliage are going to be once they develop.

Fruit tree in bloom
Ornamental fruit tree in bloom
Trees are, of course, vital to many landscape compositions in graphic arts and needle arts, but they can compliment many other types of composition. For example, they can contribute in many ways to photography: to enhance an outdoor wedding or family picnic, as backgrounds for pictures of animals that use them for food and shelter, to soften the lines of street scenes or individual buildings, etc. One way to change a potential landscape or a picture with houses, for example, is to move the surrounding trees into different positions.


Click here to Download
Here is a quick watercolor study of a palm tree that I made many years ago in Panama. Imagine that you can "borrow" my palm tree. What do you see beneath it? An abandoned beach ball? A picnic lunch? A sunbather stretched out on a blanket? An animal digging in the sand for turtle eggs? See how a single tree can stimulate your imagination? Download the tree. Make a sketch of what you would include or look for a photograph that you could adapt.

Here are some things to consider when looking at trees. Study the patterns created by the direction of the light. If the sun shines directly on the tree from the front, which parts of the tree are darkest and lightest? What sorts of patterns are created around the tree? Where do the shadows fall? How do these things change when the trees are lit by light coming from behind them? (Sometimes it helps to half-close your eyes to really distinguish the masses of dark and light.)  If you are sketching the tree, put in the masses of middle value first. Then concentrate on the lighter and darker masses. Trees do not grow out of the ground like fence posts. Include the roots and the spread of the tree toward the roots in your study (sketch) of the tree. If you are doing a picture that includes a group of trees, remember that distance tends to add gray to more distant objects and try to make the farthest trees less distinct than those in the foreground.

Landscaping tree book
I have, as a prized possession, a book written in 1983 specifically for landscape architects and nurserymen. It shows detailed drawings of trees and shrubs commonly used for those purposes. The pictures are all drawn to the same scale, so that you can make combined groupings and be sure that they would look natural together (in a park or garden, for example). It is also possible to enlarge a tree — or even part of a tree — to show how it would look beside or behind a building. You can also enlarge foreground trees and reduce background ones to show realistic perspective. Remember that distance not only makes trees look smaller. It also makes them look paler.

Transparency of an  evergreen
One of Annake's transparencies
Finally, the trees can be copied on clear overlays,  and be superimposed one on another. Although my book is probably long out of print, comparable photographs or drawings can be found in library books or online. Look for such topics as Forestry, Trees of <insert your country, region, continent, or the World>, Landscaping, or Ornamental Trees.

Here is a simple way to determine whether a tree might enhance your picture. When you have your photograph or sketch well organized, place a clear plastic overlay of the tree shape you are considering on top of it. This doesn’t have to be a detailed picture of the tree, just its general shape and growth pattern. You would be surprised, for example, how many shapes different kinds of evergreens can take. I have built up a collection of such overlays that I keep in a file folder. Because they are transparent, I can move them into any position I want on top of my sketch, reverse them, show only a portion of the tree, etc. Move a tree that blocks the view of a building to behind the building. You will still have its shape as a point of interest in the composition, but it will no longer overshadow the building or hide interesting architectural features. Even a single branch can have a big impact as you can see in this  needlepoint picture.

Cascades needlepoint by Annake
"Cascades," needlepoint by Annake

sketch of bare trunk and llmbs
Trunk and limbs
Let's go step-by-step through a tree sketch. I am going to use a simple #2 pencil because it is the one you are most likely to have available. I recommend you do this exercise in late spring or summer, when trees are usually in their best condition. It is neither necessary nor desirable to draw, paint, or embroider the majority of tree branches.  Get the larger ones and enough of smaller ones to show the directions in which the tree is growing. I like to think of the limbs as gesturing in these directions.  After all, when you portray a tree you are making an image of a living, growing creature, constantly adapting to its environment. Its growth is dictated by the amount of sunlight it gets and the directions and angles of that light. It responds to the winds and the amount and kind of moisture it gets — rain, fog, snow, etc.  Its form may be changed at various stages of its life by the presence of obstacles like large rocks, fences, buildings and other trees.  Try to see these influences in the living tree and indicate them in your sketch. And don't forget to show some roots in your sketch to connect the tree with the ground. When I am satisfied with my sketch, I move on to the next step.

sketch of trunk and llmbs with foliage blocked in
Foliage blocked in
Just as it is not necessary to show all the tree limbs, it is not necessary to show all the foliage. If you look at a single tree, you will see the foliage is arranged in large clusters with parts of the trunk and limbs showing through between them. Look at the clusters. Which ones seem to be pointing — or gesturing — toward you? Which ones are pointing away from you, out to the sides, or up at the sky?  Treat them like separate pieces in a jig-saw puzzle. Sketch the general shapes of the most important ones. You don't need all of the clusters to make the tree look real. Make some little irregularities in the outlines of the shapes for realism. Indicate the larger limbs and parts of the trunk that show between the masses of leaves and where they may be seen in "holes" in the foliage. Carefully erase any of the trunk or limbs that you don't want to have showing in the finished design. (Pencil erasers tend to smudge, so it is a good idea to have a piece of sandpaper to remove the surface of the eraser as it starts to darken. A kneadable eraser is a good thing to have.)

tree sketch in greyscale
Values
Now it is time to consider the values of the masses of foliage. Value refers to the relative lightness or darkness of objects or areas. (We are not going to consider color at this stage.)  Which cluster is the lightest and brightest in the tree? Leave it nearly as white as your drawing paper. Check to see if there are any areas that are almost as bright.  Fill them in as lightly as possible with your pencil. Now find the darkest cluster. Consider it carefully. Is it darker than the tree trunk and limbs? About the same? Lighter? Fill it in very solidly, pressing hard with the tip and side of your pencil point. Go over it as many times as you need to give it the value you want.  Continue working alternately with the next lightest and next darkest clusters until all of them have a value. Check the whole composition against the real tree for accuracy. Do you need to further darken any limbs or parts of the tree's trunk?

If you have easy access to the tree, this may be a good place to stop sketching and leave color decisions to another day. Put your sketch away and don't overwork it. If you can get a couple of photographs of the tree, that is an excellent idea. It might rain tomorrow.

Summer colors or autumn?


Evergreens photo by J.D.
Evergreens
So far we have only discussed broad-leaved trees. Evergreens present different problems and possibilities.  Because so many conifers have a generalized triangular shape, many people never try to learn the differences between the species and assign them cookie-cutter appearances. We have a number of different species close by. I love to look at them just before sunrise.  They do start out as very simple silhouettes, but, as the light begins to filter through them, you see that they grow in very different ways. Some of them reach for the sky with tiers of V-shaped branches. Others are less dense and produce their branches at much wider angles with their trunks. Still others have branches that curve or angle downward, sometimes touching the ground.  And there are ground-hugging evergreens which don't take a tree form at all.  They are all worth study and are particularly beautiful in winter.

Pine cones, photo by J.J.
Trees that lose their leaves in autumn are known as broad-leafed trees. Evergreens have needles or scales instead of leaves. They lose these gradually all year long. You can usually find a pile of them underneath the tree.  A number of evergreen trees bear cones and are classified as conifers. A photograph or sketch simply featuring cones and needles can be very decorative.  If you are not familiar with the evergreen trees in your locality,  consult a tree guide book or have a talk with someone from a local nursery.

I often use trees to design needlework projects. Some of them are highly stylized like the evergreens and aspens in the two end photos, while others are more naturalistic like the design in the center.

Needleworks with trees

Simple tree silhouettes, particularly of evergreens, make nice border designs for illustrations, needlework borders or all-over patterns, photo mats, etc.

Chart for cross-stitched border
Chart for cross-stitched border of evergreen silhouettes

It is often useful to study how artists have represented trees in their works. For a long time trees were simply backdrops and not done with particular attention to detail. It wasn't until about the middle of the 19th Century that, particularly in France, they became viewed as subjects worthy of painting for their own sake. Jean Baptiste Camille Corot led the field in this respect. He strongly influenced the Impressionist painters. They, in turn, influenced whole schools of contemporary and Post-Impressionist artists. Pointillist painter Paul Signac also did beautiful trees. Look at paintings by your favorite painters to see how they handled the subject of trees.

If you missed our recent Arbor Day post, follow this link. For more information about trees, check our Extras section for "Teachable Moments" activities and a Self-Teaching Unit for teens.  And, if you can, plant a tree!

Now, as our favorite tree-house builder loves to say: "To the trees!"


 Creative Commons LicenseThis post by Annake's Garden is licensed under a Creative Commons Attribution-NonCommercial-ShareAlike 3.0 Unported License.

Saturday, April 18, 2020

Arbor Day 2020

*** NEW MATERIALS ON OUR EXTRAS PAGE  ***
See more info at end of this post.

Aspens  (photo by J.D.)
Aspens  (photo by J.D.)
National Arbor Day is celebrated on the last Friday in April in the United States, where the idea was first proposed by Julius Sterling Morton in the 1870's. Morton was a Nebraska newspaper editor, a very successful farmer, and a statesman. He was very respected as an agriculturist. Morton loved trees, but Nebraska was not really rich in native trees, so he planted many trees on his estate. He came up with the idea for an Arbor Celebration and got the backing of other influential people. The first Arbor Day was celebrated in Nebraska on April 10, 1872. Morton's followers planted an estimated one million trees in Nebraska.

"Other holidays repose upon the past; Arbor Day proposes for the future."
J. Sterling Morton

The day became a Nebraska state holiday in 1885, the date changed to April 22 to honor Morton’s birthday. By the 1920's, each state had also passed a law establishing a state Arbor Day. These are celebrated on different days in each state. Trees are planted for these celebrations, so the dates depend on the climate in each state. In 1970, President Richard Nixon proclaimed a national Arbor Day on the last Friday of April each year. This year National Arbor Day falls on April 24th. Morton's former estate and lodge are now Arbor Lodge State Historical Park. Nebraska's state tree is the Cottonwood.

Blue spruce (public domain photo)
Blue spruce


All of the states in the United States have a State Tree (some have more than one).  In addition to State Trees, the U.S. National Tree is the mighty Oak and the District of Columbia claims the Scarlet Oak. Our Colorado's State Tree is the Colorado Blue Spruce.


What Is Deforestation?


Landscape photo by J.J.
Deforestation is the cutting down of forests to make way for farmland, pastureland, building cities, logging for lumber, and mining. It also happens when fires in the forest get out of control, or when there is an infestation of insects or diseases from some other part of the world for which the forest has no immunity.

Here are some disturbing facts about deforestation:
  • Forests currently cover about 30% of the land, but scientists fear that 100 years from now there will be none left!
  • One and a half acres of forest worldwide is cut down every second!
  • That means 90 acres are cut down every minute. That's 20 football fields! Multiply that 90 acres by 60 and you get 5,400 acres per hour. Multiply that number by 24 to see how much forest is lost every day
    Weathered stump, photo by J.J.
  • Deforestation contributes heavily to excess carbon dioxide in the atmosphere. That is because trees absorb carbon dioxide to make their food and to grow. In return, they produce oxygen and release it into the air. Carbon dioxide is a dangerous "greenhouse gas" and adding it to the atmosphere raises temperatures worldwide. The concentration of carbon dioxide in the air today is higher than it has been in 3 million years.
    Weathered tree roots, photo by Anname
  • Trees help to clear the air of pollution. People in large cities were wearing masks outdoors to protect themselves from pollution for years before the coronavirus epidemics began.
  • Deforestation also contributes to soil erosion because tree roots keep soil from eroding. Loss of trees has made floods more devastating because so much topsoil is washed away. That also means that substances like fertilizer are washed into coastal waters, poisoning ocean plants and animals.
    Endangered lowland gorilla, photo by J.J.
    Endangered lowland gorilla, photo by J.J.
  • The majority of Earth's endangered animals live wholly or partially in forests.
  • The tropical rain forests were once called "the lungs of the Earth" because of all the carbon dioxide they kept out of the atmosphere and all of the oxygen they produced. But rain forests are disappearing faster than other forests.
  • Many life-saving medicines, including cancer-fighting drugs, have come from species found in rain forests. Many more remain to be found — if they don't disappear before they are discovered. As many as 28,000 species will disappear at current rates worldwide by the year 2045.
    And a Corby in a Pine Tree, photo by J.J.
    "And a Corby in a Pine Tree",  by J.J.
  • Bird species here in North America are declining in alarming numbers. That means both numbers of birds and numbers of bird species.  Climate change is driving species to find cooler climates in order to survive. That may mean moving further north on the globe or moving to ever higher, cooler elevations. In either case, they may find these new habitats don't have good supplies of their natural foods. They may not find sufficient nesting materials to build nests that protect their eggs and baby birds. They may run into new predators. The fact that they have left their natural habitats may well mean that those habitats will suffer from increases in the populations of harmful insects and their larvae. We need to preserve existing trees and replant ones that have been lost.


What are some things that trees do for us besides affect air quality and climate change?


Maple syrup, public domain photo
Do you like to put maple syrup on your pancakes and waffles? Maple syrup is made from the sap of sugar maple trees in the Spring during a time when the trees have come out of their winter dormancy and started producing fresh sap to carry nutrients throughout the tree. Read the labels carefully; there are a lot of "maple-flavored' syrups out there which cannot compare with the real thing!

Tree fruits, photo by J.D.
Many of the fruits that we eat grow on trees. That is something you can teach small children when you serve any of these fresh, canned, or frozen: apple, apricot, avocado, cherry, date, fig, kumquat, lemon, lime, mango, olive, orange, papaya, peach, pear, plum, quince, tangelo, tangerine. Many other fruits are available and popular in other parts of the world.

Tree nuts, photo by J.D.
The same thing is true of nuts, which are the seeds of many trees. These include: almonds, Brazil nuts, cashews, chestnuts, coconuts, hickory nuts, macadamia nuts, pecans, pinon and other pine nuts, and walnuts (both black and English).  But the list does not contain peanuts, which are not nuts and don't grow on trees. Coconuts and almonds produce a good substitute for milk that lasts much longer in the refrigerator than cow's milk.

As I mentioned before, many medicines have been derived from trees and tree products, particularly those from the rain forests.

Interior design with wood features, public domain photo
A major use of cut trees is for lumber and plywood.  Woods with particularly nice colors and/or patterns are used for furniture and decorative moldings. Most of the latter are hardwoods, rather than the softer evergreens. If you have some of these, take good care of them. They will become increasingly rare and far more expensive.


What can we do about some of these problems?


Forest's Edge, photo by J.J.
The obvious answers are 1) cause fewer trees to be cut down and 2) plant new trees. Let's look at both of those activities. A huge amount of wood is used to make paper. That is something we can do something about. Going paperless as much as possible can help. Recycling paper will definitely help.

Cloth shopping bags, photo by J.D.
Cloth shopping bags
Using cloth shopping bags and not choosing to buy items with a lot of unnecessary packaging are large steps in the right direction.

Try to set up a book and magazine exchange with friends and don't duplicate subscriptions. Let the children draw and color on the backs of paper that is printed on one side only.  Ask companies that send unwanted catalogs to you to remove your name from their mailing lists. Encourage your children to make art and craft projects with paper and cardboard.  Reuse cardboard boxes for mailing or compact storage. Crumpled or shredded paper is better packing material from an environmental standpoint than "packing peanuts" or plastic airbags.  Use greeting cards and pretty wrapping paper again for decoupage and collage projects.

Planting a tree. public domain photo (USDA)
Planting a tree
Now, about planting trees.  The best trees to plant are those which are native to your area or which have been bred to do well in your soil, water, and climate conditions.  Check out your state tree, for example. Our state tree is the Colorado blue spruce and it is available here — baby ones are even free from the Arbor Day Foundation.  But you might want something that is more multi-purpose. Consider fruit trees. They don't take up as much space as shade trees, they grow fast, they provide you with valuable food, and the leftovers will make birds and squirrels happy.  In either case, read planting and care directions carefully and follow them.  You can also volunteer to plant trees in state and national parks or in areas where trees have been destroyed by wildfires or flash floods.  Check with the authorities about opportunities and regulations.

Here are some other things you can do:
  1. Learn about prospective legislation that involves forests, parks and other public lands. Make your opinions clear and vote on the side of conservation and reclamation.
  2. Vote for candidates for office who share your views. Talk to someone on your town or city council or attend some of their meetings. Ask questions about the possibilities for conservation and reclamation locally and make suggestions for improvements where possible.
  3. Learn more about trees — they can be fascinating.
  4. Teach your children to love and respect trees.
  5. Don't carve your initials or words into tree bark. It can damage the growing layers underneath and let in harmful insects or diseases that will eventually kill the tree.
  6. Watch an episode of Pete Nelson's Treehouse Masters on the Animal Channel™. Pete's a man who doesn't hesitate to hug a tree! See how carefully the crew cuts floors and decks so the trees can move naturally in the winds common to their environment. Those trees are meant to live for many decades.
  7. If you cannot plant a tree,  give a donation to a group replanting areas ravaged by fires, floods, tornadoes or avalanches. Bring back the trees.

For more about trees, check our Extras page for:
Teachable Moments: Trees for Children
Teachable Moments: Trees for "Tweens" (Ages 9 to 12)


*** Our  "Extras"  page (the last tab on the top menu) has PDF files of extra materials related to the subjects in our blog posts, mostly aimed towards young people, their parents and teachers. Due to the current pandemic resrictions, we intend to expand this section greatly over the next two months. Check back every week for new files.
J.D., Annake's Garden Gnome

 Creative Commons LicenseThis post by Annake's Garden is licensed under a Creative Commons Attribution-NonCommercial-ShareAlike 3.0 Unported License.

Contact Us

Name

Email *

Message *

Blog Archive