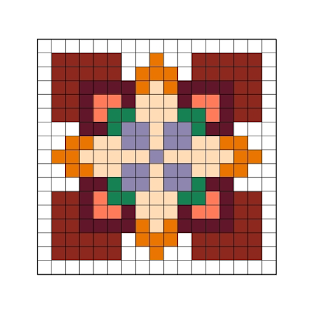
Are you going to give us a copy of that pretty geometric pattern you showed us at the bottom of your anniversary post or was that just a tease?
That wasn't a tease! It was a promise of something to come! It may take me a while, but I always try to keep my promises. Yes, there is a downloadable copy of the square. Here it is. It is a versatile little pattern, not only for the canvas work shown here, but for latch-hook, counted cross-stitch, quilt piecing, tiling and more. Feel free to substitute any colors that you wish.
Now I am going to show you a couple of ways the pattern appears in use and make a few suggestions for ways to use it. First of all is this Nordic stitch piece. That stitch consists of four identical upright stitches, each over three strands of mesh or three bars of plastic canvas for each square on the graph. The blocks of stitches are just about as square as you can get on this scale of canvas. The design can be adapted to monks' cloth or Aida, but you will have to do a little experimenting to get the right sizes of yarn or floss that will cover the background completely. This sample is done on #7 plastic canvas.
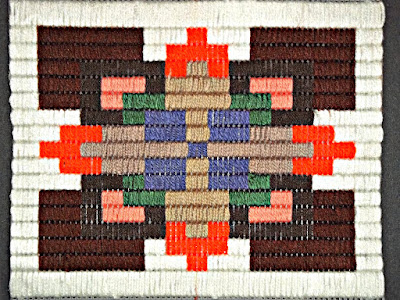 |
| Geometric pattern done in Nordic stitch |
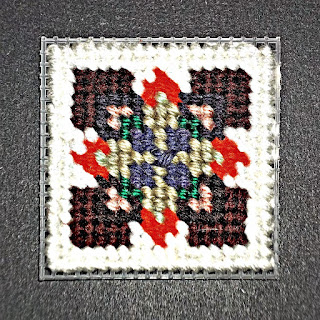 |
| The same pattern done in continental stitch |
In contrast, here is the same pattern in tent stitch on the same size canvas. this time each square on the pattern represents one stitch, preferably a continental stitch. (Using different kinds of yarn for the samples, I was not always able to duplicate the colors of the pattern.) The only change I made was to do a cross stitch on the center square.
Now suppose that you have done this much of the pattern on the center of a larger block of material. Where are you going to go from here? If you want to use the pattern for a larger object, consider one of these alternatives:
- Start by working the block in the exact center of the canvas or fabric you plan to use. Once it is worked, use a solid color to work the background or use concentric squares of more than one color.
- Make an all-over design of the pattern squares in one of these ways:
- Repeat the square, exactly as shown, above, below, and to each side of the original square and continue to make whole or partial squares until the background is filled.
- Work as above, but omit the outer row of white stitches. This will make a similar, but "tighter" design.
- Omit both white rows so that brown connects with brown, white connects with white, and orange connects with orange. This will change the design quite a bit, so you might want to practice it on one side of the square with the intention of removing it if the change does not please you.
The more I looked at the pattern, the more I wanted it to be a true 4-way design. So I am going back to the graph paper to make that pattern happen. It will be available in a future post. That's not a tease; that's a promise!
Are you going to share the pattern for the black fish with the rainbow colored spots when you get done with it?
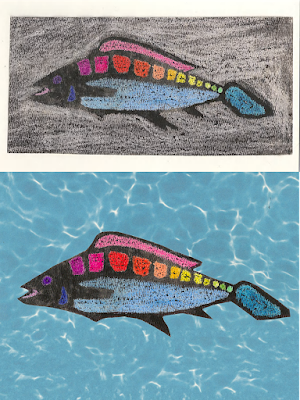 |
| Fish design, original crayon resist & on new background |
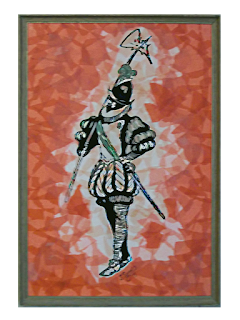
Of course. That little fish has an interesting history. It started as a demonstration of crayon resist art for 4th and 5th grade students. I recently found it in a file drawer with a lot of other samples. I didn't care for the background, so I cut out the fish and put it into a folder with other "fishy" ideas. Later, while organizing materials for collages, I found some "watery" paper that went well with the fish. I glued the fish to the background and taped it to a wall in my studio for further consideration. As I studied it, I could see the possibilities for a needlepoint picture and another in my series of reverse appliques.
I'm not going to make you wait for the pattern. Here it is to download. I have made some modifications, including the change in the pectoral (chest) fin, which I think improve the pattern; I also enlarged it to make it easier to cut out, which is why the orientation is unusual. You may think of ways to use it that I haven't even considered. You also may finish yours before I do mine! The pattern is to the left. If you would like to share yours with us and have them shown on a future post, J.D. will tell you how to do that. J.D?
If you would like to submit a picture for inclusion in a future post, please do NOT use the Comments section or our Contact form — they have no way to accept attachments. Instead, send an email (with attachment) to: annakes_garden@yahoo.com or to annakesgnome@gmail.com. -J.D.
Around Christmas you had some ideas for art projects that visiting grandchildren could do when they couldn't go outside or didn't have events to go to. Do you have some summer ideas for when school is out?
I certainly do! In my next post, there will be a long tutorial about collage and related art activities that are simple and interesting for both children and teenagers. These activities are also good for leaders of summer programs, Scouts, senior citizens, even people working to regain dexterity after an injury or stroke. And they are fun for anyone who likes art or crafts. Here are some things you can do now to prepare for them. This advice is especially for those of you working with children and teenagers, but it has wider applications.
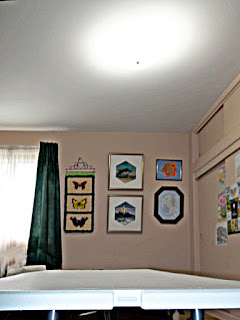 |
| Start with a well-lighted workspace |
1) Plan the place for the activity. You may want to put away some things to make room for it. Art can be messy. An old plastic shower curtain or tablecloth will save spills on tables. They are good for floors, too, but strategically-placed pads of newspapers work, too. Check to see how much light is available at various times of day and if an additional light source will be needed. Plan in advance for a place where the young artists can display their work (That is important!) Some of these activities can be done outdoors, but wind, heat, glare, insects, noise and other factors can make the activity more difficult (and give the complainers more to complain about). If the area must be cleared for other purposes, a clock or timer is good to have handy so that you can plan plenty of time for finishing, clearing, and clean-up (a group responsibility — make that plain). Have a safe place to store their unfinished projects.
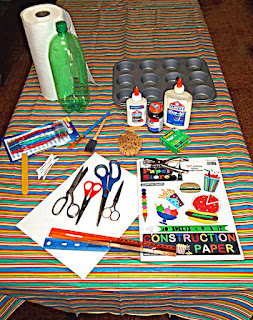 |
| Gather tools, materials, & containers... |
2) Start now collecting the things you will need that can be found around the house or acquired from family and friends. (Don't panic; you will probably not need a large amount of any of these for any one project, nor will you need everything on these lists for a whole summer of projects.) Start with all kinds of disposable containers like food trays, muffin tins, paper coffee filters, egg cartons, a large plastic soft drink bottle with a tight fitting lid to hold water, and similar items. A number of things can serve as brushes. (Glue sticks are probably better for younger children, but they will limit what can be attached.) The smallest of the soft foam paintbrushes sold at hardware stores, toothbrushes, popsicle or craft sticks all work. If you are using paintbrushes, get the wide, flat ones, not the round ones. Cotton swabs (Q-tips) are nice for adding fine details.
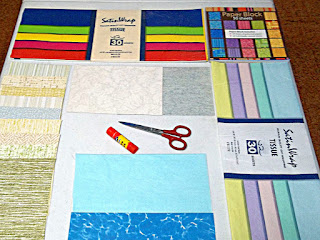 |
| ... a collection of papers for collage... |
3) Collect pictorial materials like greeting cards, calendars, catalogs and magazines with colored pictures, but be sure to go through them and delete anything you find inappropriate or questionable for your age group. Fabric scraps and trimmings, and buttons without shanks are always useful, as are toothpicks, jigsaw-puzzle pieces, stickers, and small charms. Collect as many different kinds and sizes of scissors as are appropriate for the ages and abilities of your artists. Collect colored stationery, gift wrap, wallpaper samples, paint samples, etc. Store the items in one or more boxes, labeled, or in a plastic storage tub. Have a lined wastebasket ready for scraps.
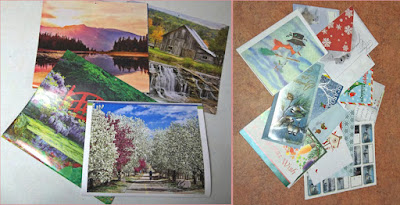 |
| ...& some pictures you don't mind cutting up. |
4) Add any of these that you don't have on hand to your shopping list:
- a BIG roll of paper towels
- glue sticks for younger children
- a large squeeze-bottle of white glue or a small one each for older children. teens, or adults
- a pack of colored construction paper a pack of colored tissue paper
5) Things that are nice to have:
- a hand-held hair dryer for faster drying
- wax paper to place between painted projects that are not yet dry
- colored and black markers for writing or drawing on the finished surfaces
- poster board to make more durable mountings for finished art
Be prepared ... to have fun!
 This post by Annake's Garden is licensed under a Creative Commons Attribution-NonCommercial-ShareAlike 3.0 Unported License.
