Showing posts with label recycling. Show all posts

Wednesday, March 27, 2019

All the World's a Stage: Another Look at Landscapes

Stinking Desert Sunset, photo by Annake
Near sunset in western Colorado (35mm SLR photo)
Jim Richardson,  National Geographic photographer, urges photographers to think of landscape photographs they are about to shoot as if they were settings for plays.* That set me to thinking of broader applications for that principle:  I wanted to apply it to pictures we already have.


Do you have photographs or sketches of landscapes that are accurate, but that just aren't ‘special’? Too good to throw away, not good enough to frame?  Perhaps you have a collection of picture postcards from past trips stored in a box somewhere. I certainly have all of those. I got out a few while I thought about what to say in this post.

I took the picture above late in the day, looking westward.  The color is accurate, I did not use a colored filter. I have always liked the picture, but had never decided what to do with it. It seemed a good place to start the current experiment.  Because I wanted to try several scenarios with my picture, I made a couple of copies before I moved to the next step.  J.D. took one for his own use. We decided to each do the project, but separately, choosing our own themes. J.D. will chime in with comments on his own results as we go along.

Camel photo by J.J.
Camel, photo by J.J.
Much of western Colorado, where our picture was taken, is semi-desert. It is not a sand desert, but dry grassland with some rocky areas. The picture certainly said desert to me. I determined it would be the backdrop for a desert scenario. And what more appropriate desert animal than a camel?

“But a camel in western Colorado?”, you scoff. Well, truth is often stranger than fiction. In 1855, Jefferson Davis (remember him from the Civil War?) was the Secretary of the U.S. War Department. He spent $10,000 to import camels to carry supplies and mail between remote western military posts. The endeavor worked well but was broken up by the Civil War, when most of the animals were auctioned off, killed, or escaped.  At least one became the source of a legend,  said to be 30 feet tall, to eat grizzly bears, and to vanish when in plain view. (Look up “camels in the Western U.S.”, and also look for a Smithsonian article on the Legend of the Red Ghost — great reading!)  I decided to do a detailed color drawing on watercolor paper to depict the Legend of the Red Ghost. One story was that the camel carried a macabre burden — a skeleton wrapped in canvas, strapped and roped to the camel's back.

Red camel with skeleton drawing by Annake

The image was drawn in colored pencil, graphite and charcoal. I sprayed it with fixative (hair spray will do, but practice first to get distances and amounts of spray correct; it is better to do this outside on a warm, calm day). I cut the figure out carefully with small, very sharp scissors and put it in place on the photograph. I used sketches, but you might prefer to use other photographs.

Legend of the Red Ghost paste-up by Annake

J.D.:  Over the winter holidays, I began to learn to use a much more powerful image editing program in order to meet the increasing technical demands of the work at Annake’s Garden; so, when Annake proposed this exercise, I decided it was a good time to see how far I’d learned to push the boundaries of what I could do with digital images. First I turned the picture upside down and backwards – and got an image that looked a lot like the sea at a sandy beach, about as far from a desert scene as you can get. Being an ornery and contrary sort of creature, I figured I would see how many element of this image I could turn into their opposites.

Moonlight on Dunes, digital graphic by J.D.
"Moonlight on Dunes," digital graphic by J.D.
Without getting into the specifics of how I used the software, this is what I did: turned sky into water and sand, mostly by stretching the image horizontally and squashing it vertically; turned the ground into night sky by pasting in a strip of the same almost-black color, then sprinkling in some fake stars; turned the sun into a reflection of the moon by laying a mostly transparent image from a different source over it, then adding a little glare effect at the right edge to suggest an out-of-frame moon rising. Everything else was just fine tuning the intensity of the colors, contrast, and sharpness to give the impression of a photograph taken at night.

This all may sound like mysterious high-tech digital wizardry, but there is nothing here that can’t also be done in an analog photographer’s darkroom (although it might take considerably more time and expense!)

ANNAKE: Now suppose you had a copy of the photograph we worked on. What would you do with it? Ask yourself some questions:
  • Do I need to turn the photo upside down? Change a horizontal picture to a vertical one or the reverse? Crop the photo (cut off parts of it)? Cover up or take out something? Change my perspective (point of view)?
  • What kind of story would I like this landscape to tell? Adventure? Romance? History? Mystery? Fantasy? Science fiction (remember J.D.'s "Early Morning Frost...” on Mars)? Horror? Comedy? Tragedy? Natural history?
Once you have decided what kind of story you want to tell, ask yourself if the picture you are considering can help you tell that kind of story. If the answer is "Yes", then ask yourself how the picture can help.
  • Does it suggest a particular place? A particular period of time?
  • What sort of people might live here or have lived here in the past?
  • Is it the habitat of a particular animal? Alive or extinct? Real or mythical?
  • What interesting objects might have come to rest here? Is it an extraterrestrial place? In the sky? Under the ground?

Cliff face public domain photo
Cliff face (rock wall**)
Each decision will clarify your story in your mind. You will begin to ‘flesh out’ your narrative. Then decide what scenery, props, and cast members you need to introduce into the photo to make your story come to life. You might have a picture of a steep rock wall.  Are you going to show a family of mountain goats descending the wall? Climbers free-climbing or ascending on ropes? A hang-glider swooping away from it? A helicopter hovering in front of it? Choose your characters and props carefully.


Now, how are you going to get your props and characters onstage?

  • Are you going to cut parts out of other photographs and glue them to your background?
  • Are you going to stand the background up and place cutouts or small model figures in front of it? Make a diorama out of it?
  • Are you going to glue or paint your characters and/or props on a clear plastic overlay?
Dry branches, 35mm photo by Annake
Another 35mm photo by Annake
This photograph is also one of mine and was done with no color filters.  Not desert this time, but certainly dry grassland and open woodland. There's no mystery involved this time. It is a simple natural history scene that could easily have happened.  J. D. asked for a big raptor alighting on the pile of branches, and that is exactly what I gave him.

Desert hawk drawing by Annake

The hawk was done in the same way as the camel and applied to the photograph. It is a kind of hawk known to make its nest of sticks. The picture was cropped to take out "clutter".

Desert hawk paste-up by Annake

J.D.:  Since Annake used my best idea for this photo, I struggled to come up with anything else interesting. In the end, I just squashed the perspective enough so that I could create sufficient foreground to put in some stock creepy elements. The skull and spider are cut-&-paste from public domain photos available online, and the burrow with glowing red eyes under the pile of sticks is pretty much the same set of effects I used for the night sky in the beach scene above. I don’t really have a story for this image, but if it inspires one for you drop us a line and let us know.

Landscape wiith skull digital image by J.D.
J.D.'s silly/spooky landscape

ANNAKE: This post is the result of my musings. It is not just for those of us who paint landscapes, photograph them, or portray them in needle arts.  It is for those who have photos, slides, or sketches they have always meant to organize and "do something" with, for those who collect picture postcards, and for those who just like to make something new out of something old that might otherwise be discarded. (If I missed anyone, it probably applies to you, too.) Have fun! 



*From a lecture for The Great Courses Masters of Photography, copyright 2014 The Teaching Company

**So, Annake tells me she needs a picture of a rock wall; I downloaded this nice public domain photo. Then I find out she meant a cliff face...


 Creative Commons LicenseThis post by Annake's Garden is licensed under a Creative Commons Attribution-NonCommercial-ShareAlike 3.0 Unported License.

Thursday, September 17, 2015

Saving the Summer: Collecting Seeds and Drying Herbs

Strawflowers
Strawflowers
This is my favorite time of year. I was born at the autumnal equinox, so each September brings me to the successful completion of another of my many years and the beginning of a new one. It is a time of hard work and satisfaction, harvesting what we have grown and planning for an even better harvest next year. It is a time of great color: the red of ripe tomatoes and chili peppers, the yellow of squash and aspen leaves, the orange of pumpkins and chrysanthemums, the purple of asters and eggplants. It's no wonder we want to preserve that color as long as we can, even by drying these colorful strawflowers.

Orange Poppies
Orange Poppies
Another way to preserve that color is to save the seeds of this year's brightest flowers to plant in new places for next spring. Many annuals self-seed; that is, they drop ripe seeds around themselves before they die. These seedlings come up in the same place ― and often in unexpected places — the following year. To gather such seeds, you need to place bags over the flower heads before the seeds fully mature. I'm not a great admirer of plastic, but I must admit that the self-sealing snack and sandwich bags are a great help for this, saving the time and effort it takes to tie on paper bags and being waterproof besides. We start saving the seeds of our poppies this way in late spring. This year we were able to offer seeds of orange, red, pink, peach and white poppies at the farmers' markets. We hope to have an even greater variety next year.

Black-eyed Susans
Black-eyed Susans, going to seed
Be aware that flowers grown from commercial seeds or bought as greenhouse plants may be hybrids. Their seeds may not produce flowers that are identical to the ones that produced them! This is not always a bad thing. You can get some interesting new varieties this way. Sometimes such flowers will revert to their wild ancestors, which are probably better for the environment. We are using more and more native wildflower seeds for ground cover and filling bare areas in the gardens.

Sunflower Seed-Heads
Several herbs have seeds that may be used in cooking. While our poppies are not the ones commercially grown for the seeds you buy at the supermarket, we can use some from the prolific orange poppies in this way. Dill seed is wonderful for pickling; harvest he ripe seeds for drying. If we let our cilantro mature completely and produce seeds, they are the same ones you buy as coriander seeds. Bag them and remove the entire seed heads. Nasturtiums, which we grow for their red, orange, and yellow edible flowers and the peppery leaves we add to salads (the pickled flower buds are also an inexpensive substitute for capers), often produce a nice crop of seeds that can even be grown attractively in hanging baskets over the winter. Sunflower seeds can be salted for snacks or used as birdseed.

Spearmint, strung to air dry
We have not had a dehydrator very long and are still exploring its capacities for drying herbs. We started by air-drying our herbs, an easy process which you can do if you have a light, airy space where you can hang bunches of plants, tied together with string, upside-down for a few days. Herbs with strong odors and flavors, like peppermint and spearmint (Mentha species), are probably best dried this way. DO NOT dry herbs in a garage: the fumes and particulates from gasoline and motor oil will ruin them. Air-drying is appropriate for anise hyssop (Agastache foeniculum), sweet marjoram (Origanum majorana), dill (Anethum graveolens), oregano (Origanum vulgare), sage (Salvia officinalis) and thyme (Thymus species). Thyme, however, is best dried hung inside paper bags. I've used the scientific names here because there are so many different common names in many languages for these plants. “Officinalis” indicates herbs used for healing properties. “Vulgare” just means “common”, not anything naughty. And I almost forgot catnip (Nepeta cataria) for your cat. Our cat, Katana, would never forgive me for that!

Annake's dehydrator
Annake's dehydrator
Herbs best dried in a dehydrator include: sweet basil (Ocimum basilicum), bergamot ― also called bee balm and Oswego tea (Monarda didyma), cilantro/coriander (Coriandrum sativum), lemon balm (Melissa officinalis), rosemary (Rosmarinus officinalis), parsley (Petroselinum crispum), and sage (Salvia officinalis). Lemon balm, oregano, and thyme should be dried with the fruit leather insert in the dehydrator. I have just included herbs we grow in the garden or greenhouse. As we acquire new ones and learn more about the dehydrator, I will update you with new information from time to time.

Herbs ready for oven curing
Although they may appear completely dry, herbs (air-dried ones especially) may not be. To avoid problems like mildew, it may be best to do a final “cure”. Preheat your oven to 200 degrees Fahrenheit. Spread the sprigs of herbs on aluminum foil. Heat for no more than 10 minutes (13 for sage). Store in an airtight container — a jar with a screw-on cap or a sealed plastic bag. You can store as sprigs or separate leaves. Or you can crumble the leaves by rubbing them between your hands over an open bowl before sealing them in a container. When cooking with dried herbs, use only ¼ to ½ of the amount you would use of the fresh herbs. The dried ones are much stronger. It is a good idea to start with a small amount, taste the result, and add more if needed. Otherwise your “culinary delight” might turn out to be a “culinary disaster”. This is true about the commercial dried herbs bought at the supermarket, as well.

Chives in bloom
Chives in bloom
Unfortunately, some of my favorite herbs don't dry well. These herbs should be frozen in ice cubes or mixed with butter and frozen (thaw and use as an herb butter). Chives (Allium schoenoprasum), which I would grow for its lovely flowers even if I didn't eat it, is one of these herbs. Others include: sweet basil (Ocimum basilicum), borage (Borago officinalis) and tarragon (Artemesia dranunculus). Sprigs of rosemary and thyme may be frozen on baking sheets and stored in air-tight jars.


Savor the summer,


Annake's spice rack
Annake's spice rack, first of a planned two...


 Creative Commons LicenseThis post by Annake's Garden is licensed under a Creative Commons Attribution-NonCommercial-ShareAlike 3.0 Unported License.

Tuesday, September 9, 2014

Use It Up!: Glass and China “Whimsies”

a group of glass and ceramic garden "whimsies"
A group of glass and ceramic "garden whimsies"
Those of you who have been reading these posts for some time know that I and other members of the Annake's Garden team really don't like to see anything go to waste (see the posts for March 15, 2013 and June 3, 2013). Lately our glass artisan (see the December 30, 2013 post for her interview), in between periods of canning and freezing food for winter, has been combining pieces of miscellaneous glassware and china dishes into delightful “garden whimsies”. I just cleared a couple of shelves in my kitchen cabinets of glass and china pieces that I never use and passed them along to her so that she can create more of these objects. There are quite a few examples of this kind of item on the Internet, most of them to be used as bird feeders. I feed native and migratory birds all year, and I have to say that many of these items while attractive are not particularly bird-friendly. You want to feed seeds and suet to the birds, not feed the birds to the neighborhood cats!

small garden whimsey with candle
So we determined that most of her creations would have other uses, in addition to (or instead of) bird-feeding. We chose three of her many pieces (see above) to feature for you. These can be used indoors, on a porch or patio, or outdoors, under trees or along paths or in flowerbeds. The smallest, we decided, was perfect for a candle-holder and it is shown that way throughout this article. I can picture a double row of these, each different from the other, along the edges of the sidewalk that leads to our front door, acting as luminarias to welcome guests to our home. Obviously the candle-holder could have many indoor uses as well.

large garden whimsey with floating flowers
The largest piece is an ingenious combination of a bowl, its inverted lid, the glass cover of a ceiling light fixture, a saucer and a small cut-glass dish, all bonded together. Indoors on the buffet, it could hold chips and dip, canapes with nuts or mints, holiday cookies and candies, etc. Outside, it makes a lovely water feature, either by itself or with flowers floating in the bowl. Its color can be changed with the water used to fill it. Just add a drop or two of food coloring to the water and stir it thoroughly before pouring it into the container. And it can even serve as a bird feeder in the right, safe, setting. The water in the base makes it very stable and hard to overturn. All the pieces are securely fastened together with an all-weather adhesive, so it is easy to carry and to transport from place to place.

medium garden whimsey with candle
The medium-sized “whimsey”, a pedestal arrangement topped with a vase shaped like a flower, proved to be the most versatile article of all. It is shown here as a candle-holder. At the bottom of this post you will see it again in a montage showing just a few of its possible uses: holding a floating flower, potpourri, hard candies and, yes, even birdseed. Incidentally, all the photographs were taken in Annake's Garden, so they give you little glimpses into small corners of our late summer gardens.


"whimsey" used as a serving tray
We were so happy with the first arrangement we made with a fourth “whimsey” creation that we photographed it separately. This is a vase cemented to a glass tray. The artisan filled the vase with her dried flowers and I contributed a combination teapot (top handle) and teacup (bottom handle). What a nice object to have at your elbow when you are ready to relax with a cup of tea and a good book! It also shows how three of our team (J.D. took all the photographs) worked together on this project for this post for you.

Recycled and fused glass trivet and spoon holder
Recycled fused glass trivet (left) and spoon holder (right)
Finally, we wanted to show you a couple of items our glass artisan “re-purposed” in the kiln she uses to make her glass plates, jewelry, sun-catchers, wind-chimes and other beautiful creations. The first is a plain glass tray which she has ornamented with fused glass dots and stripes in bright colors. She turned it into an attractive trivet to protect a tabletop from a hot dish or pot. The second article is a simple bottle, melted and shaped into a holder for a cooking spoon. It is also decorated with bits of colored glass. 

I think everyone who has been a homemaker for more than a few years probably has leftover or mismatched pieces of glass or china. While we don't all have access to a kiln, we do have access to a variety of appropriate adhesives. (Be sure to read all the cautions and directions very carefully; look for terms like “food-safe,” “dishwasher-safe,” or “weather-proof,” depending on your plans for the object.) We can all think of useful and decorative ways to keep these items from going to waste. I hope we have provided you with some ideas and inspiration. We would love to hear about and see pictures of your own creations.

Have fun with your “whimsical” project!


glass and ceramic garden whimsey collage
Some of the many uses for a "whimsey"...

 Creative Commons LicenseThis post by Annake's Garden is licensed under a Creative Commons Attribution-NonCommercial-ShareAlike 3.0 Unported License.

Sunday, June 15, 2014

Painting Needlework Canvases

Rose photo, courtesy of Joy Jardine
J.J.'s rose photo
There are at least three reasons for painting needlework canvases. The first is to obliterate a design that is already painted on the canvas so that the canvas can be “re-purposed”. Many people buy kits, fully intending to complete the project. But they lose interest for whatever reason and it never gets made. Then the “orphaned” kits are consigned to thrift shops or yard sales. I picked up a pillow-sized kit for a dollar. The kit was complete, but I had no use for the cartoon design. Therefore, I needed to cover up the design. I put down a heavy pad of newspapers to protect my dining room table, and covered it with a layer of paper towels. This layer keeps the newsprint from discoloring the canvas when it gets wet. Then I thin white acrylic craft paint with a little lukewarm water. J. D. occasionally likes to bake some refrigerated cinnamon rolls for breakfasts or late-night snacks. I wash and save the little cups the icing comes in to use as paint cups. Any “leftovers” can be covered with aluminum foil and stacked in the refrigerator. They don't take up much room and stay liquid for an amazingly long time.

"Tweetie" canvas from a commercial kit
Painted canvas from a commercial kit
If you like, you can use the foam paint brushes for this type of work and throw them away when you are finished. (They fray against the canvas, so I don't recommend re-using them.) I prefer bristle brushes, however. Because the acrylic paint is water-soluble, it washes out completely with a little care and patience. A brush about an inch wide — either round or rectangular — is ideal for this purpose. To cover a design, I like to use a daubing or “pouncing” motion with my brush, so a round brush is slightly more preferable than a rectangular one. If you can find an old-fashioned shaving brush, that's perfect. Clean your brush promptly and thoroughly, spreading the bristles all the way to the ferule and rinsing until the water runs clear. Reshape the brush while it is damp and stand it in a container to dry with the bristles pointing up.

Annake painting out cartoon on canvas
Annake painting out the cartoon
First I press the canvas on the wrong side with a warm iron to take out any creases. Once it will lie flat, I place it in the middle of the newspaper pad. I dip my brush in the paint, then allow any excess paint to drip back into the paint cup. I work on one section of the design at a time, using just enough paint to cover the color. Some colors are more resistant than others. When I can no longer see the design, I rotate the canvas 180 degrees and touch up any spots the brush had missed. Then I stroke the white paint lightly over the entire canvas and let it dry completely. I discard the paper towels and any dampened newspapers.


Aspen bargello in progress, showing toned canvas
"Aspen" bargello in progress, showing toned canvas
The second reason for painting the canvas is toning. No matter how carefully you stitch, a few bits of canvas are likely to show through. The larger the mesh of the canvas, the more likely this is to occur. Therefore, I like to paint larger-mesh canvases with a tone that is prevalent in the picture. This makes the bits of revealed canvas less noticeable. For example, I toned the canvas for the “Aspen” bargello needlepoint (May 1, 2013 post) in a medium yellow and the one with the ocean wave bargello design (January 16, 2014 post) in a medium blue-green. You can see the toning on the edges of the canvas. At his point, I had not decided whether to do the pillow top in latch-hook or grospoint. I was considering a pink camellia or water lily as a subject, so I decided to tone the canvas in a medium pink. (I was also considering this blog post, so I decided to start fresh on the back side of the canvas I had just painted.)

Annake toning canvas horizontally
For toning, I use long parallel strokes, so a rectangular brush suits me better. I cover the canvas with overlapping horizontal strokes, then let it dry for about an hour. It need not be completely dry. Then I repeat the process with overlapping vertical strokes. I pay particular attention to the outer edges where the pillow top will be joined with the pillow backing. Canvas is more likely to show through there than at the center of the design. Then I let the canvas dry completely. If I'm painting a much finer canvas like #14 mono canvas, I go back over the canvas with a pin to make sure there are no squares of mesh that were clogged with paint. If there are some, I rotate the pin point in them until they are open again.

Annake toning canvas vertically
J.D.'s sister, J.J., is also an accomplished photographer. Recently she sent me a number of photos she had taken on a trip to Florida. Among them was the dew-drenched rose at the top of this article. I was fascinated by the interplay of colors, especially the pale blue and lavender — so unexpected in this pink-and-yellow rose. So now I had the subject I wanted. My toned canvas was darker than some of the colors in the rose and lighter than others. That was exactly the effect I was striving to create. It would seem normal and unobtrusive wherever it showed in the rose itself, and should disappear in the dark blues and greens of the background.

Tools and materials for rose latchhook
Tools and materials for rose latchhook project
You can see the toned canvas up on pins ready to be worked, along with the yarns used to make the picture. Did I really use all of those colors? Yes, I really did — including the ones that needed to be cut. I was able to use some of the cut yarn from the kit (the multicolored pack near the center), but the yarn was far thinner than my other yarns, so I had to use two strands at a time. I made no attempt to show the dewdrops, but I would like to do the design again in petitpoint and sew on tiny, clear glass beads for some of the dewdrops.

Completed latch hook picture of J.J.'s rose
Here are two views of the finished pillow top. I love Impressionist paintings and latch-hook allows me to achieve that pointillist effect. The second picture (below) is of the other side of the canvas, reversed so that its orientation is the same as the front. This gives you an idea of how the project would look in quickpoint or grospoint, except that you would not be able to see as much of the canvas mesh with those techniques. I will make a color chart of the back of the canvas for future reference before I make the top into a pillow.


Back of completed project, reversed to show pattern

There's a third reason for painting a canvas, but that's a topic for another day.


 Creative Commons LicenseThis post by Annake's Garden is licensed under a Creative Commons Attribution-NonCommercial-ShareAlike 3.0 Unported License.

Sunday, June 2, 2013

Use It Up! -- What to Do with Leftover Material

In one of my earlier blogs, I mentioned a rhyme my grandmother taught me:

“Use it up,
Wear it out,
Make it do,
Or do without.”

A couple of the Annake's Garden members have been working to use up leftover materials, both our own and each other's. This is how it came about.

sunflower_quilt_.jpg
Sunflower Quilt
I've spoken before about the making of quilts and comforters as the classic example of recycling. One of our artisans has decided to concentrate on quilting exclusively from now on, so she has been cleaning out her craft cupboards. (You can see one of her quilts in the accompanying photo.) She generously donated some leftover fabric to another member and brought me a tall kitchen trash bag full of balls and skeins of yarn. In return, I was able to share some Hawaiian quilt patterns with her.

 A "Patchwork Princess" Dress
The fabric recipient started piecing together rectangles from her fabric windfall to make little girls' sundresses. These are very cute, with lined bodices, shoulder straps, and tiered skirts. They would also serve as swimsuit coverups or jumpers. We call them “Patchwork Princess“dresses. Needless to say, no two are even remotely alike.

I decided to turn the small and medium balls of yarn into what I call “scrapgans”. These are yard-square or meter-square afghans that are perfect for throws, baby blankets, lap robes, etc. They are based on traditional granny squares with some modifications of my own. By their nature, each is unique. In fact, I couldn't duplicate one of them if I tried. I have had great fun working out color schemes and figuring out how many rounds each ball or skein would provide. (I've only miscalculated once and run out of a yarn short of a round in the making of the last five scrapgans.)

scrapgan_.jpg
A "Scrapgan"
I start with a yarn combination that will give me one of several typical granny squares about eight inches on a side. I join new yarn at a corner and work a full corner, rather than a half, ending the round(s) with a slip stitch in the first corner stitch. Then I slip stitch across to the middle of the corner, secure the yarn, and break it off there. This produces a very slight ridge in the stitches, but makes a much more secure joining. Then I move ahead one corner, join the next yarn, and proceed with additional rounds, increasing as needed on each round. I do only complete rounds. By moving ahead for each change, the little ridges do not accumulate at any corner, but are distributed all the way around. I combine different colors of yarn used in the body of the scrapgan to make tassels.

ripple afghan in progress
This technique of using leftover yarns can be used to produce more conventional afghans, of course. You can see here a picture of a ripple afghan I have in progress. Once I reach the midpoint, I will repeat the sequence of color rows in reverse. If you prefer the hit-or-miss approach of the afghan on the March 15, 2013 blog, you can use up any number of yarns in a continuous repeat of any stitch pattern you like. This causes a lot of yarn splices in the middle of rows, however, and I prefer to avoid that.

Very small balls of leftover yarn go into cardboard or foam egg cartons for use in needlepoint ornaments for next Christmas. I pierce the top of the carton over each section and thread the yarn from each ball through its own hole. That way the yarns don't get tangled and I can see at a glance what colors are available for use.

Even small scraps of yarn can be put to good ecological use. Put them in a perforated container like a mesh bag or a lattice strawberry basket from the grocery store. Hang them in a shrub, being sure that they are beyond the reach of neighborhood cats. The local birds will use them, in addition to their natural building materials, to make and line their nests. If you are lucky, a bit of bright-colored yarn may help you to locate a nest and watch the nestlings as they grow up. (The birds also like dryer lint for a soft bedding for their babies.)

Happy recycling!
Annake

 Creative Commons LicenseThis post by Annake's Garden is licensed under a Creative Commons Attribution-NonCommercial-ShareAlike 3.0 Unported License.

Wednesday, April 3, 2013

Resilience

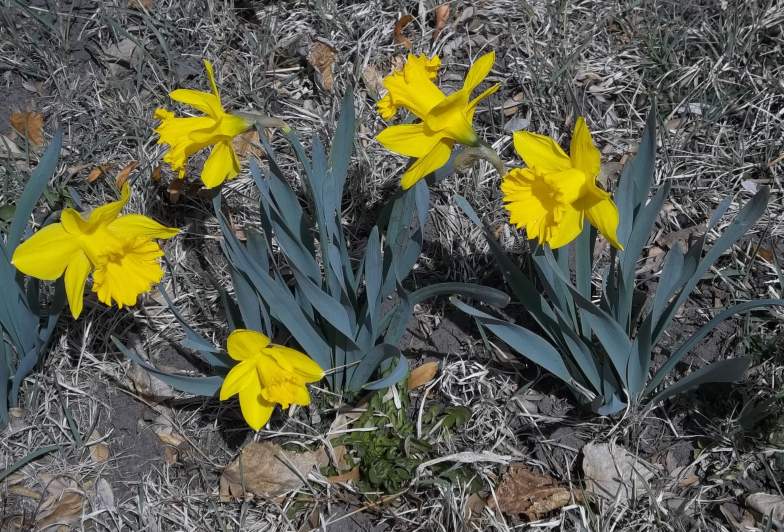
The garden has awakened. Shyly at first, like sleepy children, the crocuses appeared. Soon they were joined by graceful white snowdrops and miniature irises in their passionate blues and purples. Now there are clumps of bells-of-Holland and star-flowers. Jaunty daffodils flutter in the breeze. By mid-week we will have fragrant hyacinths in a rainbow of colors.

Daffodils.jpg
The Year's First Daffodils
One of my teen-aged garden helpers once observed how wonderful it was that the garden starts subtly and close to the ground in spring, grows taller and showier to culminate in the giant sunflowers of late summer, then begins to recede toward the earth again in autumn. Our garden both begins and ends with crocuses. Before they disappear below ground for another year, the leafless autumn crocuses warn us that winter is on its way and we must get busy to prepare for it.

Our plants must be resilient. They emerge to face a prolonged drought, extremes of temperature, drying winds, and other problems presented by high altitude. We are close to 6,500 feet above sea level here. Thunderstorms, even thunder-snows, are common. Frosts and freezes strike at inopportune times. I'm afraid the century-old apricot tree that overhangs our back fence has already lost its crop to recent bitterly cold nights.

Making jewelry.jpg
People, too, must be resilient. I'm proud to say that resilience is a characteristic of our group of artisans. None of us are young. We range from middle-aged to nearly eighty years of age. Recent years have not been kind. About half of us have faced the adjustment to retirement from long careers. A couple of us have been widowed. Others have faced serious illnesses or injuries, or are caretakers for ones who have done so. Economic woes have cost jobs, lost savings, and relationships.

Sue working.jpg
Still, we are a hardy, resilient group. One of the things that has supported us through hardships is the love we have for, and the pride we take in, the work of our hands. We work in wood, paint, natural stone, yarns, ceramics, glass, and fabrics. We believe that there is strength in numbers; that by using the various skills and talents of our members and by sharing ideas, materials, and expenses we will all profit more than we would individually. We want to advertise that there are people like us making beautiful and useful art and craft creations at prices competitive with those of mass-produced, machine-made ones. We subscribe to both the mottoes: “Buy American” and “Work Locally, Sell Globally”.

Quilting.jpg
Of course we want to sell our wares, but our philosophy extends beyond marketing. We want to emphasize the role Nature plays in inspiring us and to foster the use of natural materials wherever possible in our work. We support recycling, both as a lifestyle choice and as an integral part of the creative process. We prefer to concentrate on handmade, one-of-a-kind items. We are not interested in mass production or in making cheap, throwaway goods. Indeed, we hope that some of our creations may be handed down as heirlooms. We want Annake's Garden to provide a framework that frees our artisans to concentrate on original creations. We are very serious about keeping this a collaborative effort.

Judy working.jpg
Personally, I feel that our most important tenet is our desire to promote and preserve art forms, methods, and techniques, especially those which, sadly, appear to be disappearing. We are not young. We would like to inspire, instruct, and assist younger people to take up the pursuits which we must ultimately leave behind. We do not want these endeavors to fade away. They are a part of our legacy.
Annake

Crocus.jpg
Resilient Crocus

 Creative Commons LicenseThis post by Annake's Garden is licensed under a Creative Commons Attribution-NonCommercial-ShareAlike 3.0 Unported License.


Contact Us

Name

Email *

Message *

Blog Archive