Showing posts with label patchwork quilt. Show all posts

Monday, October 17, 2016

Autumn Questions and Answers, 2016

Butterfly reference samples
Butterfly reference samples from May 21, 2016 post
Why do you use so many photos, drawings and even fabrics for reference?

Because every photographer, artist, and designer sees something different in the subject and consciously or not emphasizes that difference in his or her work. Viewing their differences causes me to look much more closely at the subject than I might have done on my own. I always see things that I never noticed before, even about very familiar subjects. After absorbing as many impressions as I can, I choose the characteristics that I want to emphasize in my own work. On another day, I might look at the same collection and make entirely different choices. That was a good question!

I'm a fairly new reader of your blog. I went to your archive and have been working my way through early posts. I really like the Spanish blackwork, especially the onion domes. (February 27, 2014) I copied the patterns and would like to do some pictures, but I have a couple of problems. I can't draw so I need some kind of outline to work with. I don't want to use children's designs like you suggested from coloring books and I don't care much for flowers. What kind of things do you think would look good in blackwork and where do I find patterns for outlines? (This is condensed from a longer message.)

Gymnasts 'flower' mandala
Welcome to Annake's Garden! What a delight it is to have such a thorough and enthusiastic reader! I hope you find many techniques to enjoy in past, present, and future blog posts. For now, however, let's consider the blackwork. My first thought was of mandalas. These are traditionally circular designs. My gymnastic “flower” (August 31, 2016) is a mandala. They were originally inspired by intricate designs made for Buddhist and Hindu religious ceremonies. You may have seen Tibetan monks on television creating an elaborate mandala sand painting.

During the current era of popularity for adult coloring books, there are whole volumes devoted to mandalas. These can feature anything from cats to Cleopatra, trees to temples, or flags to fancy desserts. As interesting as these are, however, the areas are much too small to show off blackwork patterns. You would want a simple design with fairly large sections something like this framed quilt block (courtesy of J.D.'s sister J.J.). You could then fill in the sections with different blackwork patterns instead of these pieces of printed fabric. 

Mandala-like quilt block


Onion Domes blackwork on monk's cloth
"Onion Domes", blackwork on monk's cloth
Now let's think about topics. You liked the architectural look of the onion domes. You might want to do a picture of a Victorian house like the famous “Painted Ladies” of San Francisco, California; this was the subject of one of my earliest blackwork pictures. If you are more mechanically inclines, you might want to look at some Steampunk patterns. There is even a steampunk mandala adult coloring book. We recently had a parade of antique cars and trucks here in town; I thought at the time that some of them might be good subjects for a blackwork picture. There is always costume to explore, from wearable fashion to theatrical costumes (masks, too). For inspiration, check your library for a book on the work of Gustav Klimt, an artist who made masterful use of areas of intricate design in his paintings.

Antique automobiles coloring book
A good source for designs for any of these topics is Dover Publications. They have books of black and white line drawings. Just remember to copy only the basic outlines, not the tiny details which you plan to put in with embroidery. Calendars are a rich source of pictures of animals, landscapes, still-lifes, etc. I collect inexpensive ones from the dollar stores for my picture files. My friends are generous with their used ones at the end of the year, too. Keep in mind that the more stitches there are in a blackwork (diaper) pattern, the darker the area will appear when it is stitched. Good luck with your blackwork project. Have fun!

I've been practicing bargello patterns on needlepoint canvas and I think I'm pretty good at them. Now I want to make Christmas ornaments with the patterns on them. I have some cute cookie cutters to use for outlines. Can I just do a square of the bargello design, draw the cookie cutter outline on the back and cut it out?

No, no, no, no, NO! Never cut into a finished piece of stitched needlepoint! The cookie cutters are a great idea. Draw the outline on the front of your canvas. Stitch your pattern baseline somewhere near the center of the piece and work both upward and downward from it. Work right up to your drawn outline, using partial stitches where there is not enough room for a whole stitch. I've done a simple bell design to show you what I mean.

Bargello bell shape
Bargello bell shape, ready to turn into an ornament
Place your needlepoint face down on felt or another non-woven fabric and pin it in place. Stitch along the outline by hand or machine, leaving an inch (3 to 4 cm) or so unstitched so you can turn the ornament right-side-out. Cut around the outline, leaving about ¼ inch (1 cm) of canvas between the cut and the outline. Turn the ornament right-side-out. Use a smooth, blunt object like the handle of an aluminum crochet hook to push the outline smooth from the inside. Stuff the ornament if you like. Turn under the raw edges and stitch it closed. Thread yarn into a tapestry or darning needle and make a tied loop at the top of the ornament to act as a hanger.

Keep those questions coming!



 Creative Commons LicenseThis post by Annake's Garden is licensed under a Creative Commons Attribution-NonCommercial-ShareAlike 3.0 Unported License.

Wednesday, August 31, 2016

Another “Op Art” Needlepoint from a Quilt Block

2 color ribbon design
From time to time, J. D and I look at our archive to see which of our older posts are getting the most attention. This helps us to plan posts which return to those subjects. Lately, there has been interest in the posts about optical illusion effects in needlepoint. If this is a new subject for you, you can find more information on the following posts: November 16, 2015, December 19, 2015, January 21, 2016, and February 10, 2016.

We have been working with geometric designs based on quilt blocks. We will continue to do this, but I wanted to show you that there are other ways to create an optical illusion. This is a color sketch I did for a future needlepoint project. It was inspired by the recent Rio Olympics. At first glance, it appears to be an open flower. On closer examination, however, you will see that it is made up of the stylized bodies of gymnasts.

Design with gymnast motif

Today's pattern is also derived from a quilt block. This one probably has several names most quilt patterns do but I know it only as “Bachelor's Puzzle”. I have no idea how it came to get that name! We are going to begin by drawing a diagram. You will need the following materials:

  • a sheet of ¼-inch graph paper
  • a sharpened pencil
  • an eraser that won't “smudge”
  • a ruler or other straight-edged item
  • a black fine-line pen or marker
I drew each step separately, but you need only follow the steps in sequence.

Design steps 1 - 3
Design steps 1 - 3


Step 1: Find the center of your graph paper and mark it with a pencil dot. Draw a square around the central point. Each side of the square should mark through the center of 5 diagonal squares of the graph paper.

Step 2: Draw four squares in the positions shown on the diagram. Be sure the positions are exact. Each of these squares should enclose 16 of the graph paper squares.

Step 3: Draw the lines connecting the squares and creating 4 parallelograms. Once again, these lines should pass diagonally through the centers of 5 diagonal squares of the graph paper. Essentially, the entire design is made with only two kinds of lines: horizontal or vertical lines along 4 squares and diagonal lines through the center of 5 squares.

At this point, you already have an interesting design. A series of these done in bright colors and evenly spaced on a plain background would make a colorful pillow top or done in latch-hook or quickpoint a small rug. On a smaller scale, they would make an attractive set of coasters or could be joined together to make a purse or tote bag.

Design steps 4 - 5
Design steps 4 - 5

Step 4: Draw these straight 4-square lines outward from the squares as shown. Once again, careful positioning is necessary.

Step 5: Complete the parallelograms with diagonal 5-square lines. This gives you four “blocks” to make appear as 3-dimensional.

Once you are satisfied with your diagram and have erased any unnecessary marks, retrace the design (using the straight-edge) with a permanent black fine-line pen or marker. This will make it easier to transfer the design to your needlepoint canvas. The easiest way to do this is to tape the design to the glass of a sunny window. Center the canvas over the design and tape the canvas to the windowpane. Press against the canvas with your free hand while you trace the design on the canvas with pencil. You can then correct any tracing errors and re-trace the lines with pen or marker if you like.

Your next decisions will depend on what you wish to do with the pattern. If you are doing a sample or a small picture, you will want to use a larger mesh canvas, probably no finer than #10. you can use either fabric canvas or plastic canvas for these purposes. For a pillow top or similar item, you will want a finer mesh fabric canvas like #14. The stitches can either be done as long upright gobelin stitches or as tent stitches.

shaded Bachelor's puzzle design

The diagram above shows the method of shading the design. You will need three shades of your chosen color: a very light, a medium, and a dark. Bear in mind that these illusions often show up best on black or a very dark blue, green, red, or brown. Dark backgrounds are my personal choice; however, that does not mean that you cannot use white or a light color for the background. Be sure that your darkest design shade is enough lighter than your dark background that it will show up well. Conversely, be sure that your lightest color is enough darker than your light background color that it doesn't just blend into the background.

three shades of yarn
Three shades of yarn

Here are the steps for making the design:

1) Work the four squares first, using the lightest of your three design colors. These represent the ends of the “blocks”.

stitching step 1

2) Use the medium color on the sides that are a light gray in the diagram.

stitching step 2

3) Use the darkest shade on the dark gray shaded sides in the diagram.

stitching step 3

4) Fill in the center square with your background color. You can have as much background as you like around the finished design motif. It need not be square (although I would recommend a square pillow top), but may be rectangular, circular, or even hexagonal. You are limited only by your imagination.

5) Back-stitch along dividing lines as needed.

Bachelor's Puzzle finished
Bachelor's Puzzle finished, framed, and hung

Enjoy!


 Creative Commons LicenseThis post by Annake's Garden is licensed under a Creative Commons Attribution-NonCommercial-ShareAlike 3.0 Unported License.

Wednesday, February 10, 2016

More Optical Illusion Needlepoint from Quilt Blocks

diamond dust quilt
Judy's latest quilt, available in our Etsy shop
I've mentioned before (November 16, 2015) that some “op art” began as quilt patterns. Quilted layers hold heat and played a large part in keeping people warm before central heating became widely used. Quilts were also helpful for using up small scraps of fabric left over from other kinds of sewing. Early ones were probably of the “crazy quilt” variety, with little attention given to the shapes of the quilt pieces. Soon, however, quilters began arranging geometric shapes the same squares, triangles diamonds, rectangles, parallelograms and hexagons that we will be using to make interesting and attractive quilt blocks. Quilt-making and hand-quilting became a social activity, where women came together to share fabric scraps, patterns, ideas and, of course, gossip.

This time we are going to adapt a quilt pattern to make an entire “op art” needlepoint. I started with a pattern called “Ring Around the Star”. (Be aware that many quilt patterns have multiple names.) I don't know the origin of the pattern, but I suspect it is 18th Century American. However, I think it is derived from a much older English pattern called (among other things) “King's Cross”. The “King's Cross” pattern is shown in the sketch at the very left below, and the center part of the “Ring” pattern is just to its right. The other two sketches are ones I made to decide which shading best gave the effect I wanted. I decided the one on the far right.

quilt block design collage


op art needlepoint stage 1
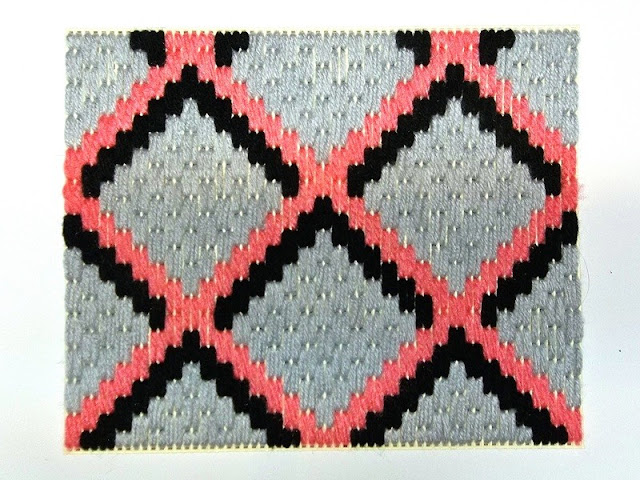
I prepared my canvas, drawing the lines lightly with a pencil. I used #10 mono canvas. (For more on preparing a canvas, see the post for May 11, 2014.) I worked the sections with tapestry wool, but you can use other yarns. The yarn is in two shades of the same brown, one noticeably darker than the other. I used upright Gobelin stitch on the first stage, covering the pencil lines on both sides of each parallelogram and leaving no open squares of canvas. I put in the darker shade first. To keep all of my stitches upright, I turned the canvas ninety degrees for each new parallelogram. Then I put in the lighter shade in the same way. I usually save back-stitching for the very end of a project, but did it here to emphasize the shapes of the finished sections.

For the second stage, I concentrated on the squares formed by the V-shapes at the end of each pair of parallelograms. I did these in Graduated Diagonal Stitch. The enlarged photo shows one square done in this way. I began in one upper corner of the square with a stitch over a single thread of canvas. The next stitch was over 2 threads. I continued in the pattern: 3, 4, 5, 6, 7, 8, 9, 10. and 11 threads for the squares on the needlepoint canvas. With the 11th stitch I made the diagonal line between the bottom corner on the side I started from and the upper corner on the opposite side. I then began decreasing the number of threads crossed with each stitch: 10, 9, 8, 7, 6, 5, 4, 3, 2 and 1. The square was complete.

op art needlepoint stage 2
I turned my canvas ninety degrees and began the second corner. When all four squares were completed, I back-stitched the edges where the squares touched the ends of the parallelograms. I did not stitch the edges bordered by bare canvas. As you can see, the illusion of structures emerging from the canvas has been achieved. But there is yet more illusion to come.


I turned my attention to the large diamonds between the “structures”. These diamonds will make the second illusion. They were too large to do effectively with the Graduated Diagonal Stitch, so I first divided each square into four equal parts by connecting their corners with their centers, using very light pencil lines. The stitch pattern in red on the upper left is the Diamond Eye Stitch. Begin at any of the corners. Stitch over threads (or bars) in this pattern: 1, 2, 3, 4, 3, 2, 1. Give the canvas a quarter turn and do the same stitches again. The stitches should end in the same squares of canvas as those in the first triangle. Turn the canvas and repeat until the square is completed. I liked the stitch, but decided to do it diagonally in order to cover the canvas better. This is shown in the blue sample at the upper right. Working diagonally, the pattern becomes: 1, 1, 2, 2, 3, 3, 2, 2, 1, 1. Each stitch is doubled, increasing until you reach the diagonal, then decreasing in order. You will notice that the ends of the stitches are uneven. This will be covered on the project piece by back-stitching when the next section is completed. A simpler way to do the diagonal stitch is shown in the green sample at the bottom. Start in the center of the diamond and stitch over 1 thread. Increase each stitch by one thread until you reach the edge of the diamond. Turn your canvas a quarter turn and continue. The disadvantages to this stitch are that the outer stitches become very long and that the stitches do not cover the canvas as well.

I completed the four diamonds and back-stitched the horizontal and vertical center lines in the same color. I back-stitched the lines between the diamonds and the ends of the parallelograms with the same brown yarn that I used previously for back-stitching. If you now concentrate on the large diamonds rather than the small squares, you see shorter but much larger blocks emerging from the canvas. The second illusion is complete. Your eyes can move back and forth between the two, but you don't see both simultaneously.

Any illusion stands out best against a very dark background. I usually use black for this purpose, but I thought it was too harsh for the nice brown and beige combinations in the design. Instead, I used the darkest brown I could find. (Very dark purple, maroon, forest green, or navy blue also make good backgrounds.) I worked the “ring” of 8 parallelograms around the double illusion in upright Gobelin stitch, making the inside end of each stitch go into the same square of canvas as the outside ends of the stitches that make up the diamonds. I back-stitched these joinings with the original brown yarn. I left the outside edges of the parallelograms unstitched.

basket weave stitch sample
Basket Stitch sample
The multicolor sample shows you how to do the tent stitch known as basket-weave. Begin in the upper right-hand corner with a single slanting stitch, shown here in red. The next color shows the next row of stitches. Each row fits in between the stitches of the previous row. Even numbered rows, like the second one shown here in orange, are worked from left to right. Odd-numbered rows, like the third one shown here in dark blue, are worked from right to left. This is the favorite stitch of most devoted needlepointers.

I worked the outer triangles of the design in basket-weave, turning the canvas a quarter turn each time so that the triangles are all worked inward from their corners. Stitches which cannot be completed outside the “ring” are worked by finishing the stitch just under the outer stitch of the “ring”. I back-stitched the lines between the basket-weave sections and the “ring” with the darkest brown yarn. J.D. later found an attractive frame for the piece, but it was a little large, so I continued stitching the background until I achieved a good fit. The framed project is shown below.

Plan some illusions of your own,


 Creative Commons LicenseThis post by Annake's Garden is licensed under a Creative Commons Attribution-NonCommercial-ShareAlike 3.0 Unported License.

Thursday, January 21, 2016

Still More Optical Illusion Needlepoint: Folds, Wraps, Interlocks and Mitered Corners

Gobelin stitch zig-zag

Colors produce the illusion of folding in the first pattern. The dark sections seem to be slanted away from you, and the light sections slant toward you. The effect is one of looking at something that has been folded into equal sections and partially unfolded. The pattern is done in upright Gobelin stitch, the basic stitch of bargello, and is repeated below in continental tent stitch. Each upright line of the Gobelin is a stitch over 5 threads (or bars) of canvas. The stitches ascend and descend by one thread at a time. The upright lines of the tent stitch are 5 continental stitches in a vertical row. Because of its slanted stitches, that pattern requires an additional row of canvas squares. The Gobelin rows were worked from left to right and the tent stitch rows from right to left. Both cover both sides of the canvas; however, the tent stitches require 2½ to 3 times as much yarn to cover the same amount of canvas as the straight ones. This is a good design to work with two needles, one for each color. When a color section is complete, let the needle and yarn drop down the back of the canvas, holding the yarn out of the way with your free hand.

tent stitch zig-zag

Gobelin all-over from zig-zag

These are linear patterns, suitable for borders, frames, and narrow objects like belts and straps. It is easy enough, however, to make them into all-over patterns. Let me give you a couple of examples. In the first example, the pattern row is repeated over and over, but the colors are reversed in every other row. The three-dimensional illusion has been lost; nevertheless, it is still an attractive pattern. As always, when you approach the edges of your all-over pattern, you may not have room for a complete pattern row. In that case, do as much of the pattern row as you can, ending with straight edges.

Gobelin zig-zag with lozenges

The colors are also reversed in the second example. Here the pattern rows meet only at the highest and lowest points, leaving small blocks of empty canvas between them. Since the points are offset slightly, the empty blocks are not diamond-shaped as one might expect. The parallelogram-like segments of the pattern are sometimes called “lozenges”, used frequently in bargello patterns. I worked all of the pattern rows first. The odd-numbered rows are identical. The even-numbered rows are identical to each other, but differ slightly from the odd-numbered rows. This causes the lozenges to point to the right in one row and to the left in the next. Each lozenge is worked over this pattern of threads: 2, 4, 6, 6, 4, 2. I used a third color to fill in all the lozenge shapes. This pattern does have an optical illusion effect.

wrapped bar samples

The next pattern produces the illusion of a ribbon or heavy cord wrapped around a bar. The “bar” is made up of lozenges in Gobelin stitch over this pattern of threads: 1, 2, 3, 3, 3, 3, 3, 2, 1. I worked all the lozenges of the “bar” before starting on the “ribbon”. Use the picture as a reference to complete the pattern, enlarging it if necessary. Again, the pattern is repeated below in continental stitch. To make this easier, I've made a typed pattern below with the number 1 representing the “bar” and number 2 the “ribbon”.
wrapped bar pattern
To do this as an all-over pattern, I suggest you leave a couple of rows of empty canvas between each two repeats of the pattern. When all the repeats have been completed, fill all the empty squares with a third color, preferably in a tent stitch, to make the “bars” and “ribbons” stand out even more.

interlocked links sample
This next pattern shows interlocked links, as of a heavy chain. The motif is done in continental tent stitch. Some background has been added to make the stitches easier to count. You should be able to work the design from the picture. If you want to do it in Gobelin stitch, simply substitute a short upright stitch, over a single thread, for each of the tent stitches. This motif, repeated in rows or scattered, works nicely on a large project. Do you also see how the links can be manipulated to form the capital initials C, D, G, J, O and Q? With a little work, you can also make B, P, R and U.

mitered corners sample
Some of you may have done sizeable pieces of all-over patterns and may now wonder how to finish the edges neatly. One way is to make a “frame” with mitered corners. Work a band of upright Gobelin stitch along each side of the piece, leaving several spaces open on both sides of each of the corners. Work the corners as shown below. The number of stitches in the miter will depend on the length of the stitches in the band. Make sure the stitches used in the miter end in the same square of mesh each time. Back-stitch both the inside and the outside edges of the band with the same color or a contrasting one. Turn fabric canvas under along the edges. Trim plastic canvas just outside the “frame”.

Finally, let's revisit the twisted ribbon pattern at the end of the November 16, 2015 post. Use the picture as your guide, but choose your own colors. Skip the first 5 squares of mesh and begin in the sixth one. Each upright stitch covers 4 threads or bars and the stitches ascend or descend by moving up or down 2 threads at a time. No space is left open between stitches. There are 5 open squares between the top two (blue and red) stitches and 5 more between the red stitch and the other edge of the canvas.

twisted ribbon sample
Here's a similar design done in tent stitch, along with an alphabet chart to help you place the stitches. This one uses 5 shades for each “ribbon”. The one that begins and ends on the left has shades A, B, C, D, and E; the one that begins on the right, shades F, G, H, I, and J. You may assign any colors you like to the letters. You may want to print out the chart and outline the two “ribbons” before you begin. You may also want to back-stitch around the two sections when you have finished stitching them.
twisted ribbon pattern
Experiment with colors,


 Creative Commons LicenseThis post by Annake's Garden is licensed under a Creative Commons Attribution-NonCommercial-ShareAlike 3.0 Unported License.

Monday, November 16, 2015

Optical Illusion Needlepoint and Bargello - An Introduction

optical illusion needlepoint
Optical illusion needlepoint samples
We're going to explores some patterns that fool the eye into seeing things that are not really there. These include 3-dimensional objects that appear to extend out from the canvas, “hollow” spaces in the canvas showing depth, textured surfaces, and interwoven areas where sections appear to pass over and under each other. Some optical illusions can be traced back to Early American quilt blocks. One of these, called “Tumbling Blocks”, was the inspiration for our first project. You will need either plastic or fiber canvas, at least one tapestry needle, 3 shades of one color of yarn, and scissors. I did the sample on #7 plastic canvas with knitting yarn to make the stitches easily visible.

reversible block illusion
Reversible block illusion, the basis for "Tumbling Blocks"

Begin in the upper left-hand corner of your canvas (or the upper right-hand corner if you are left-handed) with the lightest shade of yarn. Count down to he 4th square of mesh. Bring your needle up through this square from the back. Pull the yan through, holding some against the back of the canvas so you can secure it by stitching over it. Stitch down over 2 threads of mesh (or 2 bars of plastic canvas). Bring your needle up through the next higher square of mesh in the next row and stitch down over 4 threads. Repeat, stitching over 6 threads in the next row and 8 threads in the 4th row. Then repeat the stitches over 6, 4, and 2 threads. You have made a little diamond like those in the top row of the sample below. Skip one row of squares of mesh and begin the next diamond in the following row. Make a row of at least 4 complete diamonds. Secure your yarn on the back of the canvas.

Thread your needle with the darkest shade of yarn. Beginning in the empty square between the diamonds, stitch down over 9 threads. Make 3 more such stitches, starting in the same square of mesh where a diamond stitch ended, each over 9 threads. Move over to the next diamond and repeat. Continue until you have made one side of the block below each diamond as in the sample. Work another row of light-colored diamonds. Put in the dark sides of the blocks. Now thread your needle with the medium shade of yarn. Fill in the remaining side of each block with four stitches down over 9 threads each. I worked an additional row of blocks on the sample, showing the top diamonds back- stitched in white. This is optional.

The other “tumbling block” samples were done on #10 canvas with tapestry yarn. The blocks are much more distinct on the smaller mesh. The separations are so clear that back-stitching is not needed, but you may do it if you like the effect. (I recommend that — once you have mastered one of these patterns — you repeat it on #14 canvas for maximum effect.) You can now see that your eye moves back and forth from blocks that appear to be pointing upward and acting like stepping stones to blocks that appear to be pointing downward and coming out of the canvas. The illusion is complete.

Tumbling Blocks in longstitch

We haven't forgotten those of you who prefer tent stitching. This pattern adapts easily to being worked in continental stitch, as you can see in this sample. You will have to make two small adjustments in the directions, however, to make it work. Your top diamond is now made with this pattern of stitches:

1
123
12345
1234567
12345
123
1

The dark side of the block is unchanged, with 4 rows of 9 stitches vertically. But the first vertical row of the medium color has only 8 stitches, followed by 3 rows of 9 stitches each. That's it.

Tumbling Blocks in tent stitch

The second project uses the illusion of depth. It appears that you are looking down at a surface that is farther away than the surface of the canvas. This is quite a large sample, so we have shown it at a distance to illustrate the effect. You will need a bright yarn, a dark yarn, and a light yarn. (By now you have probably realized how nice it is to have several tapestry needles for your work.) If you are working on the same piece of canvas, turn it so that you start in the same corner as for the first project. Count down to the 19th square of mesh. Bring your needle up in that square with the bright yarn and stitch up over 4 threads. Make a second stitch just like this in the next row. We have done ascending and descending stitches before (See the post for March 21, 2014). Each stitch will cover 4 threads and each will be doubled. The step, either up or down, will be 2 threads. You are going to do a diagonal stepped line of 8 pairs of stitches. This should bring you to the top of your canvas. Then you are going to step down diagonally for 7 pairs of stitches, bringing you to the level where you started. Turn your canvas 180 degrees and complete the diamond in the same way. Using the picture as a guide, make several diamonds, both horizontally and vertically. Notice that each pair of diamonds shares a pair of stitches.

diamond-shaped boxes
Diamond-shaped boxes

With your dark yarn, put in a row of stitches under the top of each of the bright diamonds. The stitches are the same size, as are the steps. This time you step up 7 pairs and down 6. The rest of the diamond will be filled with the light yarn with the following rows: up 6, down5: up 5, down 4; up 4, down 3; up 3, down 2; up 2, down 1, finishing with a single pair of stitches. Complete several filled diamonds until the pattern emerges. Practice the pattern on a finer mesh if you can.

diamond-shaped box with shaded rows
Diamond-shaped box with shaded rows
The more shaded rows you have inside the diamond, the deeper the “box” or “room” appears to be. I'm going to leave you with the start of one such pattern to see what you can do with it. This makes a striking allover pattern on a smaller-scale canvas. For a nice masculine look, use white for the lattice pattern, black for the small diamond shape, and deepening shades of gray for the “walls”. One of these days, I am going to use this technique on a honeycomb pattern; I'm working on it, but it isn't ready yet!

Remember that practice makes for perfection,


twisted ribbons needlepoint
Twisted Ribbons - a sample from the next set of projects

 Creative Commons LicenseThis post by Annake's Garden is licensed under a Creative Commons Attribution-NonCommercial-ShareAlike 3.0 Unported License.

Contact Us

Name

Email *

Message *

Blog Archive