Showing posts with label crafts. Show all posts

Monday, March 21, 2016

Latch Hooked Butterflies for Summer, and a Pattern for You

Iris Wall Hanging
Iris Wall Hanging
Those of you who follow these posts regularly know that I like the theme of the Four Seasons. I have previously shown a latch-hooked snowflake wall hanging for Winter and provided a pattern for you to follow if you like (January 28, 2015). For Spring, I did a hanging with three iris flowers and gave you an iris pattern to do in colors of your choice (June 18, 2015). My choice for Summer was to do pictures of three butterflies. All are different species, so I have put a pattern for a ‘generic’ butterfly for you at the end of this article. The black or dark brown border is given and you can the fill in the wings with any colors you prefer.

First Latch-hooked Butterfly
First Latch-hooked Butterfly (bottom)
I have discussed latch-hooking before (June 16, 2013), and you may want to look at that post. On re-reading it, however, I thought of a number of suggestions and/or cautions that I would like to pass along to you. I have done so in this post. The best canvas for most latch-hook projects is a jute canvas. I have used the nylon mesh for soft projects like pillows and for items that have to be washed, but it is too fragile for rugs and most wall hangings. The best jute canvas is marked off with horizontal and vertical lines so that areas are outlined that contain 100 squares of mesh (10 squares x 10 squares). If you must use unmarked canvas, take the time to use a yardstick or meter stick and a permanent marker to put these lines on the canvas. It will make the placement of your designs much easier. The canvas is very sturdy, but it is also very rough on the surface. To protect my hands from this roughness, I wear crafting gloves with the ends of the glove fingers cut off. If you don't have such gloves, you may want to wear adhesive bandages (such as Band-Aid®) on the parts of your hands that come into contact with the canvas.

Second Latch-hooked Butterfly
Second Latch-hooked Butterfly (middle)
I begin my work at the bottom of the canvas and work upward one row at a time. As I make a row of knots, I examine each knot to make sure the two cut ends of the knot are even. If they are not, I pull gently on the shorter end until they are the same length. Sometimes I need to remove a knot. To do so, I press the cut ends upward against the unworked canvas and pull the loop of yarn at the bottom gradually until the knot releases. If the yarn is undamaged, I use it to re-make the knot; if it is damaged, I discard it. Once a row is complete, I use the back of my hook to press all the knots downward evenly. This gives me another opportunity to look for and correct imperfect knots. As the project grows long enough to come close to my knees, I want to protect it from any lint, dust, hair from the shop cat, etc., that might brush off of my clothing. For a wall hanging, I tape an open pillowcase or plastic trash bag to the edge of the work surface and slip the work in progress into it. When I'm working on a rug, I can keep a clean tablecloth spread across my knees.

Third Latch-hooked Butterfly
Third Latch-hooked Butterfly (top)
Once a section with a butterfly was completed, I took the time to put away the pattern for that butterfly and any yarns that I would not use again, I discarded damaged yarn. I brushed the loose fibers from the surface of the butterfly. To do this, I use the side of my hand or a soft hairbrush. I begin at the top center of the work and brush the surface of the work in long strokes to the edge of the canvas and off onto the worktable. I work my way to the bottom of the panel a few rows of knots at a time. Then I repeat the process from the center to the opposite edge. I'm always surprised by the amount of “fuzz” I need to remove! Then I clean the tabletop and check the floor for stray yarn. Finally, I put out the next pattern and the colors of yarn I will need to use for it. This keeps the table relatively uncluttered and puts everything within reach.

Back of First Butterfly
Once the design was completed, I turned the work over and examined the back of the canvas. I was looking for knots I might have missed or put into the wrong place in the pattern, damaged ones, and anything else that needed to be corrected. The tops and bottoms of wall hangings have the most stress on them. I fold these edges under for several rows of mesh and make the knots of yarn through both layers. You may do this with the sides, too, but it isn't really necessary. The raw edges can be turned under and sewn to the back of the finished knots. I back the finished hangings with felt, leaving enough of it at the top to make a pocket for a dowel or other type of hanger. J.D. then completes the hanger.
Now, here is a butterfly pattern that you can download for free and work in any colors. The pattern will also work for cross-stitch, tent stitch, blackwork and a number of other techniques. The outlined squares should be worked in black or very dark brown, unless you are doing a fantasy butterfly (in which case you should use your imagination). The bodies, marked with an X are usually some shade of brown or gray, but black also works well. The row of dotted squares indicates where the wings meet or overlap. If you are doing a solid-colored butterfly, you may want to do this row in black or dark brown to match your outline. If you are using different colors for the upper and lower wings, chose one or the other to do this row. (In Nature, the upper wing is the one more likely to overlap.)

May your summer be bright with butterflies,



Finished Butterfly Wall Hanging


 Creative Commons LicenseThis post by Annake's Garden is licensed under a Creative Commons Attribution-NonCommercial-ShareAlike 3.0 Unported License.
Wednesday, April 3, 2013

Resilience

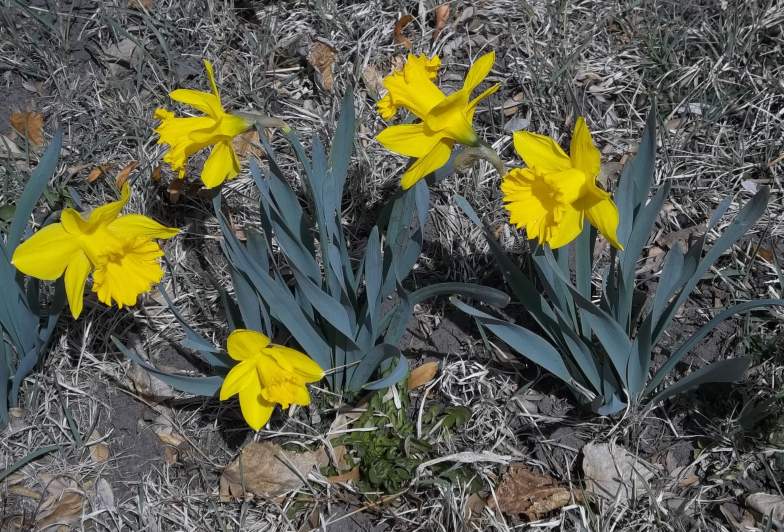
The garden has awakened. Shyly at first, like sleepy children, the crocuses appeared. Soon they were joined by graceful white snowdrops and miniature irises in their passionate blues and purples. Now there are clumps of bells-of-Holland and star-flowers. Jaunty daffodils flutter in the breeze. By mid-week we will have fragrant hyacinths in a rainbow of colors.

Daffodils.jpg
The Year's First Daffodils
One of my teen-aged garden helpers once observed how wonderful it was that the garden starts subtly and close to the ground in spring, grows taller and showier to culminate in the giant sunflowers of late summer, then begins to recede toward the earth again in autumn. Our garden both begins and ends with crocuses. Before they disappear below ground for another year, the leafless autumn crocuses warn us that winter is on its way and we must get busy to prepare for it.

Our plants must be resilient. They emerge to face a prolonged drought, extremes of temperature, drying winds, and other problems presented by high altitude. We are close to 6,500 feet above sea level here. Thunderstorms, even thunder-snows, are common. Frosts and freezes strike at inopportune times. I'm afraid the century-old apricot tree that overhangs our back fence has already lost its crop to recent bitterly cold nights.

Making jewelry.jpg
People, too, must be resilient. I'm proud to say that resilience is a characteristic of our group of artisans. None of us are young. We range from middle-aged to nearly eighty years of age. Recent years have not been kind. About half of us have faced the adjustment to retirement from long careers. A couple of us have been widowed. Others have faced serious illnesses or injuries, or are caretakers for ones who have done so. Economic woes have cost jobs, lost savings, and relationships.

Sue working.jpg
Still, we are a hardy, resilient group. One of the things that has supported us through hardships is the love we have for, and the pride we take in, the work of our hands. We work in wood, paint, natural stone, yarns, ceramics, glass, and fabrics. We believe that there is strength in numbers; that by using the various skills and talents of our members and by sharing ideas, materials, and expenses we will all profit more than we would individually. We want to advertise that there are people like us making beautiful and useful art and craft creations at prices competitive with those of mass-produced, machine-made ones. We subscribe to both the mottoes: “Buy American” and “Work Locally, Sell Globally”.

Quilting.jpg
Of course we want to sell our wares, but our philosophy extends beyond marketing. We want to emphasize the role Nature plays in inspiring us and to foster the use of natural materials wherever possible in our work. We support recycling, both as a lifestyle choice and as an integral part of the creative process. We prefer to concentrate on handmade, one-of-a-kind items. We are not interested in mass production or in making cheap, throwaway goods. Indeed, we hope that some of our creations may be handed down as heirlooms. We want Annake's Garden to provide a framework that frees our artisans to concentrate on original creations. We are very serious about keeping this a collaborative effort.

Judy working.jpg
Personally, I feel that our most important tenet is our desire to promote and preserve art forms, methods, and techniques, especially those which, sadly, appear to be disappearing. We are not young. We would like to inspire, instruct, and assist younger people to take up the pursuits which we must ultimately leave behind. We do not want these endeavors to fade away. They are a part of our legacy.
Annake

Crocus.jpg
Resilient Crocus

 Creative Commons LicenseThis post by Annake's Garden is licensed under a Creative Commons Attribution-NonCommercial-ShareAlike 3.0 Unported License.


Tuesday, February 12, 2013

Welcome to Annake's Garden -- What We're About

People who see our name on our  business cards or on our banner at craft shows often ask me if it is just a catchy title, or if it is a metaphor, or if a real garden is involved somehow.


Indeed there is a real garden, replete with trees, shrubs, masses of flowers, grape arbors, berry bushes, vegetable beds and patches of herbs. The garden is sleeping now. The ground is frozen to a depth of three feet. Unfortunately, there is no comforting blanket of snow over the garden today, but we are hopeful that it is on its way. Skiers and snowboarders are not the only ones who pray for snow, you know. Gardeners need snow, especially those of us who need to ease the damages of a prolonged drought.

Our Head Garden Gnome is recharging his gardening batteries by browsing through a tall stack of seed catalogs and making wish lists. I'm fueling my springtime dreams by looking at pictures of last year's flowers.

SE View of Annake's Garden
We began photographing our garden's blossoms in mid-spring of last year. Our immediate goal was to make an album of lovely blooms to comfort a very dear friend who was mourning the death of an adult son. We finished one album and began a second, continuing to add to it throughout the seasons. We had missed photographing the early spring flowers, however, so we will be watching for the earliest snowdrops, crocuses, and windflowers more eagerly than ever this year. I'll keep a watchful eye on the fattening buds of forsythia and apricot and apple trees so I can bring a few into the house to force into bloom.

The photography had added benefits, too, not the least of which is our ability to share our flowers with you on this Website. We hope you enjoy them.

Black-eyed Susans
The Garden in bloom
The pictures also provide me with both inspiration and a wealth of reference for my art and craft projects. Flowers have been an inspiration for me since I drew violets in purple crayon on butcher paper when I was four years old. Since then they have adorned pictures, pillows, rugs, quilt blocks, clothing and a long list of other objects. I moved on to drawing and painting animals, landscapes, portraits --- even abstracts --- but I always come back to flower subjects.

iris needlepoint
Iris needlepoint, a current project
My pick-up work for this week is a small needlepoint picture destined for a round frame. Its subject is a sturdy bi-color iris (irises are my favorite flowers) which grows at the southeast corner of our front perennial garden. It has bright yellow standards and lavender-to-purple falls. We have another variety with purple standards and golden-yellow falls that is just as beautiful. I prefer the former flower for art needlework, however, because the darker tones at the bottom of the bloom seem to give the picture a more realistic “weight”.

In a sense, though, Annake's Garden is also a metaphor. It represents the group of artisans who contribute their talents to our enterprise. Their work is diverse, but there is a common thread. We all draw our inspiration from Nature, whether from aspen wood or weathered barn wood, natural gemstones, animals, trees or flowers, landscapes or skyscapes.

We're really hoping that "Annake's Garden" is a catchy title, too.

Please visit our Web garden often, and enjoy it with us throughout the year.

Annake

white poppies
White poppies along a Garden path

 Creative Commons LicenseThis post by Annake's Garden is licensed under a Creative Commons Attribution-NonCommercial-ShareAlike 3.0 Unported License.

Contact Us

Name

Email *

Message *

Blog Archive