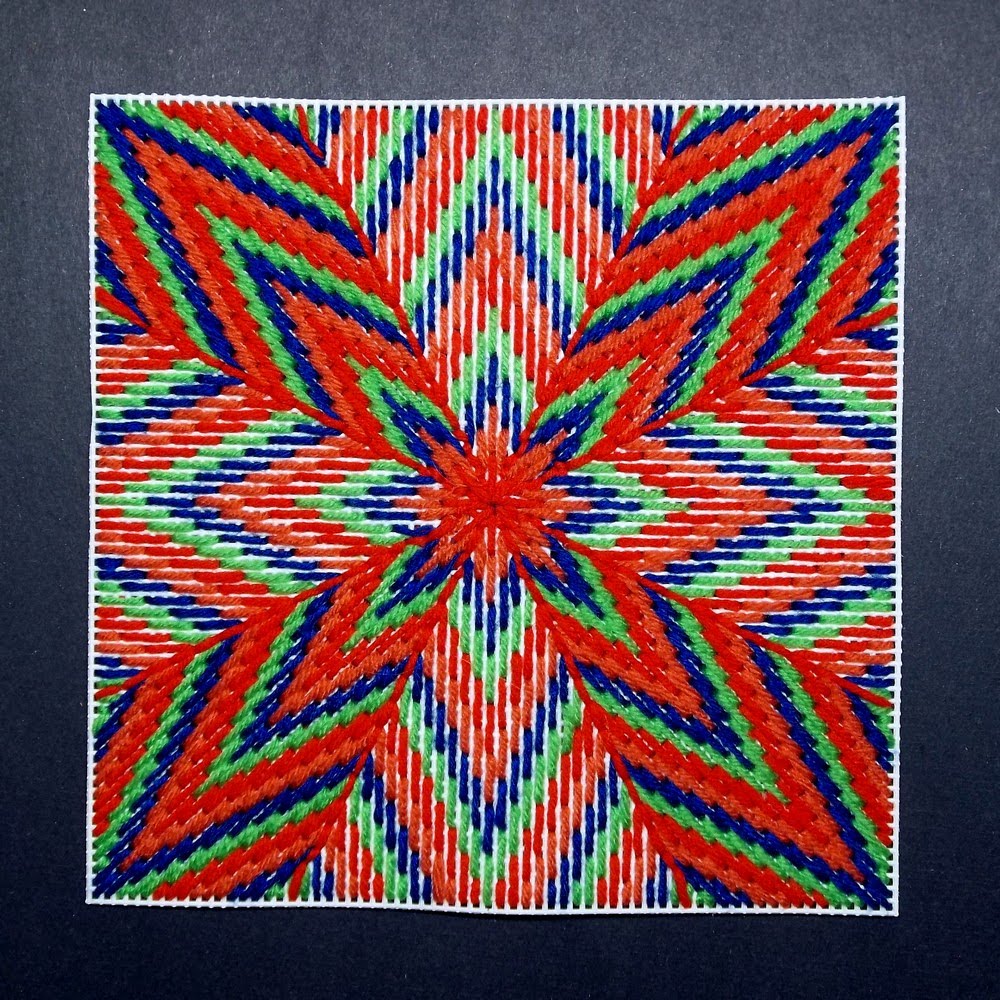
Showing posts with label four-way bargello. Show all posts

Sunday, January 27, 2019

On the Other Hand...Our Mid-winter Q & A

Daisy pattern pillow
Daisy pattern pillow, based on our icon
We began this blog in late February, 2013. Since then it has grown a lot. Some of you, bless your hearts, have been with us from the beginning. While it is possible to work your way backward to that beginning, it would take a very determined person to do so. Most of you have joined us in later years, found one or more topics that interest you, and used the search engine to find posts on those topics. Sometimes someone asks a question about topics from long ago. I'm going to try to answer a couple of them today. Those of you who already know all this, feel free to use the search engine to just browse or check back for our next topic in a week or so.

"I want to do a pillow like the one you did with the daisies all over it, but I get confused by the chart you gave for it.. Can you give me one with the graph paper squares instead? I don't have any trouble with those. Also, I want to use different colors of daisies. What is the best way to arrange them?”
Graphed pattern for daisy needlepoint stitches
Here is the pattern in squares. Each square represents 2 stitches side-by-side, each stitch over 2 threads on #10 canvas. If you are working on #14 canvas, you may want to adjust the squares to 3 stitches over 3 threads for each square. I hope you find it much easier to follow this chart. I prefer to start in the center of the canvas and work outward. For arrangement of colors, there are many ways; here are four suggestions. Make the center row in your main color and do the rows above and below it in the other colors, (above) ending with the outer rows in the main color. Do the same thing but put the colors in diagonal lines, with the main color in the center and at the corners. Put the main color in the center square and make concentric squares of different colors around it, repeating the center color at least once, preferably in the outer square. Or you can scatter the colors randomly, even if you use a different color for every flower. It is an excellent way to use up odds and ends of yarn. I'm sure other patterns will occur to you as you lay out your colors.

"My needlepoint is starting to feel heavy and awkward. Is it all right if I turn it around and work from the other end when I get to the middle?”

That depends.  I doubt that it is going to feel any lighter, but it might seem less awkward. If you are working with continental stitch on a printed or hand-painted canvas, and both the canvas and the design are even, you can safely turn the canvas 180 degrees. If there are patterned stitches in the design, don't turn it. If you are working from a chart, I advise you not to turn it. If you are working on a symmetrical geometric design such as a 4-way, 6-way, or 8-way, definitely don't turn it.  If you do turn it, be sure you reverse it the entire 180 degrees. If you turn it 90 degrees or some in-between amount, the stitches will not join properly at the center.

Home-made device for rolling needlepoint canvas
I suggest you try this instead. After completing two or more inches of the design, use masking or packaging tape to secure the top edge to something cylindrical: a mailing tube or the center of a roll of paper towels or gift wrap.  Use small metal clips to hold the canvas in place and readjust them as you make each new turn. I think you will find this helpful and the finished piece will require less blocking.

"I would really like to do needlepoint, but I am left-handed and all the directions and charts seem to be made for right-handed people. I have seen advice to sit across from someone who is doing needlepoint and make a mirror image of what they are doing, but I don't know anyone. I got some plastic canvas like what you advise us to learn with, but that is as far as I've gotten. I don't want to put a lot of time or money into a project and then find out I'm not able to do it. Can you help me?"

I will certainly try. I expect you will be able to do it. I understand your hesitation, though. My mother was strongly left-handed and I am right-handed. She did embroidery and some conventional needlepoint, but she got frustrated trying to teach me and stopped trying. I had to teach myself. I agree that you should not invest much money to begin with, but I hope you are willing to invest time.  If you find you enjoy needlepoint, it will become a lifelong pastime and pleasure.

complex-looking Gobelin stitch pattern
A complex-looking Gobelin stitch pattern
You will need at least two contrasting colors of knitting-weight yarn and tapestry needles with eyes large enough to thread the yarn through.  Later I will teach you a simple way to do continental stitch, with which you can stitch canvases with patterns printed on them or ones from black-and-white charts. There are other tent stitches, but continental is the only one you really need. Right now I want you to practice some patterns with upright stitches. You don't need to be concerned with the slant of the stitches, as you do with tent stitches. These patterns often look much more difficult than they are.

Each stitch in the patterns below comes up through a square of mesh, passes over 4 bars of canvas (which represent the threads in needlepoint canvas), and goes down in the hole directly below where it came up. The bottom of each stitch in the first row shares a square of canvas with the top of the stitch in the second row. No canvas is left bare. We count threads, not holes.  Leave a couple of inches of yarn dangling below the first stitch. When you reach the end of the row, push your needle under the finished stitches on the back of your work for an inch or two and cut the yarn. Thread the dangling yarn into a second needle and secure it under stitches on the back. Get into the habit of doing this each time. Bad things can happen when ends of yarn are not secured.
Sample 1
Sample 1
The first pattern is a simple 2-color checkerboard with 4-stitch clusters. Begin at either the left or the right side, whichever is more comfortable.
Sample 2
Sample 2
This scalloped design is a little more difficult because the stitches follow a curve. Count carefully. Once the first line is done, it is easy to follow.
Sample 3
Sample 3
Working from top to bottom, the next row, in the second color, will begin in the bottom of the first stitch of the first color. Continue with the pattern until you feel that you have mastered it. To complete your sample swatch, turn your canvas around and work as much of the pattern in reverse as you can until the rows are even.

These simple patterns can be done in as many colors as you like and can be used to make things as small as a bookmark or key ring or as large as a piano bench cover. The stitch you have been using is called upright Gobelin and is used in a technique called Bargello. If you liked doing the samples, here is a link to a lesson in beginning bargello: [Link].

Directions for doing the Continental stitch
Here is an easy way to learn continental stitch. Your stitches should look like those in the diagram above. Begin in the upper right-hand corner of your canvas. Your first stitch goes from lower left to upper right. Work the entire first row. There are two ways to proceed.. One is to turn your canvas at the end of each row and keep stitching as you did before. This diagram shows you the way to do this by numbering the stitches. This may be the easiest way for you. Or you can just remember that working from left to right, stitches go from lower left to upper right; working from right to left,  your stitches go from upper right to lower left. Incidentally, the smallest design on the post for January 1, 2019 is worked almost entirely left-handed except for two parallel green lines that were worked right-handed.

I hope these steps help all three of you. Good luck. Have fun.


 Creative Commons LicenseThis post by Annake's Garden is licensed under a Creative Commons Attribution-NonCommercial-ShareAlike 3.0 Unported License.

Tuesday, January 1, 2019

Adjustments, Additions, and Adaptations

All-over pattern worked from a "corner" design
A phone call from a friend alerted me to an error in the December 5th post. She called to say she had accidentally reversed the numbers in the sample she was doing of the multicolored 4-way bargello pattern. Instead of making her stitch squares 3 stitches over 4 threads, she had made 4 stitches over 3 threads and wondered if she should take the completed stitches out and start over. This puzzled me because when making stitch squares, I recommend 4 stitches over 4 threads. I suggested that she do another sample with those numbers and keep the original one to see how they differed. She agreed. Then I went back to the blog post to see what went wrong.

What happened was that sometime before posting J.D. had told me the post was too long and something needed to be cut from it. I took out a section about using this design as an all-over design, along with a completed sample. Somehow the stitch directions given for this change got detached and the stitch count I had recommended for that exercise got attached to a place it did not belong. My apologies if this has confused anyone. J.D. doesn't do needlework, so he wouldn't have caught the error. I should have caught it, but didn't.  The error has now been corrected in the initial post.

I was trying to make two points with that segment of text. First, that, since this was an all-over pattern, it was not necessary to start in the middle of the canvas. I started the piece pictured at the top of this page at the upper right-hand corner of the design and expanded it both horizontally and vertically as far as my canvas segment allowed. Second, the pattern can be worked to fit rectangular projects. They do not have to be square, as the 4-way ones do need to be.  I suggested that viewers might want to do a sample using the 3 stitches over 4 threads formula that I used for this sample, which elongates the squares into rectangles vertically. (That's where the text error occurred.) The pattern stitch my friend was using elongated the squares to rectangles horizontally. Here is an example of what that would look like done on the same canvas as mine and beginning in the same corner of the design. The result is definitely rectangular — and large. It is probably not a good design for a 4-way, unless you are using much smaller squares of canvas. It would probably work on #14 needlepoint canvas.

Pattern resulting from error in directions
Pattern done as tent stitch
Same pattern done as tent stitch, 1 stitch per square
The samples I usually show on these posts are done on #7 plastic canvas. I recommend this for practice and to make pattern samples that are meant to be filed for future reference. But before we leave this pattern, I would like to show you one more variation. This is the pattern square done in conventional tent stitch, with one stitch for each square of the pattern. It is also done on #7 canvas, so you can imagine how small it would be on a canvas with more squares to the inch!  These patterns are very versatile. If you do latch-hook, for example, you can use a pattern like this one by putting in a knot for each square of the pattern. This would work as both a four-way pattern, perhaps for a pillow, and an all-over one for a mat or rug. Beading and mosaics could also be done with such a pattern.

When working a multicolor pattern like this, I recommend using a separate needle for each color. This cuts down on the time spent in threading needles and decreases yarn waste. Secure each color often on the back of your canvas. Do not carry long strands of yarn across the back of your canvas while moving from one colored segment to the next.

The designs made from the small corner squares have proven to be popular. For that reason, I am giving you some more of them to work with. In each case, the original square that was rotated is shown in its proper position and is emphasized by a black outline. The two-color pattern is suitable for an all-over design, but perhaps is not as good for a 4-way design.

3 patterns based on different corner patterns

New 8 way bargello design
We have a new 8-way bargello to show you. Because some stitches are horizontal or vertical, while others are slanted on the canvas, some segments of the eight do not reflect the light in the same way that others do. This gives a feeling of movement to the composition. I don't know how well this will show up in a photograph, but I hope you can see the effect. I also hope you enjoy the new design.

We have used plain backgrounds behind bargello patterns a great deal. Only once, when we emphasized the use of a bargello pattern behind the capital A in the original Annake's Garden's logo, have we discussed the use of bargello as a background for other kinds of stitchery. Here is a picture of a screaming eagle that we use to decorate our table when we are doing an event on or near a patriotic holiday. The background is made up of strips of bargello patterns in red, white, and blue combinations. Doing slanted designs like this requires some planning. I recommend drawing a few diagonal lines lightly in pencil on your background canvas to guide your stitches. I worked the eagle first in conventional tent stitch,  then ran the last stitches of each pattern under the edges of the eagle's feathers.
                                    
Screaming eagle with bargello stitch background
I urge you to try making some of your own new designs. All you will need is some graph paper and colored pencils, pens, or crayons. Often what looks like a very simple pattern on a 6-part square turns out to be unusual and beautiful when fully rotated.  Then you will want to see it done in yarn. Keep your small samples in a container of some kind (any thing from a shoebox to an expandable portfolio), so that you can return to them whenever you like. Also, when you have a pattern you really like, try it in several different color combinations.

Have fun - and a wonderful new year!


 Creative Commons LicenseThis post by Annake's Garden is licensed under a Creative Commons Attribution-NonCommercial-ShareAlike 3.0 Unported License.

Wednesday, December 5, 2018

Wrapping Up the Season: Late Fall Q &A, 2018

small tree with lights
Before I begin with recent questions, I want to pass along two items of interest from a benefit show and sale for a local animal shelter that we took part in a few days ago.

A charming couple purchased several of my puppets for their children. They said they planned to fill the bodies and arms of the puppets with "stocking stuffers" like candy, money, miniature toys and games, etc., and sew them shut with an easy-to-pull thread. Then the children would each have a puppet to play with after they had enjoyed their small treats. What a great idea! I learn so much from the people I meet! The same idea would work for birthday parties or sleep-overs. Here J.D. is showing the puppet of a girl elf with some stocking stuffers.

elf puppet filled with goodies
Elf puppet filled with goodies

dog and cat puppets
Two of our puppet pets
The other thing I want to point out refers to our dog and cat puppets, like the Siamese cat and Yorkshire terrier seen here. You will notice that each of our dogs and cats is wearing a "collar" and a "tag".  This is to remind children that their pets should be licensed and wear identification tags for their protection.

Now to our questions.

I like the 4-way bargellos a lot. I understand how the pattern "grows" from the center out. I can follow your examples, but I don't know how to start a new design from the center outward. Can you give me some examples to get me started?

Certainly. I'll be glad to. And I can show you a "short-cut'" that you can use to generate new designs when you run out of inspiration. All you need is quarter-inch graph paper and something to color the squares. I'll show you that trick first. Take a piece of graph paper and mark off several frames around squares that are 6 graph squares wide and 6 graph squares high. Start with the square in the lower right-hand corner. Color it. With the same color or a second color, fill in a random pattern of graph squares in the next row outward. Repeat with a 3rd color in the next rows of graph squares. Continue as long as you like, with as many colors as you like. Repeat colors if you like. Make several of these designs on your sheet until you find one you like more than the others.

three 6 x 6 designs on graph paper
Three 6 x 6 designs on graph paper

First design rotated and repeated four times
Now take a clean sheet of graph paper and mark its center both horizontally and vertically. Repeat your desired pattern on top of the horizontal line, starting just to the left of the vertical line. Now repeat your pattern in reverse to the right of the vertical line. Turn the paper upside-down. Repeat what you just did below the horizontal line above the horizontal line now. Now you have a 4-way starting pattern.  Each colored square represents a stitch in your bargello pattern. Empty squares can be worked in white, black, beige, etc. Work the four parts of your design in the center of your canvas, then decide how you want to "grow" your finished pattern. Here is what the first of our small patterns looks like done in this way. This one is done in a single color with a white background.

Second design rotated and repeated four times
Second design
Here is the second "starter square"done in the same way.  the more colors that you use, the more complex the design that you create. This one is done in two shades of two colors, plus a white background. Substitute your own choice of colors. Once you have gotten that far, you need to decide if you will continue that design all the way out to the edges or put in new directions of your own making, You may want to practice on graph paper before you start a large project.

Third design rotated and repeated four times
Third design
And here is the third "starter square", expanded. Here you have strong diagonals balancing the vertical and horizontal lines. You might choose one over the other to change your design as you work outward from the center. This one also uses four colors, but the contrasts are stronger and the white background is greatly reduced. It is a good all-over design.


But remember these important rules:
  1. Each square represents 4* vertical stitches, each over 4 threads.
  2. No canvas is left bare; stitches share the squares of mesh.
  3. There will be places where there will not be room for an entire square. In that case,work as much of the square as you can.

When you did the 6-way bargello you showed two optical illusions that you and J.D. saw. I liked them and copied them on plastic canvas, but now I don't know how to proceed. You didn't show any shading on the pieces, but it seems to me that shading is what makes the optical illusions work. Can you show those patterns with the correct shading, please?

You are correct that shading enhances optical illusions.  However, there is more than one way to shade a particular illusion, depending on where you decide the light source is.  We will be glad to show you how we would shade the two illusions.  Just be aware that there is more than one "correct" way to do them.

annake's and j.d.'s illusions with shading
Annake's (left) and J.D.'s (right) illusions with shading

You can use black, white, and grays for your shading or you can use various tones and shades of a single color. If you use different colors, you may achieve an interesting design, but lose much or all of the illusion. I suggest you work the designs out on paper before you select the yarns. Think carefully also about your background and whether or not you are going to outline the sections with back-stitch or some other embroidery stitch.  Good luck.  It should be an interesting project.

You haven't mentioned latch-hook lately. Are you still doing it?

Yes, although it has been curtailed somewhat because of the increase in frequency of shows that we have done this year and the remodeling we have been doing to give me more studio space for drawing and painting.  Here is a rug that I finished at the beginning of summer. When I was doing research for the posts on creating landscapes in needlework, I came across a photograph of a Ming Dynasty scroll that had a beautiful butterfly on it. I wanted to do a rug with a similar butterfly, but in "hot" modern colors.  This is the result.

Latch Hooked Rug "21st Century Ming Butterfly"
Latch Hooked Rug, "21st Century Ming Butterfly"

Have a happy holiday season for all the holidays we celebrate around the world.


*This post has been updated on December 15, 2018 to correct an error in content. Our thanks to the reader who brought this to our attention.

 Creative Commons LicenseThis post by Annake's Garden is licensed under a Creative Commons Attribution-NonCommercial-ShareAlike 3.0 Unported License.

Monday, March 20, 2017

Four-way Designs from Hawaiian Quilts

Orange & yellow tulips
Orange & yellow tulips in Annake's garden
Not long ago, we had an interesting question on one of our Question and Answer posts. The question was, “Do four way designs have to be geometric?” (To date most of the four-way designs we have discussed have been for needlepoint, particularly bargello (May 11, 2014, December 22, 2014, August 22, 2016). I replied that the short answer was, “Certainly not!” I went on to say the long answer would require one or more complete posts on the subject. This is the first of those posts. I thought back to a time some years ago when three classes of 5th grade students had been studying about the tropics, particularly the state of Hawaii. I wanted them to do an art project related to the subject to complete the unit.

I have never asked my students to do a project — from kindergarten drawings to junior college term papers — that I did not do right along with them, so I did some research. I came across some materials about traditional Hawaiian quilts. These were done on square blocks in two colors, one for the cut-out silhouette and one for the background. The subjects were usually native plants as represented by flowers, fruit, and leaves. I did some practicing with colored construction paper.

Pink orchid design on grey
Annake's pink orchid design on grey paper

Folded sheet tulip design
Tulip design, cut from a quarter-folded sheet
The next class day, I showed the classes how to cut a piece of rectangular paper to make it square. Then we folded each square into quarters. I drew a simple flower and leaf design on one of the small squares, beginning at the central corner. I cut out the design, unfolded the paper, and turned it over so that the drawing did not show. Pressing the paper flat on a square of a different color produced a design very similar to the Hawaiian quilt designs. I did a different design for each of the three classes and displayed them so they could be studied. Instead of the unfamiliar tropical flowers, I used familiar garden flowers from our town gardens, such as crocuses, tulips, daffodils and irises. I did, however, display photographs of tropical flowers to give them a choice.

Four-way tulip design, unfolded
The assignment was to produce “quilt blocks” of their own. The first task was to produce a corner design that they thought was attractive. Since the drawings would not show on the finished cut-out, each student could do as many as four practice drawings. During the next session, each student chose the best drawing and cut it out of the folded paper (after being cautioned not to cut the four sections apart). Then each student chose a background square in a contrasting color and glued his or her pattern to it, carefully centering it on the background. They were allowed to add additional decoration if they desired.
 
Later all the projects were displayed on a wall of the school cafeteria. Most of the students then took their designs home, but a few wrote notes to me on the backs of their projects and gave them to me, a gesture that pleased me greatly. I want to show you three of these. (Yes, I kept them.) Remember that these were 10-year-old and 11-year-old children. The first one is typical of the designs. It combined a leaf cut-out with drawings of flowers and detailed drawing of the veins in the leaves. The second one is a very carefully and skillfully done cut-out with butterflies added in the corners, facing inward rather than outward. The last one is by a rule-breaker. (Those of you who have been reading these posts for the last four years know that I am a rule-breaker myself, and therefore probably more tolerant of rule-breaking than most people.) While the swans do hold together nicely, they are not connected at the center. It was then necessary for the young artist to place a patch of blue and white “waves” in the hole in the center of the design.

Student "quilt blocks"


Now you may be asking yourself, “What does this have to do with me and my art or needlework?” That's a fair question. I expect, however, that the quilters among you have already started envisioning designs of your own. These might involve silhouettes of animals or toys for a baby's or child's quilt or vehicles or sports equipment for a man's pillow. The possibilities are endless. For those of you who want to further explore Hawaiian quilt designs, and who have a Pinterest® account (www.pinterest.com), there are enough ideas in their archives to keep you busy for years!

But let's return to the simple tulip design. You may wonder why I didn't make all the tulip leaves form “hearts”. That is easy enough to do. Try it for yourself. The answer is that I wanted a design that could be manipulated to fit a rectangle as well as a square. Since I had the pattern made, I cut it out of a couple of papers with patterned designs. Then I tried them in various combinations: plain-on-plain, plain-on-patterned, patterned-on-plain, patterned-on-patterned. Some of the most unlikely color and pattern combinations worked rather well, as you can see below.

Four-way square paterns with different paper combinations


Tip: If you are a beginning quilter, you may find it useful to collect a variety of papers in various colors and patterns. Paint and wallpaper stores and decorator's shops often discard wallpaper pattern books. If you ask them to save those for you, many will do so, especially if you are doing projects with school children, Scouts, senior citizens, etc. It doesn't hurt to ask. Then you can take a pleasing paper pattern with you to a fabric store and look for fabrics in the colors and with similar scale patterns to your paper sample.

On our next post on the subject of four-way designs (later this year), we will discuss multi-colored four-way designs in painting, collage, crewel, tent stitch, reverse applique, etc. In the meantime...

Use your imaginations,


red-and-white tulips
More tulips from Annake's Garden

 Creative Commons LicenseThis post by Annake's Garden is licensed under a Creative Commons Attribution-NonCommercial-ShareAlike 3.0 Unported License.

Wednesday, June 1, 2016

Spring Questions and Answers 2016

Once again, Annake answers questions about recent posts...and don't miss the Free Download of the new Butterfly needle arts pattern at the end of this post!

Purple poppies
Some old-fashioned poppies in the Garden
My question is for J.D. What are you growing in the straw bales?

Oh, good: an easy one! The straw bales are being planted with aromatic herbs (like basil, oregano, and marjoram) and pungent salad greens (like arugula and cress); basically, things the deer won’t like. We may try some other things later in the season, but that’s the plan right now.

(J.D., Annake’s Garden Gnome)

I received several questions about Swedish weaving patterns. I've shortened the questions for reasons of space, but added color descriptions so that you can easily find the examples the questions were about.

I have a question about a pattern from Part I (March 11, 2016). On the lower sample sheet, the fifth pattern from the top (red, black, and light green). In what order did you do the stitching? I can't tell from the enlarged photo.

First of all, thank you for looking at the enlarged sample. We use that feature (Lightbox) so you can study the patterns more easily. I hope all of you will take advantage of it. I've shown the design on plastic canvas to enlarge it even more. I did the red pattern row first, working from right to left. Next, I did the black pattern row, working from left to right. and paying close attention to the places where the two threads crossed. But I don't think it matters which one you do first because both colors pass under the two center threads. The first color sets the pattern. The second color — black in this case — passes under the first color at each crossing. To make the pattern more decorative, you might sew a tiny seed bead at each of the crossings. Finally, I put in the green row, again working from right to left. In this version, the green thread passes under the crossed stitches each time. To change the pattern slightly, make the green thread pass over the pairs of threads that the red and black threads pass under, and under the pairs that they cross over. This will make the green thread pass over the crossing threads.

Swedish weaving sample 1

On the top pattern sample sheet (on the same post), I have a question about the top pattern (purple, lavender and pink). Are the long parallel stitches that look like ‘11’ part of the outside rows top and bottom, or are they from the next rows inside?

They are from the inner rows. They skip the top row and go under the two threads one row further out than the “points” on the top and bottom rows. This pattern is stitched from the two outside rows inward, ending with the pink center row. Here the stitches are on plastic canvas.

Swedish weaving sample 2
I have a question from Part II (March 21, 2016) about the rows of (orange) diamonds at the bottom of the top sample chart. It looks to me like the two top rows of diamonds are made at the same time, while the last row is just a single one. Why isn't it a double row, too?

You are making this pattern much more difficult than it really is. No two diamonds are made at the same time. In fact, each diamond is made one half — either the top half or the bottom half — at a time. Each row is a line of simple “peaks and valleys”. They go together in a way that creates an optical illusion. I began at the right-hand side and made the first row with a stitch slanting upward. I then ran my needle under the two threads, made a corresponding stitch downward, ran my needle under the next pair of threads, and continued to the end of the row. The next row was worked from left to right and made the bottom halves of the diamonds. The two halves were held together at each side by running the needle under the same threads it went under on the row above. I've shown the diamonds on plastic canvas, but I used one bar on the canvas to represent the pair of threads on the huck fabric. When I tried that using two bars of canvas, the diamonds were distorted by the spacing and no longer looked very much like diamonds. The pattern is really quite easy and covers the cloth rapidly, as you will find if you practice it.

Swedish weaving sample 3
  
Are you going to show us more of the “mola” applique designs?

sleeve mola
Small Cuna mola
Yes. I have several more of the authentic Cuna Indian molas from my collection that I want to show you. In addition, I will be doing another reverse applique pattern with felt, but this time I will be inserting other kinds of fabric into the felt framework to add textures like satin and velvet to the finished design. I think you will enjoy this new activity.


Why will a six-way bargello pattern be more difficult than the eight-way design was?

4 way bargello "Green Envy"
Four-way bargello "Green Envy"
Good question. The answer is in the angles. We won't be working in a square any more. The four-way bargello projects were based on 90 degree angles (0 degrees, 90 degrees, 180 degrees, 270 degrees, 360 degrees), and depended on the horizontal and vertical center lines on the canvas.


8 way bargello
Eight-way bargello
The eight-way design was based on 45 degrees (0 degrees, 45 degrees, 90 degrees, 135 degrees, 180 degrees, 225 degrees, 270 degrees, 315 degrees, 360 degrees), and depends also on the diagonal lines from the four corners of the square.


Hexagon plotted for 6 way bargello
Hexagon plotted for six-way bargello


The six-way design, however, will be based on a 60 degree angle (0 degrees, 60 degrees,120 degrees, 180 degrees, 240 degrees, 300 degrees, 360 degrees). The design must be constructed along each axis from the degree mark to the center. I haven't yet decided whether to use a hexagon or a circle to enclose the design. When I get the pattern worked out, I will do a sample and write a new post describing how to make it.

I appreciate your questions.



butterfly chart 2
Click here to download!

 Creative Commons LicenseThis post by Annake's Garden is licensed under a Creative Commons Attribution-NonCommercial-ShareAlike 3.0 Unported License.

Friday, April 22, 2016

An Eight-Way Bargello? Yes!

Four-way bargello "Autumn Explosion"
Framed four-way bargello "Autumn Explosion"
Is an 8-way bargello even possible? Of course. Before you began a 4-way design, you had to prepare your canvas. First, you had to make sure your canvas was square. Second, you had to find and mark the single square of canvas that was in the exact center. Third, you put in the horizontal and vertical center lines, dividing the canvas into four equal sections. Fourth, you put in the two diagonal lines from the corners of the canvas square through the center point. Now you had 8 sections! For those of you who don't have any experience with the 4-way designs, here are some past posts that you may want to study. I'm sure you will find them helpful. Just go to our Archive and look for these dates: May 11, 2014; July 20, 2014; September 29, 2014; and December 22, 2014.

Round Protractor and Center Guide
Here are a couple of simple tools you can use to mark your canvas. The circular protractor can help you measure your lines for accuracy. Beginning at the top and moving clockwise, your lines should be at 0 degrees (or 360 degrees), 45 degrees, 90 degrees, 135 degrees, 180 degrees, 225 degrees, 270 degrees and 315 degrees, respectively. The little square of plastic canvas can be placed over the center square of your canvas to check the placement of the lines. You can make one of these yourself to use for future reference. Mark your canvas lightly with pencil in case you need to erase a line to correct it. Rub off any extra graphite with a tissue or cloth so that it doesn't tub off on your yarn. Tape the raw edges of your canvas. Decide which edge is the top and mark it N for north. Also Mark E, S, and W.

Four colors of yarn for 8-way project
Once you have you canvas marked, you can choose the colors of yarn for your design. Choose at least four colors. You will save time and effort if you have a separate tapestry needle for each color. Cut a piece of each of the four colors of yarn. Don't cut pieces more than 18 inches (46 cm.) long, because the yarn will start to fray from repeatedly being pulled through the canvas. Use a blunt-pointed tapestry with an eye that slips easily through the canvas.

Center stitch detail
Waste knot, stitch over 4 threads, stitch over 3 intersections, complete center
Make a waste knot in the end of your first strand of Color #1. Insert your needle from the top surface of the canvas, a couple of inches from the center. Pull the yarn through, leaving the knot on the surface. Bring your yarn up through the center square of canvas and point it along the line directly toward N. Skip four canvas threads and push the needle downward to make a stitch. Bring your yarn back underneath the canvas and up again through the center square. Repeat with stitches to E, S, and W, bringing the yarn back up through the center square each time. Now do the four diagonal stitches. Instead of skipping four threads each time, you will skip over three intersections (the angles where two sides of a square of canvas come together). Return to the center each time. After you have made all eight stitches, secure color #1 under the stitches on the back of the canvas and cut the yarn.

8-way Design, Stage 1
If you are a relative beginner, you may want to start color # 2 with a waste knot, as well. After that, you should be able to secure both ends of your yarn by weaving them under and around stitches on the back of your canvas. Once you have done several rounds, you can cut off the waste knots, thread the short ends of yarn in your needle, and secure them on the back of your work. Always start a new round at N. (It is easier to follow a pattern if you start each round at the same place.) Bring the needle with color #2 up in the same square of canvas where the first stitch with #1 ended. Work your way clockwise around the center, checking the diagonal stitches to make sure the ones on each side end in the same row of vertical squares. Secure #2 yarn on the back, and cut it off. Repeat the same stitches with #3 and #4. Now it is time to work backward toward the center of the design.

8-way Design, Stage 2
Start at the N line with color #4. Move your needle one square of canvas to the left of your starting stitch. Move it down 2 threads of canvas. Bring the needle up from the back and make a stitch downward over 4 threads. Move to the left again and down 2 threads. Make a second stitch over 4 threads. Move to the left a third time and down 2 threads and make a stitch exactly like the 2 you just did. Now move to the right of your original stitch and repeat those 3 stitches in reverse order. Be sure they begin and end in the same lines of canvas squares as the first 3. You have made 6 new stitches. Turn the canvas so that E is up and repeat the 6 stitches. Turn and repeat again at S and W. Secure color #4 and cut it. With color #3, begin again at N. Bring your needle up in the same square of mesh as the #4 stitch above. This time you will only have room to make 2 stitches to the left and 2 to the right (4 new stitches). Repeat all the way around. With color #2, start at N again. This time you will have room for only 1 stitch to the left and 1 to the right (2 new stitches). Don't do anything with color#1. You have made four complete points at N, E, S and W.

8-way Design, Stage 3
Next we will do the points along the diagonal lines. Turn your canvas so that the corner between N and E is up. With color #4, make a stitch to the left of your original stitch and down 1 intersection. This stitch will cover 3 intersections. Make 2 more stitches in this way to the left. The third one should end in the same square of mesh as the third #4 stitch from the completed N-E-S-W point. Make the 3 reversed stitches to the right, move on to the next diagonal and repeat. Use the same procedure to put in the 4 stitches in color #3 at each diagonal. Finally, fill in the 2 stitches in color #2 at each diagonal. You will see that the diagonal points seem longer and narrower than the first points. You may see some tiny places where the canvas is not covered. These will probably not be noticeable in the finished work. If they bother you, you can take tiny filling stitches, each across a single thread.

8-way Design, Halfway Finished
Halfway there!
Now you must make a decision about colors. You may want to continue repeating the first 4 colors in the same order. Or you may want to add additional colors, delaying the necessity to repeat colors. You may add as many colors as you like. I decided to use many colors, both dark and light, warm and cool. I did not repeat any of the colors in the design. This is what the project looked like when it was about halfway completed.

The work gets easier after the first four colors are put in. From this point on, we will work outward toward the borders. Just begin at N with each new color and follow the pattern, making two stitches meet in the same square of mesh where the N-E-S-W points and the diagonal points intersect. Remember that the stitches on the N-E-S-W points are each over 4 threads, while the stitches on the diagonal points are over 3 intersections. Start each new stitch in the same square of mesh as the completed stitch below it. The number of stitches on the sides of each point will increase by 1 in each consecutive row. You may want to continue the same pattern out to the edges of your canvas, making partial rounds where there is not enough space for complete ones. Or you may wish to stop while you have a complete “starburst” design and finish the rest of the canvas in a solid color — either continuing with the straight stitches or changing over to tent stitch for the background. Each of the three techniques will give you a different design at completion. I decided to end the “starburst” design about half a dozen squares of mesh from the nearest edge of the canvas. I made the choice of background color based on the color of the frame I intended to use, and decided to work the background inward from the four corners in tent stitch (specifically basketweave).

Finished 8-way design with tent stitched background
If you enjoy this pattern, you will be happy to know that I'm working on a 6-way (more difficult) design which probably will be worked in a circle.


 Creative Commons LicenseThis post by Annake's Garden is licensed under a Creative Commons Attribution-NonCommercial-ShareAlike 3.0 Unported License.

Contact Us

Name

Email *

Message *

Blog Archive