Wednesday, March 27, 2019

All the World's a Stage: Another Look at Landscapes

Stinking Desert Sunset, photo by Annake
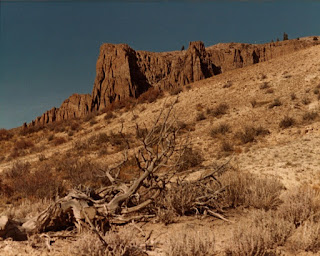
Near sunset in western Colorado (35mm SLR photo)
Jim Richardson,  National Geographic photographer, urges photographers to think of landscape photographs they are about to shoot as if they were settings for plays.* That set me to thinking of broader applications for that principle:  I wanted to apply it to pictures we already have.


Do you have photographs or sketches of landscapes that are accurate, but that just aren't ‘special’? Too good to throw away, not good enough to frame?  Perhaps you have a collection of picture postcards from past trips stored in a box somewhere. I certainly have all of those. I got out a few while I thought about what to say in this post.

I took the picture above late in the day, looking westward.  The color is accurate, I did not use a colored filter. I have always liked the picture, but had never decided what to do with it. It seemed a good place to start the current experiment.  Because I wanted to try several scenarios with my picture, I made a couple of copies before I moved to the next step.  J.D. took one for his own use. We decided to each do the project, but separately, choosing our own themes. J.D. will chime in with comments on his own results as we go along.

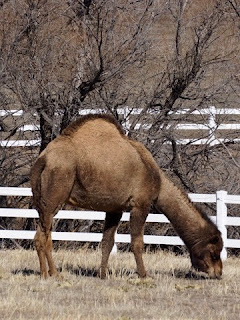
Camel photo by J.J.
Camel, photo by J.J.
Much of western Colorado, where our picture was taken, is semi-desert. It is not a sand desert, but dry grassland with some rocky areas. The picture certainly said desert to me. I determined it would be the backdrop for a desert scenario. And what more appropriate desert animal than a camel?

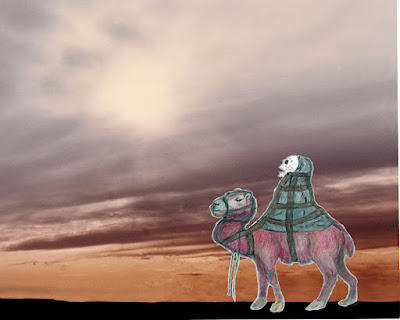
“But a camel in western Colorado?”, you scoff. Well, truth is often stranger than fiction. In 1855, Jefferson Davis (remember him from the Civil War?) was the Secretary of the U.S. War Department. He spent $10,000 to import camels to carry supplies and mail between remote western military posts. The endeavor worked well but was broken up by the Civil War, when most of the animals were auctioned off, killed, or escaped.  At least one became the source of a legend,  said to be 30 feet tall, to eat grizzly bears, and to vanish when in plain view. (Look up “camels in the Western U.S.”, and also look for a Smithsonian article on the Legend of the Red Ghost — great reading!)  I decided to do a detailed color drawing on watercolor paper to depict the Legend of the Red Ghost. One story was that the camel carried a macabre burden — a skeleton wrapped in canvas, strapped and roped to the camel's back.

Red camel with skeleton drawing by Annake

The image was drawn in colored pencil, graphite and charcoal. I sprayed it with fixative (hair spray will do, but practice first to get distances and amounts of spray correct; it is better to do this outside on a warm, calm day). I cut the figure out carefully with small, very sharp scissors and put it in place on the photograph. I used sketches, but you might prefer to use other photographs.

Legend of the Red Ghost paste-up by Annake

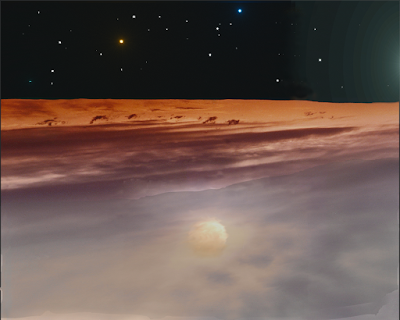
J.D.:  Over the winter holidays, I began to learn to use a much more powerful image editing program in order to meet the increasing technical demands of the work at Annake’s Garden; so, when Annake proposed this exercise, I decided it was a good time to see how far I’d learned to push the boundaries of what I could do with digital images. First I turned the picture upside down and backwards – and got an image that looked a lot like the sea at a sandy beach, about as far from a desert scene as you can get. Being an ornery and contrary sort of creature, I figured I would see how many element of this image I could turn into their opposites.

Moonlight on Dunes, digital graphic by J.D.
"Moonlight on Dunes," digital graphic by J.D.
Without getting into the specifics of how I used the software, this is what I did: turned sky into water and sand, mostly by stretching the image horizontally and squashing it vertically; turned the ground into night sky by pasting in a strip of the same almost-black color, then sprinkling in some fake stars; turned the sun into a reflection of the moon by laying a mostly transparent image from a different source over it, then adding a little glare effect at the right edge to suggest an out-of-frame moon rising. Everything else was just fine tuning the intensity of the colors, contrast, and sharpness to give the impression of a photograph taken at night.

This all may sound like mysterious high-tech digital wizardry, but there is nothing here that can’t also be done in an analog photographer’s darkroom (although it might take considerably more time and expense!)

ANNAKE: Now suppose you had a copy of the photograph we worked on. What would you do with it? Ask yourself some questions:
  • Do I need to turn the photo upside down? Change a horizontal picture to a vertical one or the reverse? Crop the photo (cut off parts of it)? Cover up or take out something? Change my perspective (point of view)?
  • What kind of story would I like this landscape to tell? Adventure? Romance? History? Mystery? Fantasy? Science fiction (remember J.D.'s "Early Morning Frost...” on Mars)? Horror? Comedy? Tragedy? Natural history?
Once you have decided what kind of story you want to tell, ask yourself if the picture you are considering can help you tell that kind of story. If the answer is "Yes", then ask yourself how the picture can help.
  • Does it suggest a particular place? A particular period of time?
  • What sort of people might live here or have lived here in the past?
  • Is it the habitat of a particular animal? Alive or extinct? Real or mythical?
  • What interesting objects might have come to rest here? Is it an extraterrestrial place? In the sky? Under the ground?

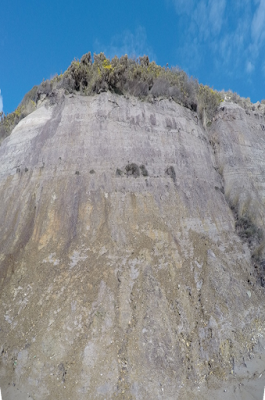
Cliff face public domain photo
Cliff face (rock wall**)
Each decision will clarify your story in your mind. You will begin to ‘flesh out’ your narrative. Then decide what scenery, props, and cast members you need to introduce into the photo to make your story come to life. You might have a picture of a steep rock wall.  Are you going to show a family of mountain goats descending the wall? Climbers free-climbing or ascending on ropes? A hang-glider swooping away from it? A helicopter hovering in front of it? Choose your characters and props carefully.


Now, how are you going to get your props and characters onstage?

  • Are you going to cut parts out of other photographs and glue them to your background?
  • Are you going to stand the background up and place cutouts or small model figures in front of it? Make a diorama out of it?
  • Are you going to glue or paint your characters and/or props on a clear plastic overlay?
Dry branches, 35mm photo by Annake
Another 35mm photo by Annake
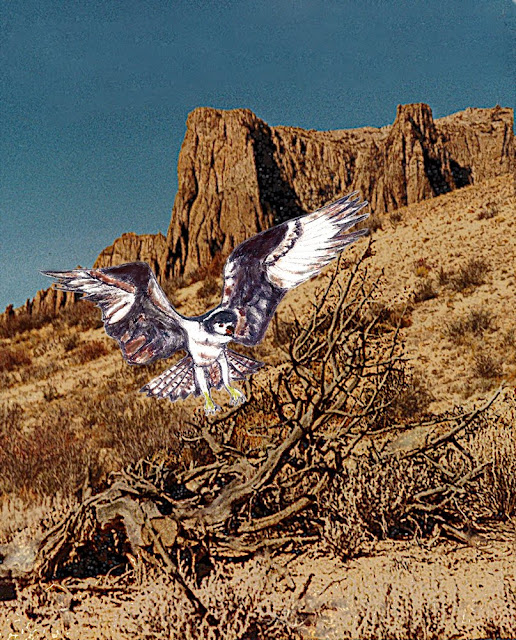
This photograph is also one of mine and was done with no color filters.  Not desert this time, but certainly dry grassland and open woodland. There's no mystery involved this time. It is a simple natural history scene that could easily have happened.  J. D. asked for a big raptor alighting on the pile of branches, and that is exactly what I gave him.

Desert hawk drawing by Annake

The hawk was done in the same way as the camel and applied to the photograph. It is a kind of hawk known to make its nest of sticks. The picture was cropped to take out "clutter".

Desert hawk paste-up by Annake

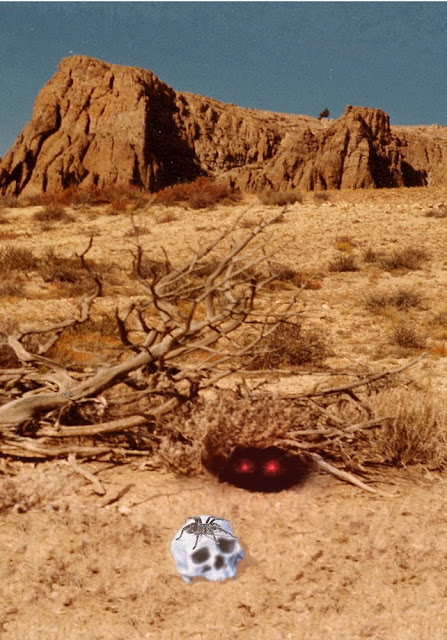
J.D.:  Since Annake used my best idea for this photo, I struggled to come up with anything else interesting. In the end, I just squashed the perspective enough so that I could create sufficient foreground to put in some stock creepy elements. The skull and spider are cut-&-paste from public domain photos available online, and the burrow with glowing red eyes under the pile of sticks is pretty much the same set of effects I used for the night sky in the beach scene above. I don’t really have a story for this image, but if it inspires one for you drop us a line and let us know.

Landscape wiith skull digital image by J.D.
J.D.'s silly/spooky landscape

ANNAKE: This post is the result of my musings. It is not just for those of us who paint landscapes, photograph them, or portray them in needle arts.  It is for those who have photos, slides, or sketches they have always meant to organize and "do something" with, for those who collect picture postcards, and for those who just like to make something new out of something old that might otherwise be discarded. (If I missed anyone, it probably applies to you, too.) Have fun! 


*From a lecture for The Great Courses Masters of Photography, copyright 2014 The Teaching Company

**So, Annake tells me she needs a picture of a rock wall; I downloaded this nice public domain photo. Then I find out she meant a cliff face...


 Creative Commons LicenseThis post by Annake's Garden is licensed under a Creative Commons Attribution-NonCommercial-ShareAlike 3.0 Unported License.

Sunday, March 10, 2019

Ships at Harbor: Seascapes in Needle Arts, Part IV

Claude Monet,  fishing boat at anchor at Rouen
Claude Monet,  fishing boat at anchor at Rouen
A painting, whether super-realistic or abstract is made up of shapes. To be interesting, the shapes should have rhythm, variety, and an element of surprise or unpredictability. That's quite a balancing act!  Rhythm implies repetition; too much repetition is boring and the viewer loses interest.  Variety suggests a collection of differing shapes, but this may be confusing or even irritating to the viewer.  (Haven't you ever seen clothing or upholstery material that you felt was too ‘busy’ for your taste or been in a room that was so cluttered that you didn't feel comfortable in it?)  Surprise means something unexpected introduced into the scene, but it probably should not be something so incongruous that it takes a viewer's mind completely away from the picture as a whole.
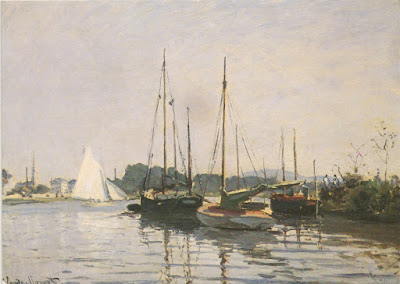
Claude Monet, sailboats
Look at the harbor scene above and notice how well the artist has used his shapes.  See how the strong vertical shapes of the masts and the fainter diagonals of the rigging rhythmically break up the horizontal areas of the water, the line of trees, and the passive sky with its barely suggested clouds. The shapes and colors of the boats' hulls add variety, as do the ripples that break up the mass of the water and provide a second area of rhythm.  The bright white sails of the boat in the background give us that element of difference and focus our attention.  The artist was Claude Monet, leader of the Impressionist movement. Although he is not known primarily for marine paintings, he did a number of them. (Another one of his is shown at the top of this article.) He was fascinated by the effects of light on water and continued to use them in his paintings throughout his entire career.
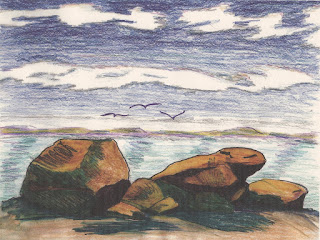
Sketch of an approaching storm by Annake
Sketch of an approaching storm, by Annake
There are some generalizations that we can make about shapes and areas in a composition (always remembering that rules are made to be broken.)  The large horizontal areas of sea and sky are generally considered as negative spaces and passive shapes unless something active, like a storm, plays out against them. In the preliminary sketch to the right, the clouds and the wavelets beginning to form on the surface of the water are active, carrying the energy of the fast-approaching storm. Vertical and diagonal shapes are generally considered to be active and positive.  Something like a tree is more "active" than a nearby boulder.  If a scene is dominated by horizontal areas and vertical shapes or lines, diagonal shapes like the white sails on the boat are often added to the scene for contrast. Curved shapes like rolling hills are more passive; turbulent curved waves or breakers are very active.  Too many passive shapes can make a composition seem dull, even though it is attractive in other ways.
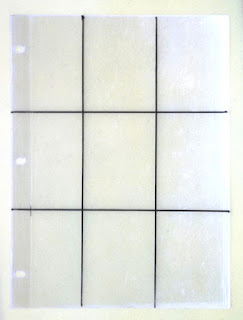
Rule of Thirds grid tool
An arc can be a powerful shape in a composition, particularly if it is at the edge of a point of interest, such as one of the focal points where the "Rule of Thirds" applies.  This plastic overlay, which we showed first in Part V of the Landscape series, works just as well for seascapes as it does for landscapes. We show it here the portrait position (in contrast to the landscape position we presented the first time). If you have not yet made this handy tool, now is a good time to do so.  You only need a sheet of clear plastic, a ruler or other straight edge, and a marking pen. Divide the plastic sheet into thirds, both vertically and horizontally, and mark the four points of intersection. Your primary point of interest in a composition should be at or near one of these points.  A secondary point of interest, if you include one, should be at or near the point diagonally across from the primary one.
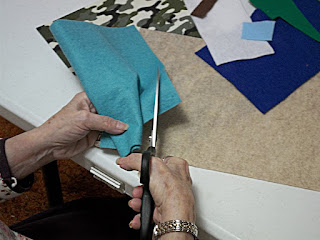
Cutting felt shapes
A shape that may be interesting by itself can get lost in, and be neutralized by, other shapes unless it is supported by color and contrast.  If a shape that you are using is distracting from, or not contributing to, your composition, try moving it. If that doesn't work, remove it. This is especially true if you are doing a composition in applique. Before you stitch anything to a background,  be sure that the shapes that you have chosen to cut out are really contributing to the design.  When you are satisfied with the arrangement, pin it in place and check it one more time before you begin to stitch. View it from a distance as well as at close range. If you decide that a piece isn't right after you have sewn it in place you may be unwilling to remove it, even though it weakens the design.

I know that some of you are concentrating on lakeside or riverside scenes, rather than true seascapes. You can certainly put sailboats, motorboats, rowboats — even rafts and inflatables — into those compositions to give variety and points of interest that counterbalance the landscape and water.
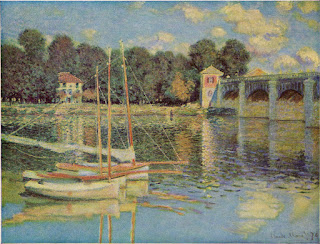
Claude Monet, "The Bridge at Argenteuil"
Here is another Monet painting, obviously portraying an inland waterway, which may give you some ideas. Notice how the boats cover the primary point of interest at the lower left (when the plastic overlay is in the horizontal position), while the towers on the bridge are close to the secondary point of interest, diagonally at the upper right. The bridge itself moves away in a slightly diagonal line, and the arches and reflections introduce another rhythm. A more passive rhythm is created by the variety of shade trees in the background.  The other building in the scene occupies a place close to the point of interest on the upper left, but is less "positive" than the other two.

It is all too easy to get so interested in the smaller positive or "active" features of your composition that  you neglect the larger negative or "passive" parts of it. But they are equally important to the success of your design. You have just seen me making shapes and I have emphasized the importance of their arrangement for applique projects. They are also important for embroidery projects where the background fabric(s) will show between the areas of embroidery.  In my tapestry work I often do three-dimensional, even padded, stitching on top of a background of tent stitch or other essentially flat stitches, so I'm always planning my backgrounds first. Here is a simple technique that I use when I am working on an unpainted canvas. I have used it successfully as a teaching technique with school-age children as well as older students.
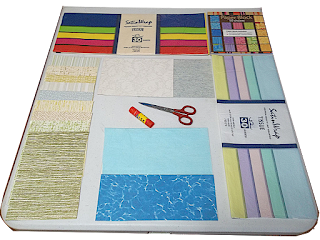
Examples of materials needed for the exercise
First collect all the colored paper that you can find: stationery, poster paper, wrapping paper, tissue paper, colored newspaper advertisements, etc. You will need scissors and a glue stick or other adhesive. Cut a piece of heavy paper, poster board, or cardboard in the size and shape that you want for your final design. Work first with the two large ares of your seascape. Will the sky be light blue, bright blue, dark blue, light gray, dark gray, or sunset colors? Cover the area you have designated as sky with the appropriate colored paper. Do the same thing with the part of the picture that you have reserved for the sea. When you are satisfied with the proportions of these two areas, glue them to the background.

Think about ways that might make these areas more interesting. Can you put in tall, impressive clouds or sweeping, diagonal ones? Is there an island or headland in the area where sea and sky meet? Is it rocky, with hard shapes, or soft and rounded? Is it grass-covered or does it have trees?  Are the tress broad-leaved trees, evergreens, or palms (each has a different outline)? What is at the bottom of your picture? Rocks, a sandy beach, a jetty? Cut pieces of paper in the shapes and colors of the appropriate features and place them on your background, but do not glue them to the background.
Mock-up of a background using cut shapes

Now cut out the positive, active features that you planned your composition around. Position your pieces where you think they will be most effective.  Again, do not glue them to the paper. Then reconsider the shapes you put in during the second stage of this process.  If the pieces do not contribute to the design, move them. If they still don't help, remove them. Glue in place the features of this group that you want to keep. Now reconsider the entire composition.  Are your positive pieces completing the design the way you intended? When they are doing that, glue them in place.

Congratulations! Now you have a good "working model" and are ready to begin creating with your choice of materials.

Keep up the good work!


Claude Monet, Regatta in Argenteuil

 Creative Commons LicenseThis post by Annake's Garden is licensed under a Creative Commons Attribution-NonCommercial-ShareAlike 3.0 Unported License.

Contact Us

Name

Email *

Message *

Blog Archive