The background photo for our summer posts is of a lovely old scarlet rambler which overhangs three paths in our perennial garden, as well as a rustic bench where we can sit and admire it. When we bought this home thirty-five years ago, there was a dying tea rose at this spot in the garden. I found that it was grafted onto another root. (I recognized it because I had grafted young fruit trees with my dad.) I cut away the dying rose and decided to leave the grafted rootstock to see what it might be. Every summer since I have been rewarded with this beautiful and fragrant display. The flowers dry easily once they are past blooming and make a great base for potpourri.
In the post for
August 1, 2013, we offered a free rose pattern for you to download. I did samples in counted cross-stitch, conventional tent stitch, and latch-hook. Since then, I have done the same pattern in these media at different scales. The basic pattern has remained the same, while materials and color schemes have varied. All of the projects to date will be shown in this post. My purpose is two-fold: a) to show the results of widespread differences in scale; b) to show the versatility of a pattern that can be adapted for a wide variety of uses. The pattern was not always followed exactly, so you will see some differences in the finished works. Additional rose designs, not derived from the pattern, will also be shown, as well as photographs of some of the roses that were my inspirations. For those of you who missed the original pattern, you can download it by clicking on this link:
Rose Pattern Download.
This sample was designed for an 18-inch (about 46-centimeter) square quilt block, but was destined to become a pillow top instead. It was done in counted cross-stitch with embroidery floss on quarter-inch checked gingham.
The second sample from that post was this yellow rose done in tent stitch on #10 mono canvas with tapestry wool. The finished needlepoint is 9 inches x 11 inches (about 23 centimeters x 28 centimeters). A black, dark blue, or dark green background will enhance most rose designs.
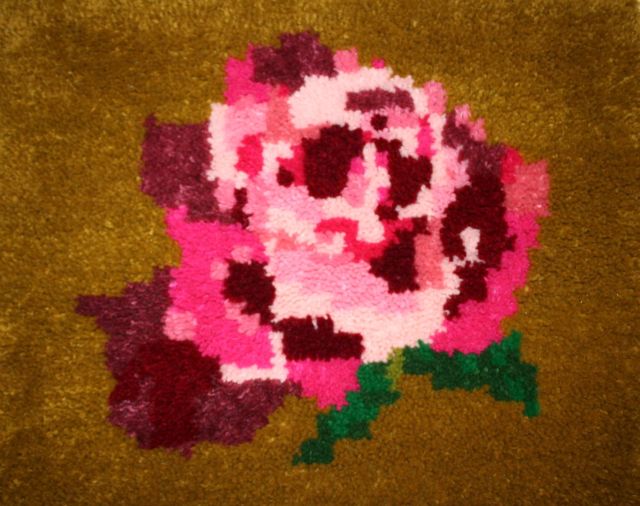
Also seen in that post was our Heritage Rose rug, a latch-hook rug with a central design based on the original pattern, but with each square in the original design represented by approximately four latch-hook knots. This was done on conventional rug canvas.
This picture shows an orange rose done in counted cross-stitch on monk's cloth with embroidery floss. The motif is 7 inches (18 centimeters) in diameter, not counting the frame. The off-white background works well with this vivid rose, but might not be as good for a paler one. This one made its debut in the post for
April 30, 2014.
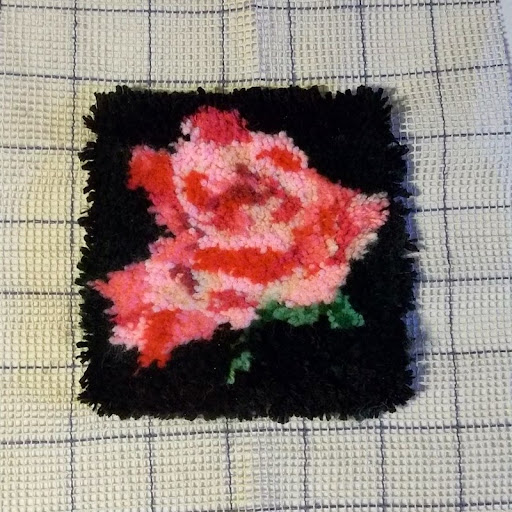
Here is another latch-hook rose (shown as a work-in-progress). This one is done on #5 quickpoint canvas. Each square on the pattern has a corresponding latch-hook knot. As shown here, the motif --- destined to become the center of a pillow top --- is currently 8 inches (about 20 centimeters) square. As you can see, the same pattern can be used in projects of various sizes, color schemes, and stitching techniques.
This floribunda rose, first shown on
July 15, 2013, was done in tent stitch on #14 canvas and then embellished with surface stitching. It is in the same size frame used for the orange rose above. We showed it along with the rose from our garden which inspired it, and the tutorial illustrated the steps I take when I convert one of J.D.'s or J.J.'s photos into an embroidery design. One of J.J.'s rose photos was featured on our last post, worked as a latch-hook pillow top on grospoint canvas (
June 15, 2014).
Here is another floribunda rose done as Assisi work. The rose was outlined with gold craft thread, letting the monk's cloth background represent the petals. Then the background was filled in solidly with cross-stitches in red embroidery floss. It is 7 inches (18 centimeters) x 9 inches (23 centimeters). For more on Assisi work, see the post for
May 21, 2014.
The final rose in our 'bouquet” is another work-in-progress. (Yes, there are a lot of those around my workshop!) It is a French long-stitch rose based on the newest hybrid tea rose in our garden. This one is named after singer Barbra Streisand and is a marvelous combination of purple, lavender, and pink. It is very pretty, even as it fades. Long-stitch is is a satin stitch technique, done with yarn on needlepoint canvas. The stitches may be made horizontally, vertically, or diagonally, and all three may be combined in the same piece of work. For more about long-stitch, see the post for
November 3, 2013.
We will leave you with some of J.D.'s roses. We hope you enjoy this bouquet, sent to you with our compliments.

 This post by Annake's Garden is licensed under a Creative Commons Attribution-NonCommercial-ShareAlike 3.0 Unported License.

 I've been doing bargello for many years, but I still practice my patterns on plastic canvas before I do them on needlepoint canvas. If there are going to be problems with the design, I will find them at the practice stage. If I'm going to make mistakes (as I probably will), I will make — and correct — them there. I strongly suggest you practice on plastic canvas, too. You will want your first four-way to be special, and “practice makes perfect.” You can file your plastic practice piece for future reference. Here is my practice piece for this project.


