 |
| "Honalee" by jljardine |
I've recently been studying a photograph of an old piece of Norwegian embroidery, looking for new needle-weaving motifs. The picture is in black and white and the motifs are rather small, so I don't know how accurate my reconstructions are. I have, however, derived a couple of patterns that I like. I wanted them to be large enough to use on a belt, so they are much larger than the original embroidery. I also wanted them to be colorful, so I did each motif half in red and half in blue. The spaces between the motifs were left empty, but they could easily be filled in with a third color, leaving no empty squares in the design. I worked the two examples in acrylic yarn on plastic canvas so that I would have good reference samples to keep on file. The directions for each of the two patterns is below its picture.
Pattern I: Starting on the far left of the canvas and leaving enough yarn loose to weave into stitches on the back of the work, bring your needle down through the first square of canvas mesh.
- Rows#1 & #2: under 1, over 2, *under 2, over 2, under 6, over 6, under 6, over 2, repeat from * across.
- Rows #3 & #4: under 1, over 2, *under 2, over 2, under 4, over 10, under 4, over 2, repeat from * across.
- Row #5: under 3, over 2, *under 4, over 6, under 2, over 6, under 4, over 2, repeat from * across.
- Row #6: Repeat Row #5 (with a second color, if you choose).
- Rows #7 & #8: Repeat rows #3 and #4.
- Rows #9 & #10: Repeat Rows #1 and #2.
Pattern II: Starting on the far left of the canvas and leaving enough yarn loose to weave into stitches on the back of the work, bring your needle down through the first square of canvas mesh.
- Rows#1 & #2: under 1, *over 2, under 2, over 4, under 4, over 2, under 4, over 4, under 2, repeat from *across.
- Rows #3 & #4: under 1, *over 2, under 2, over 6, under 2, over 2, under 2, over 6, under 2, repeat from *across.
- Row #5: under 1, *over 2, under 4, over 6, under 2, over 6, under 4, repeat from * across.
- Rows #7 & #8: Repeat rows #3 and #4.
- Rows #9 & #10: Repeat rows #1 and #2.
When I looked at the second pattern, I was reminded of butterflies. At that time, I was looking for a way to decorate a hat for a dear friend of mine who is a member of the Red Hat Society. (Their motto is: “When I'm an old lady, I shall wear purple with a red hat.”) I had a wide-brimmed red straw hat. It was pretty, but rather plain. Why not, I asked myself, make a wide hatband with a row of purple and lavender butterflies? I chose dark purple for the bodies, a lighter purple for the lower wings, a dark lavender for the upper wings and white for the background. But first I needed to make some minor changes in the pattern of the butterfly. I decided that I didn't need the rectangles between the butterflies. I liked the straight edges and squared corners, so I didn't try to make any of those into curves. I filled in the hole in the center of the body and shortened the “head” end by one row. Then I added “antennae” like little stair-steps on either side of the head. After carefully measuring the crown of the hat, I determined how many butterflies I could place on the band and how they needed to be spaced so that there would not be any butterflies that were not whole. (See the practice piece.)
 |
| Sample of the needleweaving butterfly motif |
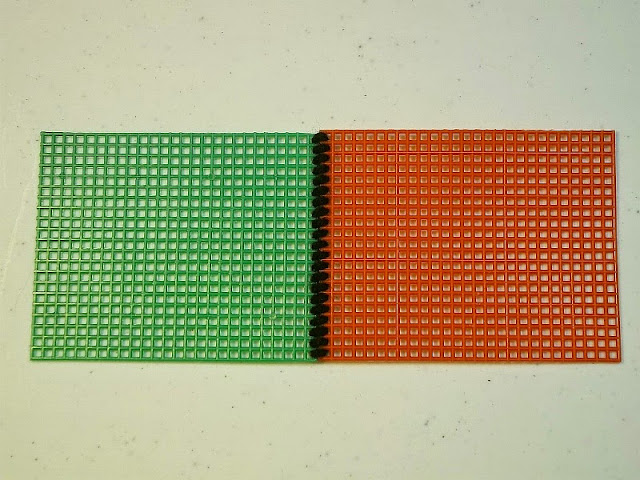
I formed this into a circle and lined up the two ends so they matched exactly. Using a piece of the background yarn, I overcast the two edges to make a flat seam, leaving extra yarn at both the beginning and the end. The loose ends were both secured and hidden inside the tube of stitches formed by the seam. (see picture showing the joining of two pieces of plastic canvas). The finished hatband was then placed over the crown of the hat and pushed down to sit directly on the brim of the hat. (see below) I hope my friend enjoys wearing her hat to Red Hat Society meetings and festivities.
Here are some things you may want to do:
- Practice both of the patterns on sample canvas for your pattern file. You may think practice pieces are a waste of time, but they are not. Not only do they give you a good idea of how a project will look, but they also allow you to encounter and solve a lot of minor problems that you can then avoid when you do a larger project.
- Look at the empty spaces between the motifs on the patterns. Design one or more borders using these “negative” spaces. (Turn your pattern samples over to get ideas.)
- Make something useful or decorative (headbands, hatbands, belts, eyeglass or cell phone cases, etc.) from one of the border designs or from the butterfly motif.
Have fun!
 |
| The red hat with purple butterfly motif headband |


No comments :
Post a Comment
Post a New Comment Below -- We Love Feedback !!!