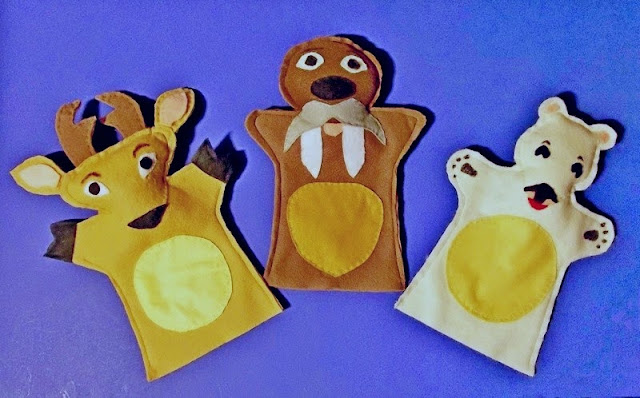
I'm delighted by the positive response my puppets have generated! I am asked lots of questions about them at shows, so I want to answer some of those before I offer a puppet pattern for you to download.
I'm asked why I show tails and other features on the backs of my puppets. When I used to work with puppets to teach children about animals, I liked to have the puppets be as active as possible: hiding their faces shyly against my shoulder, climbing up my arm, scampering across my lap, wrestling with each other, and so forth. During these actions, a puppet is seen from all angles. I wanted them to be interesting --- and authentic --- from the back as well as the front. I wanted to show the animals' most distinguishing features so that the children would recognize them wherever they encountered them; in pictures, storybooks, television programs, movies, parks or zoos. That's why I also add hands, paws, hooves, or wings to the puppet arms.
One interesting question was,”How do you get their heads to be so firm?” I stuff them, of course, preferably with fiberfill. But the real “secret” involves what I do to the “wrong”(reverse) sides of the heads before I put the fronts and backs together. First I sew the two halves of the heads to the respective parts of their bodies. Then I turn them over so that I can work on the insides of the heads. I sew the neck --- which extends well up into what will be the head cavity --- to the inside of the face, using very small overcast stitches that catch just the surface of the felt and do not show through to the other side. (This takes a little practice, so you may want to try it on felt scraps before you attempt it.) I do the same thing to the back of the head and also stitch down any other loose edges. For example, the top of the lamb's gray head is sewn to the back of the scalloped white “wool”. The extra stitching gives the head more strength and solidity, so that it does not sag or wrinkle. Remember when stuffing the heads to leave enough room for the puppeteer's fingers.
My favorite question came from a mother holding a beautiful baby girl about six months old. “It will be a long time before she is old enough to play with the puppets,” she said. “Is there some way she could enjoy them now?” I gave her several suggestions. Since the child will obviously be in a crib for some time yet, the most obvious thing would be to suspend the puppets from strings and hang them above her crib where she can see them easily. Another easy solution would be to pad a small bulletin board and cover it with felt, flannel, or fleece to hang near the child's crib or playpen. Small pieces of Velcro sewn or glued on the backs of the puppets will allow them to stick to the board. But they can also be detached and moved around the board to help the mother act out stories, rhymes, or songs. If longevity isn't an issue, the arms and bodies of the puppets can be stuffed with fiberfill, cotton, or fabric scraps and the bottoms sewn shut to make huggable soft toys. A little weight added inside the bottoms and they could even stand up by themselves. These were ideas that sprang immediately to mind. I'm sure you could all think of others.
Those of you who have been reading my blog posts for a while probably already know about the little pink pig puppet that started me designing and making puppets (April 17, 2013). I'm giving all of you a pattern (with instructions) that you can download to make your own little pink pig. (Click here to download.) The picture shows an alternate appearance for the pig. Just gently curl his ears forward and attach the tips to his face with a few tiny pink stitches. If you are doing a set of the Three Little Pigs, you might make one with upright ears, one with curled ears, and the third with one of each kind of ear.
 |
| Pig Puppet Pattern (Click to download) |
Whether you have small children or grandchildren or not, why not make a little pig for some little person to love?
Annake


No comments :
Post a Comment
Post a New Comment Below -- We Love Feedback !!!